background image

Bask Mistmaster

®

 3-in-1 Compact Misting System: Mist Station Kit Instructions 


v.210119 


Page 

6

 of 

20


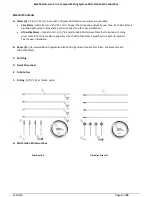
Overhead Kit Contents 

A.


Tees (4)

 with dripless Mist Nozzles 


B.


Large Hardware Clips (10) 

(for mounting Tees) 


C.


End Plug 


D.


Quick Disconnect 


E.


Tube Cutter


F.


Tubing

, 50 ft (~15.2 m) black, nylon 


G.


Screws (20),

 stainless steel 


H.


Small Hardware Clips (10) 

(for mounting Tubing)


I.


Mist Station Kit Instructions 


Additional parts and accessories are available at 

www.bask-solutions.com

.


Overhead Kit 

Содержание 3-in-1 Compact Misting System

Страница 1: ...www bask solutions com 1 888 814 BASK basksolution basksolutions Bask Mistmaster 3 in 1 Compact Misting System Mist Station Instructions ...

Страница 2: ...s 8 Slim Riser Copper 9 Ultra Slim Riser 316 Stainless Steel 9 Typical Mist Station Configuration with Four Risers 10 Installing your Mist Station Overhead Kit 12 Position Your Mistmaster and Overhead Mist Nozzles 12 Test Your Mist Station 13 Add Treatment to the Tank 14 Mistmaster Status Indicators Guide 15 Optional Long Range Remote Control 16 Pairing your Device 16 Using your Long Range Remote ...

Страница 3: ...spend more time enjoying the great outdoors For your convenience Bask offers Mist Station Kits that contain everything you need to create your own customized Mist Station for use with your Mistmaster For additional information and answers to frequently asked questions visit www bask solutions com GENERAL SAFETY INSTRUCTIONS For your safety and the safety of others read understand and follow all wa...

Страница 4: ...one or more customized mist stations that you can operate remotely using your Bask Mistmaster Mist Button or Long Range Remote Control Additional individual Risers Overhead Mist Nozzles and mounting hardware can be purchased separately to expand a mist station s treatment coverage area or add additional stations where needed Mist Station Kits are accessories designed solely for use with the Bask M...

Страница 5: ...g and a push to connect Tee for easy installation Ultra Slim Risers made from inch 6 5 mm Grade 316 Stainless Steel that maintains its shiny silver color for a more modern appearance Each Ultra Slim Riser is plumbed to a push to connect Tee for easy installation B Bases 4 pre assembled with galvanized stake straight Base for each Slim Riser Tee Base for each Ultra Slim Riser C End Plug D Quick Dis...

Страница 6: ...dripless Mist Nozzles B Large Hardware Clips 10 for mounting Tees C End Plug D Quick Disconnect E Tube Cutter F Tubing 50 ft 15 2 m black nylon G Screws 20 stainless steel H Small Hardware Clips 10 for mounting Tubing I Mist Station Kit Instructions Additional parts and accessories are available at www bask solutions com Overhead Kit ...

Страница 7: ...sing your Mistmaster in areas prone to freezing temperatures keep the device indoors e g in a temperature controlled garage and plugged into its Battery Charger 18 If nylon tubing is exposed to freezing temperatures check the tubing for cracks and leaks prior to operating your Mist Station If used in areas experiencing freezing temperatures winterize fluid tubing by draining or blowing fluids out ...

Страница 8: ...onnect charger prior to transportable use Use only the charger and charger extender offered by Bask Bask recommends positioning your Mistmaster in an area that is easily accessible ensuring that it does not block walkways or create a tripping hazard 2 Determine the best location for each Riser For best results position Risers approximately 8 to 10 feet 2 4 to 3 1 meters apart along the outside per...

Страница 9: ...h Riser Leave enough slack so the Tubing lies flat on the ground without pulling on the Risers do not allow Tubing to create loops or kinks See illustrations of a typical Mist Station Riser Kit installations below Slim Riser Copper Ultra Slim Riser 316 Stainless Steel Each Slim Riser is preassembled with a Mist Nozzle and Tubing running from the Mist Nozzle through the Riser Body and extending out...

Страница 10: ...t D so it locks into place Pull gently on the body to assure the connection is secure Typical Mist Station Configuration with Four Risers The illustration above shows a typical installation of a Riser Kit with each Riser spaced approximately 8 to 10 feet 2 4 to 3 1 meters apart You can adjust the positions of the Risers to fit your treatment area If you wish to treat a larger space visit www bask ...

Страница 11: ...rough or sharp surfaces e g rocks that can create abrasion and damage the tubing Cut the Tubing to the proper length using the Tube Cutter provided ensuring that the cut is straight and does not cause the Tubing to crimp bend or be distorted 10 Align the Tee at the bottom of the first Riser so that one connector points toward your Mistmaster then insert the end of the Tubing extending from your Mi...

Страница 12: ...lts position Overhead Mist Nozzles approximately 8 to 10 feet 2 4 to 3 1 meters apart along existing elevated structures such as walls soffits eaves fences or trees Better coverage is created by higher nozzles Use care to ensure mist does not drift to neighboring properties and does not adversely impact furniture landscaping pools or fountains and other structures Do not position Overhead Mist Noz...

Страница 13: ...that your Mistmaster battery is fully charged and that your Mistmaster is connected to your Mist Station Tubing through the Quick Disconnect D 3 Press the Power Button 15 to power ON your Mistmaster 4 If you have not yet purged the pump follow the Purge the Pump instructions in your Bask Mistmaster 3 in 1 Compact Misting System User s Guide see Appendix A of these Instructions 5 Test your Mist Sta...

Страница 14: ...solution offered by Bask When using your Mistmaster for the first time you will need to purge air from the pump Properly purging air from the pump will allow your Mistmaster to function at the maximum pressure necessary for optimal performance Repeat the Purge the Pump instructions in your Bask Mistmaster 3 in 1 Compact Misting System User s Guide Never purge the pump with less than half a tank of...

Страница 15: ...ce into an environment that is above freezing temperature immediately to prevent damage 2 When your Mistmaster tank is approximately halfway filled with clean potable water continue with the Fill the Tank instructions in your Bask Mistmaster 3 in 1 Compact Misting System User s Guide see Appendix A of these Instructions The Fill the Tank instructions guide you through the process of mixing a treat...

Страница 16: ...g If pairing was unsuccessful your Mistmaster s lights will illuminate after 20 seconds but the Status Indicators 5 will not display the success sequence Repeat steps 2 4 to try again Using your Long Range Remote Control 1 Wake the Mistmaster Press the Remote Button C once to wake the unit The Status Indicators B will cycle back and forth for a moment followed by a display representing the tanks f...

Страница 17: ...between low and medium Low Fluid When all three Indicators begin to flash your Mistmaster is shut down due to low fluid Add fluid to the Mistmaster to continue using it The three indicators flashing on your remote control can also mean that there is no communication between your Long Range Remote Control and a Mistmaster Low Battery When the two outer Indicators begin to flash your Mistmaster is s...

Страница 18: ...p 1 by turning clockwise until the cap is firmly in place The Fill Cap 1 and Vent 2 reduce spillage in the event that your device tips over or is tilted at extreme angles during use 4 Power ON your Mistmaster 5 Rotate the Selector 9 to the Blower position with the arrow pointing up and the bottom of the Selector 9 covering the Auxiliary Output 11 located in the top center of the Control Panel 10 6...

Страница 19: ...next step in setting up your device is to fill the tank with a treatment designed specifically for your intended use Bask offers a variety of natural and chemical treatments that are selected for use in the Bask Mistmaster 3 in 1 Compact Misting System For information about specific products and uses visit us online at www bask solutions com See the USE OF TREATMENTS section of this User s Guide f...

Страница 20: ...ollow the precautionary statements on the product label and insert prior to handling any treatment Instructions may include the use of gloves eye protection mask or other Personal Protective Equipment PPE to protect your skin eyes mouth and lungs CHEMICAL SAFETY INSTRUCTIONS AND WARNINGS Use only treatments selected for use in the Bask Mistmaster 3 in 1 Compact Misting System Read understand and f...

Отзывы: