Bask Mistmaster
®
3-in-1 Compact Misting System: Mist Station Kit Instructions
v.210119
Page
13
of
20
Two Large Hardware Clips may be used to mount a Tee directly to a structure. Wrap the Large Hardware
Clips around the Tee, one on each side of the Mist Nozzle. Insert the screw through the hole on both ends of
the Large Hardware Clip and screw in tightly, ensuring that the Mist Nozzle is pointing in the desired
direction.
Test Your Mist Station
1.
Before using your Mist Station, test it for leaks by filling your Mistmaster tank with potable water; DO NOT ADD
ANY TREATMENT SOLUTIONS UNTIL AFTER YOU HAVE TESTED YOUR MIST STATION when possible.
2.
Ensure that your Mistmaster battery is fully charged and that your Mistmaster is connected to your Mist Station
Tubing through the Quick Disconnect (D).
3.
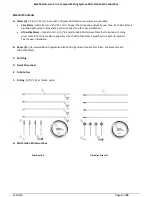
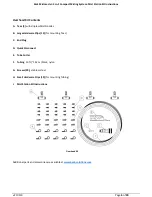
Press the Power Button (15) to power ON your Mistmaster.
4.
If you have not yet purged the pump, follow the Purge the Pump instructions in your Bask Mistmaster
®
3-in-1
Compact Misting System User’s Guide (see Appendix A of these Instructions).
5.
Test your Mist Station by pressing and holding the Mist Button (4) located on the Mistmaster Handle (3). Pressure
from your Mistmaster’s internal pump will force fluid from the tank though the
Auxiliary Output (11), through the
nylon Tubing connecting each of the Risers and/or Overhead Mist Nozzles in your Mist Station. Continue to press
and hold the Mist Button (4) until observing mist emerging from the Mist Nozzles until air is no longer heard
escaping through the nozzles.


