


Annuncicom IC User Manual Version 01.20
Page
23
IO settings
The
I1
pushed command r=192.168.0.20/c=80 will activate
the relay on the control station for the Relay toggle
duration time set in the control station when the RING
button is pressed on the door station panel.
The
I1
released command has to be blank.
Adjust the Relay toggle duration according to the
specification of the door strike used.
All other commands are not used and can be left blank
or as is.
Security settings
These settings need not to be changed for now.
Adjust them later according to your security needs.
9.2.2 Control station configuration
Lets take a look on how to configure the control station.
Wiring
The control station is connected to an intercom panel:
Speaker to speaker out (C).
Microphone to Microphone In (E or F).
The TALK button to Input 0 (B1 and B3).
The DOOR button to Input 1 (B2 and B3).
The flash or buzzer to Relay normally open (B4) and Relay
common (B5).
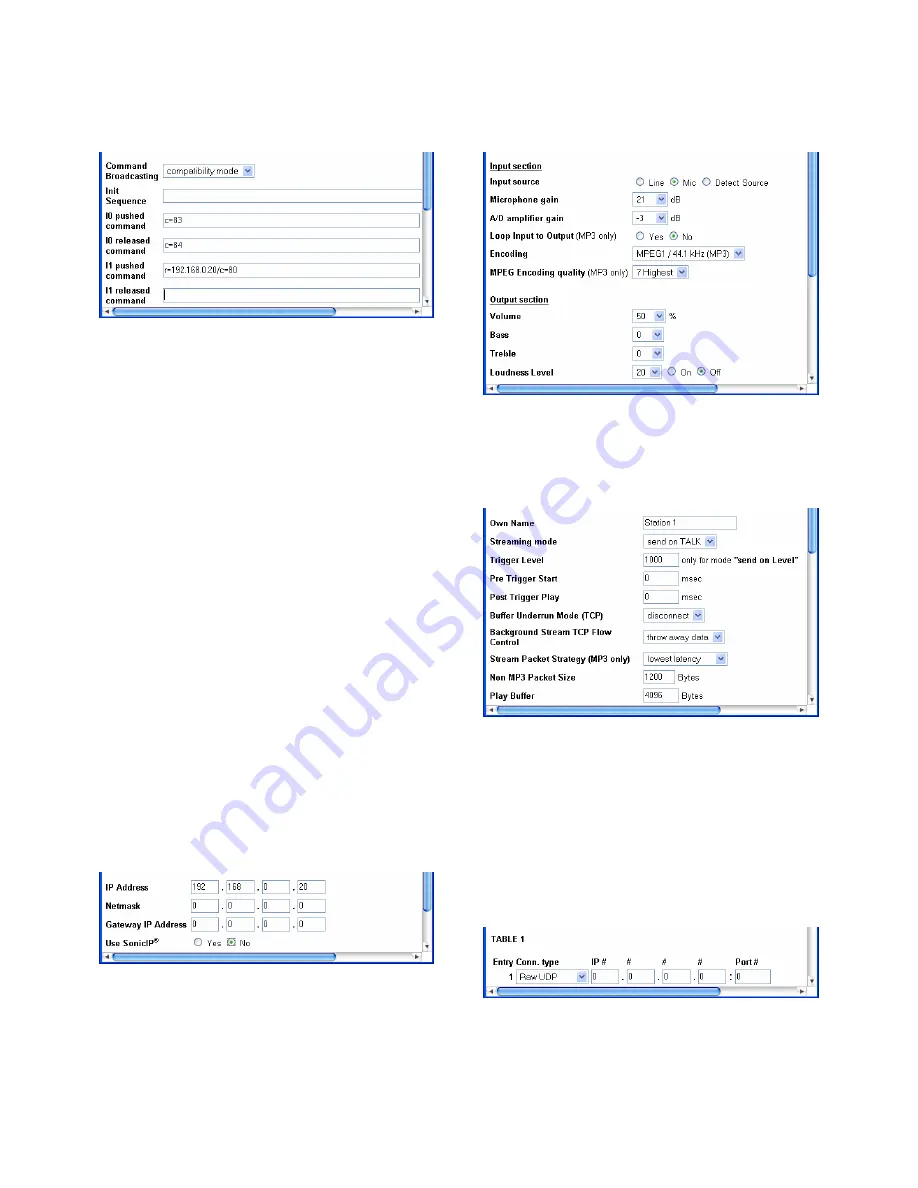
Network settings
SonicIP is disabled, no need to hear it on power up as the
IP is static and known and will not be power cycled anyway.
Audio settings
Change the Input source to "Mic".
See details under Door station configuration.
Streaming settings
No changes needed.
The control station is set to talk only when the Talk button
is pushed using UDP broadcast.
Pre Trigger Start can be adjusted to prevent cut offs when
starting to talk too early.
Post Trigger Play can be adjusted to prevent cut offs after
the button has been released.
When receiving a stream, 4096 Bytes will be buffered first
before playing it back over the speaker. Lower this value to
minimize delay, increase this value to prevent dropouts.
The stream will be transmitted using a UDP broadcast on
port 3030.


