


NioWatch operation
58
• To select another display function, select an item from the
Display Function
drop-down box.
If you select
DICOM Optimized
, you will be able to adjust your
grayscales using a wizard (see below).
• To adjust display luminance, adjust the
Luminance
slider.
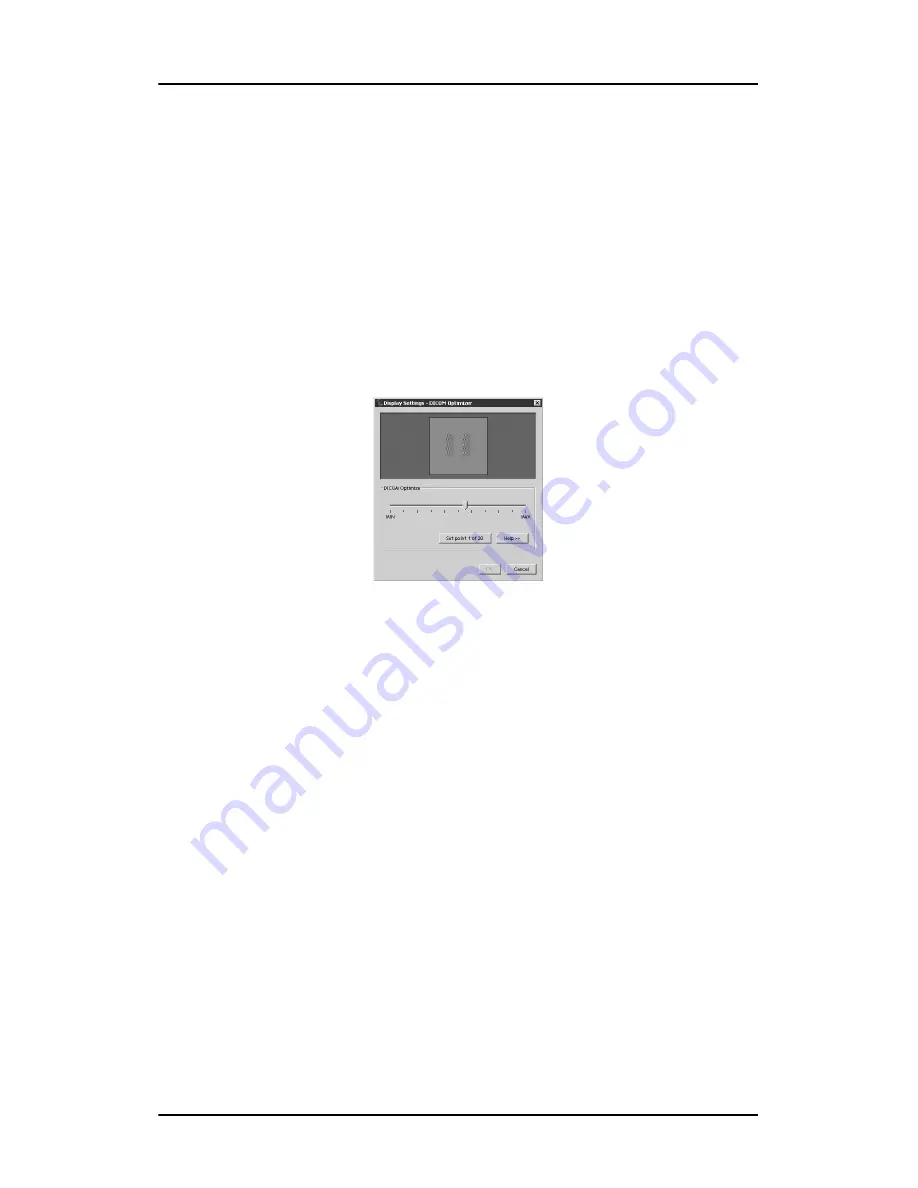
DICOM Optimizer wizard
1.
When you have selected the DICOM Optimized display function,
the following window appears:
Figure 23
2.
Adjust the slider until there is almost no visible difference
between the background of the image above the slider and the
bitmap inside this image.
3.
When done, click button
Set point 1 of 20
.
4.
Repeat this procedure until the button is grayed. This indicates the
last point is set.
5.
Click
OK
to finish.
Содержание Nio 5MP
Страница 1: ...Installation User Manual Nio 5MP...
Страница 2: ...This page intentionally left blank 2 This page intentionally left blank...
Страница 3: ...3 Preface...
Страница 4: ...Preface This page intentionally left blank 4 This page intentionally left blank...
Страница 11: ...Safety Instructions 11 Switch on DPMS on display and PC Activate a good screen saver...
Страница 13: ...13 Overview...
Страница 14: ...Overview This page intentionally left blank 14 This page intentionally left blank...
Страница 23: ...Parts controls and connectors 23 1 Video 1 output 2 Video 2 output 3 VGA boot on off jumper 4 PCI connector...
Страница 24: ...Parts controls and connectors This page intentionally left blank 24...
Страница 25: ...25 Installation...
Страница 26: ...Installation This page intentionally left blank 26 This page intentionally left blank...
Страница 45: ...Software installation 45 Figure 20...
Страница 48: ...Settings for optimal display performance throughout the product lifetime This page intentionally left blank 48...
Страница 49: ...49 Operation...
Страница 50: ...Operation This page intentionally left blank 50 This page intentionally left blank...
Страница 65: ...65 Cleaning...
Страница 66: ...Cleaning This page intentionally left blank 66 This page intentionally left blank...
Страница 69: ...69 Troubleshooting...
Страница 70: ...Troubleshooting This page intentionally left blank 70 This page intentionally left blank...
Страница 83: ...83 Technical Information...
Страница 84: ...Technical Information This page intentionally left blank 84 This page intentionally left blank...
Страница 90: ...Glossary This page intentionally left blank 90...
Страница 91: ...91 Warranty Statement...
Страница 92: ...Warranty Statement This page intentionally left blank 92 This page intentionally left blank...
Страница 97: ...Warranty Statement 97...
Страница 98: ...Warranty Statement 98...
Страница 99: ...www barco com B4100447 06 March 2007...


