background image

R

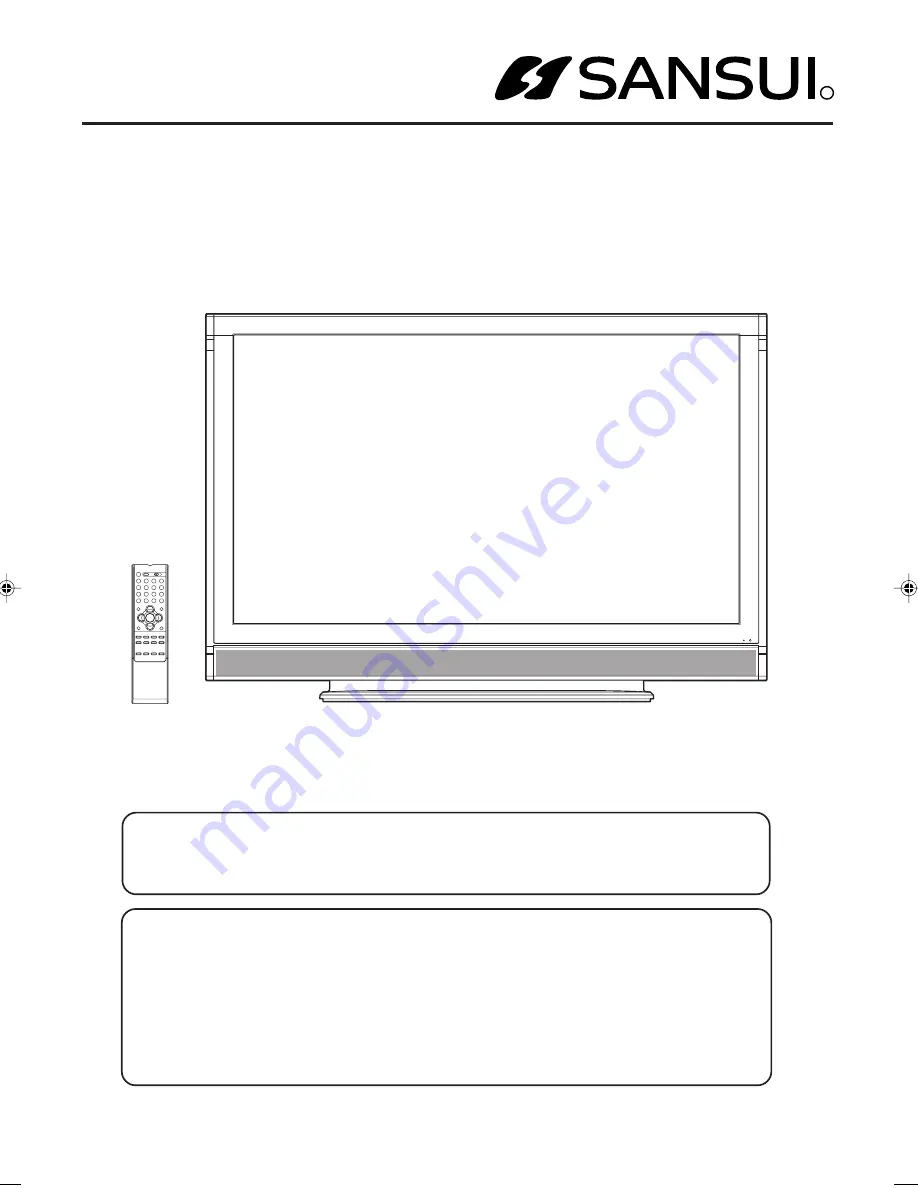
50” WIDE PLASMA DISPLAY

HDPDP5000

OWNER’S MANUAL

Before operating the unit, please read this manual thoroughly.

ATTENTION

If you purchase a universal remote control from your local retailer, please contact the remote
manufacturer for the required programming code.

IF CONTACT WITH CUSTOMER SERVICE IS REQUIRED

PLEASE HAVE THE MODEL NUMBER READY PRIOR TO THE CALL

CUSTOMER SERVICE – 1-800-289-0980

ORION WEBSITE

FOR INFORMATION ON OUR OTHER PRODUCTS, PLEASE VISIT OUR WEBSITE AT

www.orionsalesinc.com

 3X90101A_En_cover

3/16/06, 9:56 PM

1

Summary of Contents for HDPDP5000

Page 1: ...al remote control from your local retailer please contact the remote manufacturer for the required programming code IF CONTACT WITH CUSTOMER SERVICE IS REQUIRED PLEASE HAVE THE MODEL NUMBER READY PRIOR TO THE CALL CUSTOMER SERVICE 1 800 289 0980 ORION WEBSITE FOR INFORMATION ON OUR OTHER PRODUCTS PLEASE VISIT OUR WEBSITE AT www orionsalesinc com ...

Page 2: ...nd found to comply with the limits for a Class B digital device pursuant to Part 15 of the FCC Rules These limits are designed to provide reasonable protec tion against harmful interference in a residential installation This equipment generates uses and can radiate radio frequency energy and if not installed and used in accordance with the instructions may cause harmful interference to radio commu...

Page 3: ...een dropped 15 Apparatus shall not be exposed to dripping or splashing and that no objects filled with liquids such a vases shall be placed on the apparatus 16 Do not overload wall outlets and extension cords as this can result in a risk of fire or electric shock 17 Do not push objects through any openings in this unit as they may touch dangerous voltage points or short out parts that could result...

Page 4: ...splay panel and cause subtle but permanent ghost images This type of damage is NOT COVERED BY YOUR WARRANTY Never leave your plasma display on for long periods of time while it is displaying the following formats or images Fixed Images such as stock tickers video game patterns TV station logos and websites Special Formats that do not use the entire screen For example viewing letterbox style 16 9 m...

Page 5: ...lecting the color temperature 31 Resetting your picture adjustment 31 Sound control adjustment 32 Turning off the built in speakers 32 Using the WOWTM surround sound feature 33 Selecting the HDMI audio input source 33 Resetting your audio adjustment 33 Screen Saver function 34 Picture Audio control adjustment in the PC mode 35 IMPORTANT SAFETY INSTRUCTIONS 3 SAFETY PRECAUTIONS 4 IMPORTANT NOTICE 4...

Page 6: ...nglish Spanish or French for on screen programming NOTES Please make sure to insert the cord securely at both the Plasma Display and the wall outlet The AC Cord has a grounding type AC line plug If the supplied AC cord does not match you AC outlet contact a qualified electrician do not defeat the purpose of a grounding plug WARNING DO NOT CONNECT THIS UNIT TO THE POWER USING ANY DEVICE OTHER THAN ...

Page 7: ...cket PC IN jack PC AUDIO HDMI 1 AUDIO LR IN jacks HDMI 1 IN jack VIDEO 2 IN To display the menu screen Press both VOLUME buttons at the same time to display the menu screen CURSOR buttons and VOLUME buttons can be used to select the desired setting during the menu screen operations HDMI 2 IN jack HDMI 2 AUIDIO IN jack Right side POWER button INPUT button VOLUME button CURSOR button ...

Page 8: ...ammed properly using a code listed on page 11 1 PLASMA DISPLAY VCR CBL Cable Satellite box DVD POWER Button Used to turn the Plasma Display VCR Cable Satellite box or DVD on or off after you select the operating mode on step 9 2 SLEEP Button To set the Plasma Display to turn off after a preset amount of time use the SLEEP button on the remote control 3 Direct Channel Selection Buttons 0 9 Allows d...

Page 9: ...te your products Some buttons are used exclusively for each product and some buttons are used in common with each product To operate your products correctly using this universal remote control follow each step below A For PLASMA DISPLAY Slide the selector switch to select TV first B For VCR Slide the selector switch to select VCR first C For CABLE SATELLITE box Slide the selector switch to select ...

Page 10: ...13 47 Sanyo 06 12 47 Funai 31 Scott 04 05 33 43 General Electric 14 16 20 Sears 06 09 11 12 15 Goldstar 09 Sharp 08 61 Go Video 56 62 63 Shintom 39 Hitachi 15 57 Signature 2000 08 14 16 19 31 49 Instant Replay 14 27 Sony 17 32 37 J C Penney 14 15 18 27 Sylvania 07 14 27 JVC 02 25 58 Symphonic 31 Kenwood 02 Tashiko 09 Logik 39 Tatung 02 LXI 09 31 Teac 02 31 Magnavox 07 14 31 Teknika 34 Marantz 07 1...

Page 11: ...a 01 14 Funai 18 32 Samsung 10 Hitachi 11 Sharp 08 JVC 09 Silvania 18 32 Kenwood 15 29 SMC 25 Konka 19 Sony 04 26 27 28 Mitsubishi 05 Technics 00 Nordmende 01 Thomson 01 Onkyo 21 Toshiba 03 Orion 33 Vialta 31 Oritron 24 Wave 22 Panasonic 00 Yamaha 00 30 Philips 03 16 Zenith 07 12 Pioneer 02 ...

Page 12: ...a Display to a VCR with an S Video cord If you connect a VCR with a S VIDEO cord to the S VIDEO IN jack on the rear of the Plasma Display you must also connect the audio cords to the AUDIO IN jacks on the rear of the Plasma Display The S VIDEO cord only carries the video signal The audio signal is separate NOTE When the S video cord and the video cord are connected to each jack at the same time th...

Page 13: ... connect the Plasma Display to a DVD player with component video If your DVD player has component video out jacks connect your Plasma Display to a DVD player using a component video cord It can greatly enhance picture quality and performance To Component OUT To Audio OUT Audio cord not supplied Video cord not supplied To AUDIO IN 1 or 2 To COMPONENT IN 1 or 2 NOTE Component Video input of this uni...

Page 14: ...akers and adjust the audio level using the Plasma Display s remote control To control the audio turn on the Plasma Display and the stereo amplifier and turn off the Plasma Display s built in speakers see Turning off the built in speakers on page 32 NOTE To hear sound when using an external audio amplifier the volume of both the Plasma Display and the amplifier must be set above 0 zero For example ...

Page 15: ...isplay modes MODE Resolution Refresh rate VGA 640x480 60Hz WVGA 848x480 60Hz SVGA 800x600 60Hz XGA 1024x768 60Hz WXGA 1280x768 60Hz WXGA 1280x720 60Hz WXGA 1360x768 60Hz To return to normal mode Press INPUT SELECT again Rear lower of the Plasma Display To connect the Plasma Display to a HDMI or a DVI device Rear lower of the Plasma Display HDMI to DVI adapter cable HDMI type A connector not suppli...

Page 16: ...sequent hook up variations required they have not all been included in the suggested connection diagrams You ll need to consult each component s Owner s Manual for additional information To playback from a camcorder connect the camcorder to the Plasma Display as shown Side of the Plasma Display Audio Video cord not supplied To Audio Video OUT Side of the Plasma Display To Audio Video OUT Audio Vid...

Page 17: ... screen Press MENU The menu screen will appear 5 Setting the language You can choose from three different languages English French and Spanish for the on screen displays NOTE If no buttons are pressed for more than about 60 seconds the MENU screen will return to normal operation automati cally SETUP LANGUAGE ENGLISH CLOSED CAPTION OFF PICTURE SIZE PICTURE SCROLL CINEMA MODE FILM SELECT ADJUST ...

Page 18: ...een by white bars As the volume level increases so do the number of bars If the volume decreases the number of white bars also decreases QUICK VIEW This button allows you to go back to the last input source selected by pressing QUICK VIEW Press QUICK VIEW again to return to the last input source you were watching MUTE Press MUTE to switch off the sound The unit s sound will be silenced and MUTE wi...

Page 19: ...eft side of the unit COMPONENT1 COMPONENT2 HDMI1 HDMI2 or PC depending on which input jacks you used to connect your devices Pressing INPUT SELECT on the remote control displays the current signal source To change the video input source press INPUT SELECT again or 0 7 Labeling the video input source The video label feature allows you to label each input source for your unit SOURCE SELECTION 0 VIDE...

Page 20: ...losed Caption WHAT IS CLOSED CAPTIONING This Plasma Display has the capability to decode and display Closed Captioned television programs Closed Captioning will display text on the screen for hearing impaired viewers and may translate and display text in another language if broadcast Select desired video source for the Plasma Display 1 Press MENU then press or to display SETUP menu 2 4 Press or to...

Page 21: ...ure that you may choose to exclude The restriction applies to TV RATING and MOVIE RATING if this data is transmitted You may set this restriction separately To use the V Chip function you must register a password NOTES If you forget the password contact Customer Service at 1 800 289 0980 for assistance Your original remote control will be required To avoid forgetting the pass word write it down an...

Page 22: ...s than 13 years old R Under 17 years old Parental guidance suggested NC 17 17 years old and above X Adult only To use the Plasma Display after the V Chip protection has been set When a program exceeding the selected V Chip level is received a screen will appear blocking the channel display To temporarily override the V Chip press MUTE then enter your password and press ENTER Changing the channel o...

Page 23: ...Use the number buttons 0 9 to enter your password then press ENTER The LOCKS menu appears Press MENU then press or to select LOCKS menu 3Press or to select NEW PASSWORD then press or 2 Setting the V Chip LOCKS PANEL LOCK OFF NEW PASSWORD SELECT ADJUST LOCKS V CHIP PANEL LOCK NEW PASSWORD SELECT ADJUST LOCKS PASSWORD 0 9 SELECT ENTER SET EXIT END LOCKS NEW PASSWORD 0 9 SELECT ENTER SET EXIT END LOC...

Page 24: ...reen 3Press or to select PANEL LOCK then press or to select OFF 2 1Press MENU then press or to select LOCKS menu You also can unlock the front panel using the menus Press or to display the password entering mode Use the number buttons 0 9 to enter your password then press ENTER The LOCKS menu appears Press or to display the password entering mode Use the number buttons 0 9 to enter your password t...

Page 25: ...e size as described below and on the next page You can view 480i and 480p format programs in a variety of picture sizes NATURAL CINEMA WIDE1 CINEMA WIDE2 CINEMA WIDE3 and FULL CINEMA WIDE1 picture size for 4 3 format programs To fill the screen the right and left edges are extended more widely though the center of the picture remains near former ratio The top and bottom edges of the picture may be...

Page 26: ...creen it is extended horizontally How ever it is only slightly extended at the top and the bottom The top and bottom edges of the picture may be hidden To view the hidden areas such as subtitles or captions it is possible to make the picture scroll see the next page FULL picture size for 16 9 source programs FULL will display the picture at the maximum size NOTES The PICTURE SIZE feature is not av...

Page 27: ...MA WIDE2 and CINEMA WIDE3 Setting the picture scroll NOTE The scroll amounts are as follows 480i 480p signal source CINEMA WIDE1 Not adjustable CINEMA WIDE2 10 to 20 CINEMA WIDE3 10 to 10 5 Press EXIT to return to the normal screen SCROLL ADJUSTMENT 10 ADJUST SCROLL ADJUSTMENT 0 ADJUST SCROLL ADJUSTMENT 0 ADJUST SCROLL ADJUSTMENT 10 ADJUST SETUP LANGUAGE ENGLISH CLOSED CAPTION OFF PICTURE SIZE PIC...

Page 28: ...ect VIDEO in step 2 above A smoother motion may be obtained by setting the CINEMA MODE to FILM when you view a DVD from the DVD player con nected with the component input Press EXIT to return to the normal screen 3 SETUP LANGUAGE ENGLISH CLOSED CAPTION OFF PICTURE SIZE PICTURE SCROLL CINEMA MODE FILM SELECT ADJUST SETUP LANGUAGE ENGLISH CLOSED CAPTION OFF PICTURE SIZE PICTURE SCROLL CINEMA MODE FI...

Page 29: ...right and dynamic picture factory set STANDARD Standard picture quality factory set MOVIE Movie like picture setting factory set MEMORY Your personal preferences set by you see Picture control adjustment on page 30 PICTURE PICTURE PREFERENCE SPORTS BRIGHTNESS 25 CONTRAST 50 COLOR 25 TINT 0 SHARPNESS 25 SELECT ADJUST PICTURE PICTURE PREFERENCE SPORTS SPORTS STANDARD MOVIE MEMORY BRIGHTNESS 25 CONTR...

Page 30: ...screen SHARPNESS BRIGHTNESS CONTRAST COLOR TINT decrease brightness decrease contrast paler color reddish color tint makes picture softer increase brightness increase contrast brilliant color greenish color tint makes picture clearer Picture control adjustment PICTURE PICTURE PREFERENCE SPORTS BRIGHTNESS 25 CONTRAST 50 COLOR 25 TINT 0 SHARPNESS 25 SELECT ADJUST PICTURE PICTURE PREFERENCE SPORTS BR...

Page 31: ...t PICTURE menu 1 2 Selecting the color temperature Resetting your picture adjustment Press EXIT to return to the normal screen 3 Press or to select RESET then press Press MENU then press or to select PICTURE menu 1 2 Mode Picture Quality COOL Blueish MEDIUM Neutral WARM Reddish NOTE When you press RESET in PICTURE menu the picture adjustments return to the factory preset levels PICTURE COLOR TEMPE...

Page 32: ...adjust the treble sound 2 Turning off the built in speakers Use this feature to turn the Plasma Display speakers off when you connect an audio system see pages 14 Press MENU then press or to select AUDIO menu 1 Press or to select SPEAKERS and then press or to select OFF 2 To turn on the built in speakers Select ON in step 2 above Press EXIT to return to the normal screen 3 AUDIO BASS 25 TREBLE 25 ...

Page 33: ...tion returns the audio adjustment to the following factory settings BASS center 25 TREBLE center 25 BALANCE center 0 Resetting your audio adjustment Using the WOWTM surround sound feature WOW is a special combination of SRS Labs audio technologies that creates a thrilling surround sound experience with deep rich bass from stereo sound sources Your TV s audio will sound fuller richer and wider WOW ...

Page 34: ...he screen will return to normal when any button is pressed Press MENU then press or to select SETUP menu 1 Press or to select SCREEN SAVER then press or to select ON or OFF 2 Press EXIT to return to the normal screen 3 SCREEN SAVER When a still picture is displayed for an extended period of time a ghost image may permanently appear on the screen SETUP LANGUAGE ENGLISH CLOSED CAPTION OFF PICTURE SI...

Page 35: ...UT Set to ON when you select the WVGA mode on the PC WXGA INPUT Set to ON when you select the WXGA mode on the PC Example Adjust the contrast Press MENU during PC mode then press or to select PICTURE menu Press or to select CONTRAST then press or Press or to adjust the setting Press EXIT to return to the normal screen PC Monitor Menu There are a number of picture and audio settings you can adjust ...

Page 36: ... 1 Press MENU during PC mode then press or to select PICTURE or AUDIO menu 2 Press or to select RE SET then press PICTURE menu BRIGHTNESS center 25 CONTRAST center 25 RED center 25 GREEN center 25 BLUE center 25 AUDIO menu BASS center 25 TREBLE center 25 BALANCE center 25 PICTURE RED 25 GREEN 25 BLUE 25 WVGA INPUT OFF WXGA INPUT OFF RESET SELECT ADJUST 3 Press EXIT to return to the normal screen ...

Page 37: ...e Batteries are weak dead or inserted incorrectly Remote is out of range move closer to Plasma Display within 15 feet Make sure Remote is aimed at sensor Confirm there are no obstructions between the Remote and the Plasma Display Make sure the power cord is plugged in Power interrupted Display shuts off Set closed caption decoder in the menu Closed Caption is not activated Cleaning instructions fo...

Page 38: ... V p p 75 ohms AUDIO 8 dBm 1k ohms HDMI input HDMI compliant type A connector HDCP compliant E EDID compliant Suggested scan rates 1080i 480p 480i 720p HDMI Audio 2 channel PCM 32 44 1 48 kHz sampling frequency 16 20 24 bits per sample PC Monitor input Mini Dsub 15pin x 1 PDP 49 95 inches 1268 7 mm diagonal 1366 x 768 pixel Speaker Main 2 3 16 inches 56 mm x 5 inches 127 mm 4 ohms x 2 Tweeter 2 in...

Page 39: ... ORION to effect warranty repairs to the class of product or by the ORION Factory Service Center d Damaged because it is improperly connected to the equipment of other manufacturers This warranty does not cover a Damage to equipment not properly connected to the product b Costs incurred in the shipping of the product to an ORION authorized Independent Service Center or ORION Factory Service Center...

Page 40: ...Printed in Thailand J3X90101A SH 06 04 N ...

Reviews: