


15. Layout
15.7 Lens behavior
What can be done ?
Different custom layouts can have different zoom/focus/shift (lens) settings, e.g. when using the projector on 2 different projector
distances or two different screen sizes (same image but 2 custom layouts needed due to different zoom/focus/shift settings).
Adjust the lens settings for the different situations and save these settings each in a different custom layout.
When using only one screen to project the different layouts, the same lens settings can be used for all custom layouts.
When using different screens, different lens settings can be used (settings saved in the custom
fi
le will be used). To use different
lens settings, it is important that the lens is calibrated so that the lens always returns to the saved position when opening a custom
layout.
Switching from a custom
fi
le (layout) to a standard
fi
le (layout) will not change the current lens settings.
How to set the lens behavior
1. Press
Menu
on the remote control (RCU) or on the local keypad to activate the menus and select
Layout
→
Lens behavior
.
The
Lens behavior
menu is displayed.
2. Press
ENTER
to select.
The
Lens behavior
window opens.
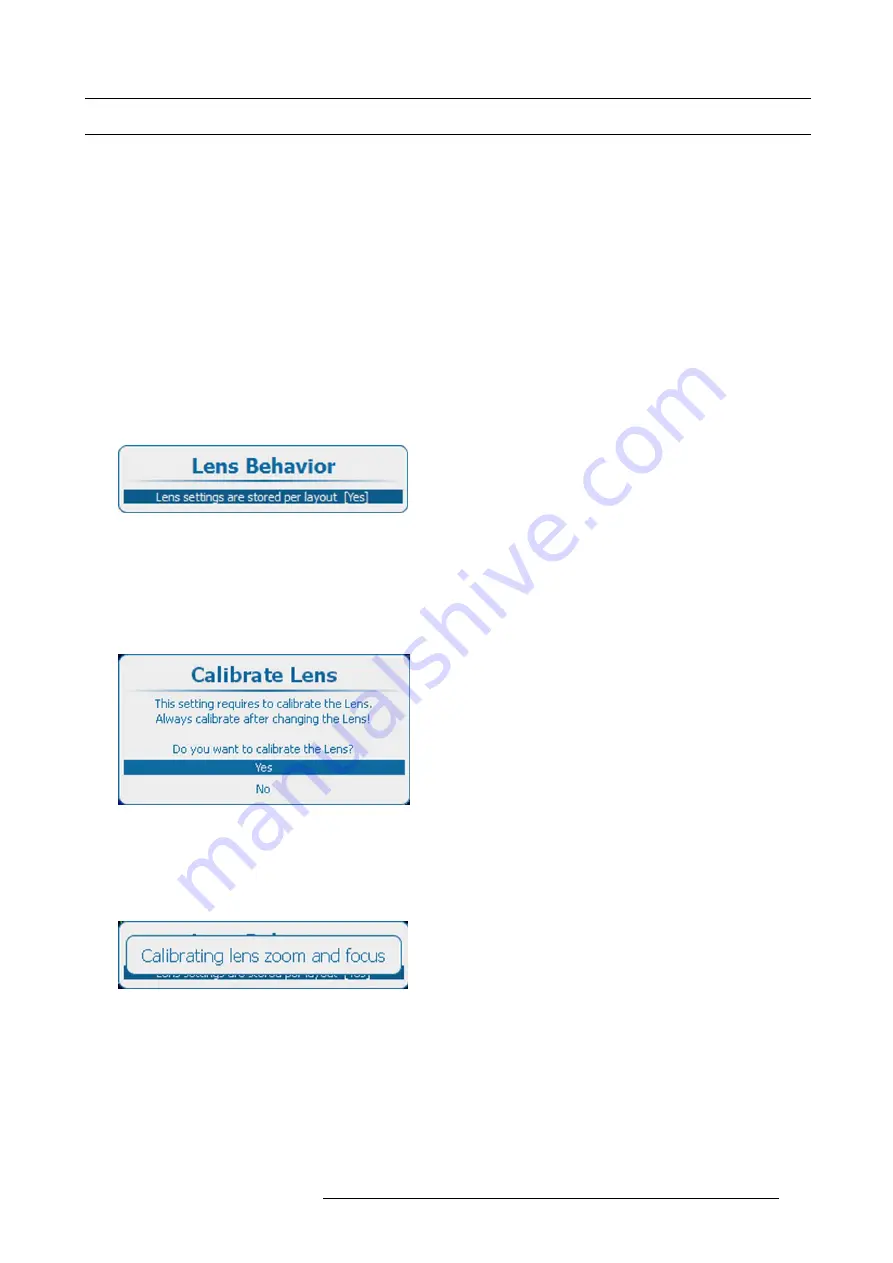
Image 15-35
Lens behavior setting
3. Press
ENTER
to toggle lens behavior between
[Yes]
or
[No]
.
[Yes] = each layout will use the same zoom/focus/shift settings. The zoom/focus/shift settings of the previous selected layout will
be applied to the next selected layouts.
[No] = each layout will use its own zoom/focus/shift settings. Lens should be calibrated, when using this setting.
4. If
[No]
is selected, the calibrate lens menu opens.
Image 15-36
Lens calibration
Before different zoom/focus/shift setting can be used, the lens should be calibrated. When a lens change has taken place, always
calibrate the lens before using this setting.
5. If you have to calibrate the lens, select
Yes
and press
ENTER
to start the calibration.
During the calibration, a message is displayed. This message disappears when the calibration is
fi
nished.
Image 15-37
Lens calibration message
R5906730 HDF WLP SERIES 01/08/2017
167
Содержание HDF-W30LP
Страница 1: ...HDF WLP series User and Installation manual R5906730 05 01 08 2017...
Страница 4: ......
Страница 10: ...Table of contents 6 R5906730 HDF WLP SERIES 01 08 2017...
Страница 78: ...8 Input Communication 74 R5906730 HDF WLP SERIES 01 08 2017...
Страница 90: ...9 Getting started 86 R5906730 HDF WLP SERIES 01 08 2017...
Страница 94: ...10 Software upgrade Image 10 5 90 R5906730 HDF WLP SERIES 01 08 2017...
Страница 95: ...10 Software upgrade Image 10 6 R5906730 HDF WLP SERIES 01 08 2017 91...
Страница 98: ...10 Software upgrade Image 10 11 94 R5906730 HDF WLP SERIES 01 08 2017...
Страница 99: ...10 Software upgrade Image 10 12 R5906730 HDF WLP SERIES 01 08 2017 95...
Страница 100: ...10 Software upgrade Image 10 13 10 Clear the history log 96 R5906730 HDF WLP SERIES 01 08 2017...
Страница 108: ...11 Quick set up adjustment 104 R5906730 HDF WLP SERIES 01 08 2017...
Страница 172: ...15 Layout 168 R5906730 HDF WLP SERIES 01 08 2017...
Страница 180: ...16 Laser The Current light output panel is displayed Image 16 13 176 R5906730 HDF WLP SERIES 01 08 2017...
Страница 224: ...17 Alignment 220 R5906730 HDF WLP SERIES 01 08 2017...
Страница 258: ...18 Projector Control 254 R5906730 HDF WLP SERIES 01 08 2017...
Страница 272: ...19 Service 268 R5906730 HDF WLP SERIES 01 08 2017...
Страница 282: ...21 Maintenance procedures 278 R5906730 HDF WLP SERIES 01 08 2017...
Страница 300: ...C Standard source files 296 R5906730 HDF WLP SERIES 01 08 2017...
Страница 304: ...D DMX chart 300 R5906730 HDF WLP SERIES 01 08 2017...
Страница 310: ...E Stacking HDF WLP series projectors 306 R5906730 HDF WLP SERIES 01 08 2017...


