


10. Layout menu
The main window opens.
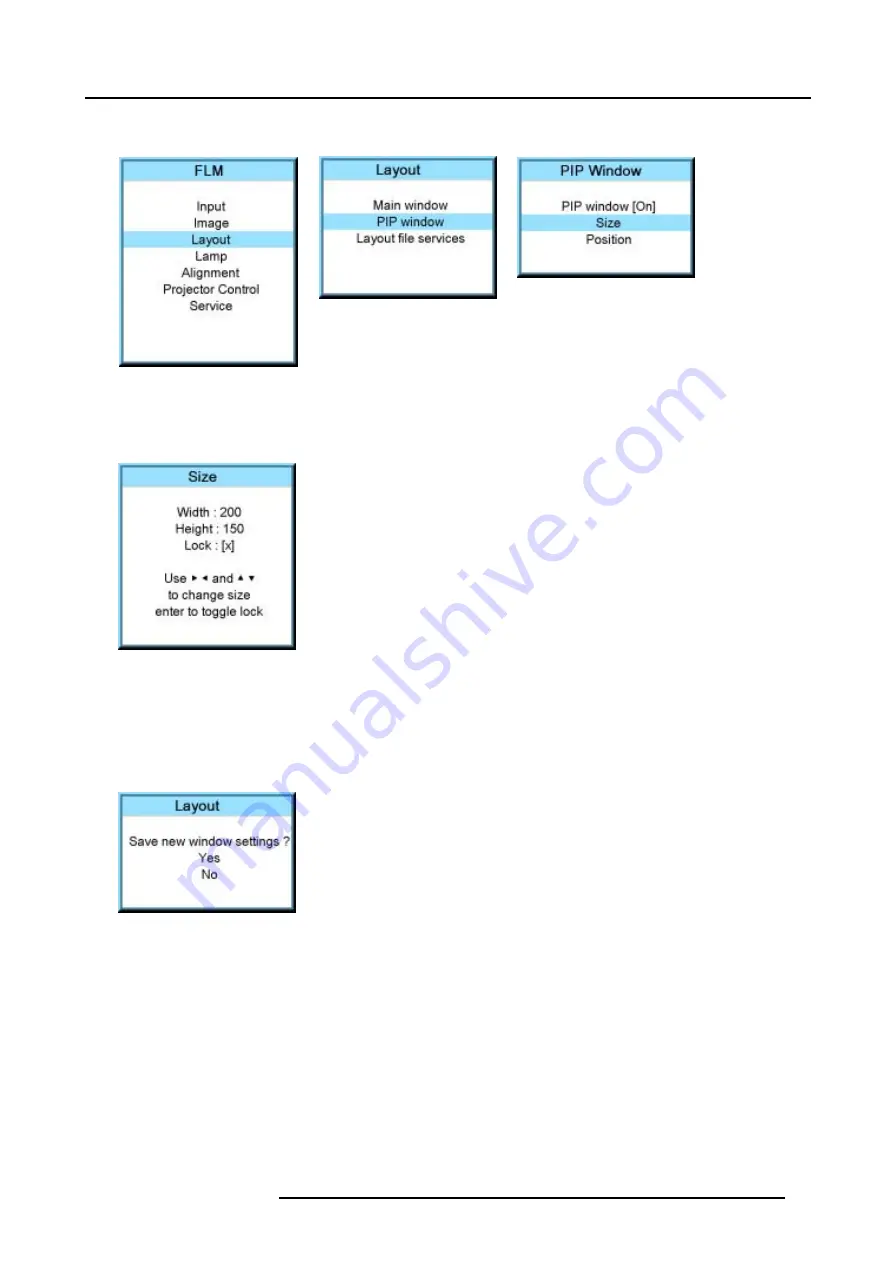
Image 10-31
Image 10-32
Image 10-33
4. Use the
▲
or
▼
key to select
Size
and press
ENTER
.
The size adjustment window opens.
5. Toggle with
ENTER
till Lock is set to [ ].
Image 10-34
[ ] = no lock between height and width.
[x] = width and height are locked.
6. Use the
▲
or
▼
key to adjust the height.
Use the
◄
or
►
key to adjust the width.
When the desired size is reached, press
EXIT
.
A Save window opens.
Image 10-35
7. Select with the
▲
or
▼
key
Save
and press
ENTER
.
Select with the
▲
or
▼
key
Delete
, when no save is desired and press
ENTER
.
10.3.4 Picture in Picture, position window
What can be done?
The picture in picture window can be position on any place on the display just by changing its start coordinates. The reference is
the upper left corner of the window.
How to position?
1. Press
MENU
to activate the menus.
2. Use the
▲
or
▼
key to select
Window
and press
ENTER
.
3. Use the
▲
or
▼
key to select
PIP Window
and press
ENTER
.
R5976986 FLM HD18 01/09/2006
95
Содержание FLM HD18
Страница 1: ...FLM HD18 Users manual R9004450 R5976986 00 01 09 2006...
Страница 4: ......
Страница 44: ...5 Connections 40 R5976986 FLM HD18 01 09 2006...
Страница 56: ...6 Getting started 52 R5976986 FLM HD18 01 09 2006...
Страница 90: ...9 Image menu 86 R5976986 FLM HD18 01 09 2006...
Страница 104: ...10 Layout menu Image 10 53 Image 10 54 Image 10 55 Image 10 56 100 R5976986 FLM HD18 01 09 2006...
Страница 134: ...13 Projector control 130 R5976986 FLM HD18 01 09 2006...
Страница 166: ...17 Removal of the projector covers 162 R5976986 FLM HD18 01 09 2006...
Страница 170: ...A Dimensions 166 R5976986 FLM HD18 01 09 2006...
Страница 186: ...E Order info 182 R5976986 FLM HD18 01 09 2006...


