


601
–
426-03
F70 Series
94
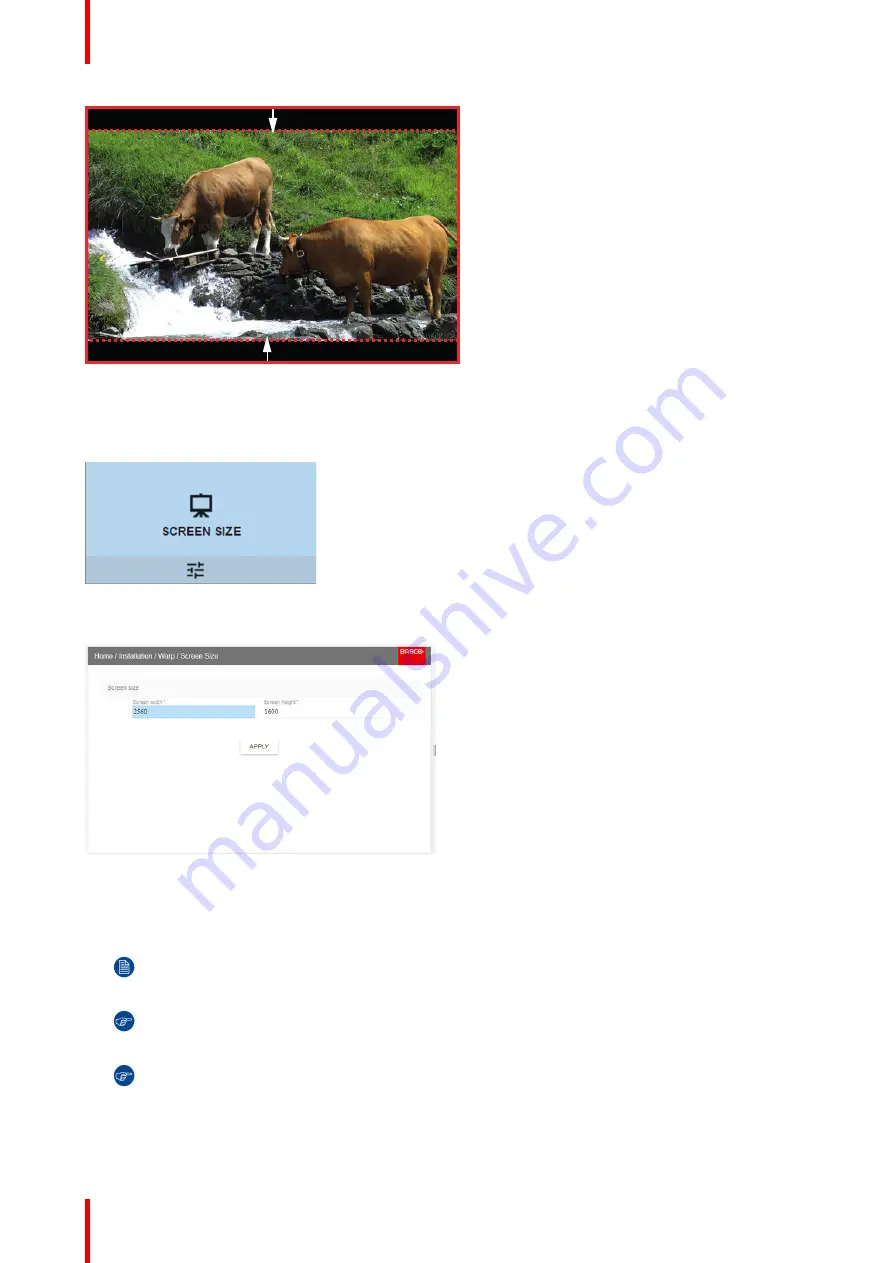
Image 8-14: Warp outline example
How to adjust the image?
1.
In the main menu, select
Installation
→
Warp
→
Screen Size
.
Image 8-15: Warp Menu, Screen Size
The Screen Size menu is displayed.
Image 8-16
2.
Select either
Screen width
or
Screen height
.
3.
Set the screen size width and height to match the measurement of the screen.
Note:
It is only the ratio between the width and height that is used, so the values may be entered as
the screen aspect ratio or actual measurement in cm, inches or any other unit.
Tip:
A red border will be projected along with the current image. The border is a visual tool, showing
the result of the adjusted outline.
Tip:
The value can also be entered by the numeric keys on the remote control. Press * to delete
existing numbers, and enter the new value by the numeric keys.
4.
Click
Apply
.
Содержание F70 - 4K6
Страница 1: ...ENABLING BRIGHT OUTCOMES User Manual F70 Series...
Страница 8: ...601 426 03 F70 Series 8 14 3 FS70 4K6 132 14 4 FS70 W6 134...
Страница 26: ...601 426 03 F70 Series 26 Safety...
Страница 38: ...601 426 03 F70 Series 38 Getting to know the projector...
Страница 46: ...601 426 03 F70 Series 46 Lenses...
Страница 68: ...601 426 03 F70 Series 68 Getting started...
Страница 74: ...601 426 03 F70 Series 74 Source menu...
Страница 76: ...601 426 03 F70 Series 76 Image 7 2 Image sub menu visible on the LCD Image menu...
Страница 120: ...601 426 03 F70 Series 120 Status menu...
Страница 124: ...601 426 03 F70 Series 124 3D...
Страница 125: ...125 Overview Update Projector Firmware 601 426 03 F70 Series User Maintenance 12...
Страница 127: ...127 601 426 03 F70 Series Cleaning the projector 13...


