


601
–
426-03
F70 Series
106
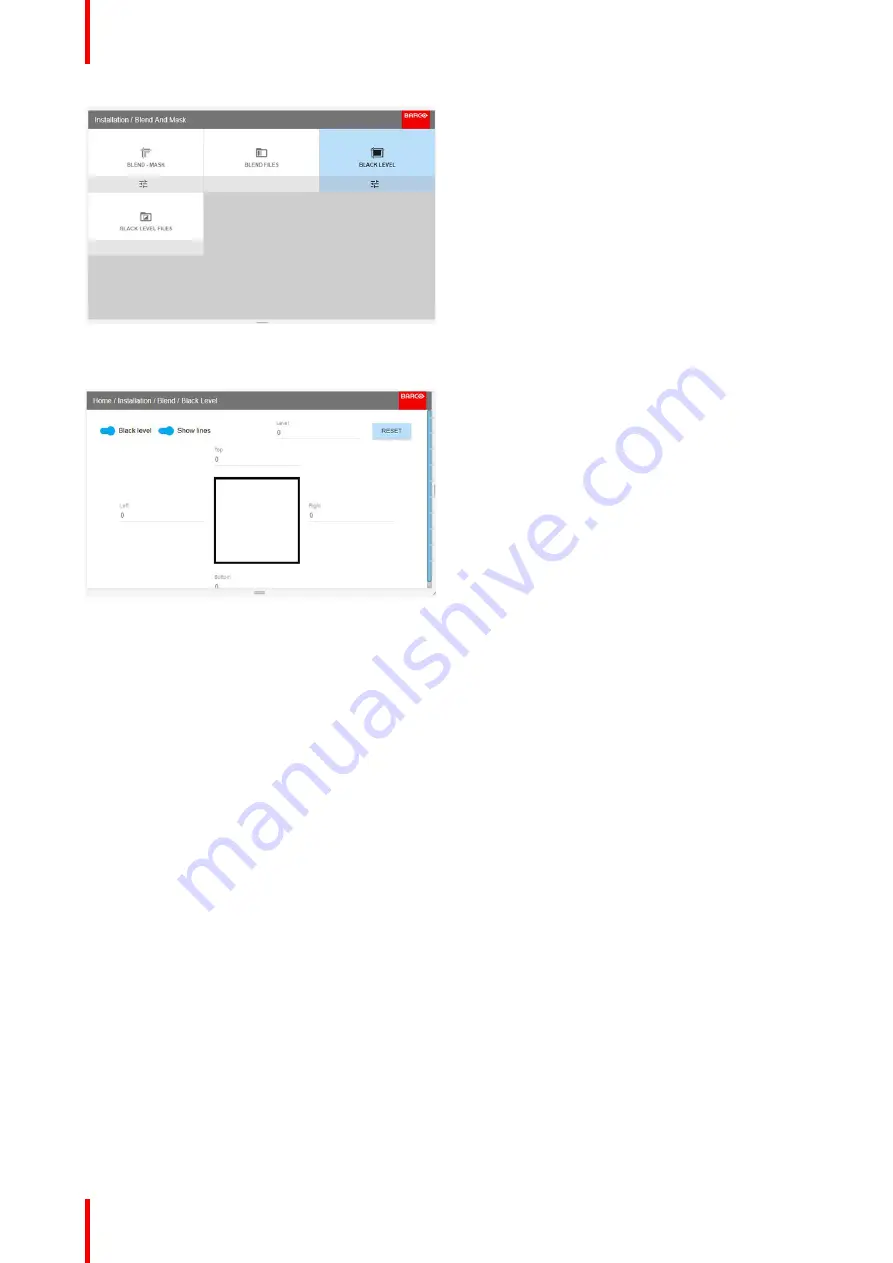
Image 8-42
2.
Enable the
”
Black level
”
and
“
Show lines
”
buttons.
Image 8-43
3.
Move the cursor to the side where the overlapped area occurs. (Left/right/top/bottom.) For the left projector,
this will be the right side in the menu. Press enter, and adjust the value with the arrow keys. As mentioned
earlier, the value shall be slightly larger than the blend zone offset. A line that indicates the zone will also be
visible when
“
Show lines
”
is enabled. When the black level zone is optimal, press enter.
The value can also be entered by the numeric keys in the remote control.
4.
Move the cursor to
“
Level
”
, press enter and adjust this level until the black level equals the level in the blend
zone.
This value can also be entered by the numeric keys on the remote control.
5.
Repeat the same procedure for the other projector,
6.
Disable the
“
Show lines
”
when the Black level adjustment is completed.
8.5.5 Black Level Files
About custom Black Level Files
Next to setting your specific Black Level Adjustment in the GUI, you can also upload or download a custom
Black Level adjustment file in png, jpeg or tiff format to/from the projector.
To upload or download Black Level masks you can use the Prospector tool. Alternatively, you can contact the
“
file endpoint
”
directly via the curl program or some other tool that supports http upload.
For more information on uploading/downloading Black Level files using the Prospector, refer to the Prospector
user manual.
For more information on uploading/downloading Black Level files using curl or other tools that supports HTTP
upload, refer to the Pulse API Reference Guide.
How to activate an uploaded Black Level adjustment file?
1.
In the main menu, select
Installation
→
Blend and Mask
→
Black Level Files
.
Содержание F70 - 4K6
Страница 1: ...ENABLING BRIGHT OUTCOMES User Manual F70 Series...
Страница 8: ...601 426 03 F70 Series 8 14 3 FS70 4K6 132 14 4 FS70 W6 134...
Страница 26: ...601 426 03 F70 Series 26 Safety...
Страница 38: ...601 426 03 F70 Series 38 Getting to know the projector...
Страница 46: ...601 426 03 F70 Series 46 Lenses...
Страница 68: ...601 426 03 F70 Series 68 Getting started...
Страница 74: ...601 426 03 F70 Series 74 Source menu...
Страница 76: ...601 426 03 F70 Series 76 Image 7 2 Image sub menu visible on the LCD Image menu...
Страница 120: ...601 426 03 F70 Series 120 Status menu...
Страница 124: ...601 426 03 F70 Series 124 3D...
Страница 125: ...125 Overview Update Projector Firmware 601 426 03 F70 Series User Maintenance 12...
Страница 127: ...127 601 426 03 F70 Series Cleaning the projector 13...


