


R5911705 /02
Bragi
80
5.3 Using dual inputs
Dual Input.
For extended flexibility to connect high resolution sources with a pixel clock over 330 MHz, the projector is
supporting a dual input mode. In this mode, the left and the right half of the image can be connected to the
DVI-1 and DVI-2 respectively, or DP1 and DP2.
To enable this mode, select the source that fits in the
Menu/Source
Dual input modes
There are four ways to connect dual input.
•
Dual Displayport Columns
•
Dual Displayport Sequential
•
Dual DVI Columns
•
Dual DVI Sequential
For Images to be displayed in this mode, the resolution must be the same on both channels
Signal source setup.
When using dual inputs, it is important that the signal sources are set up correctly, with the correct resolution.
Please refer to the manual for the source itself (PC, Graphic driver card..) in order to obtain a correct setup. If
the setup is wrong, no picture will be visible in dual mode.
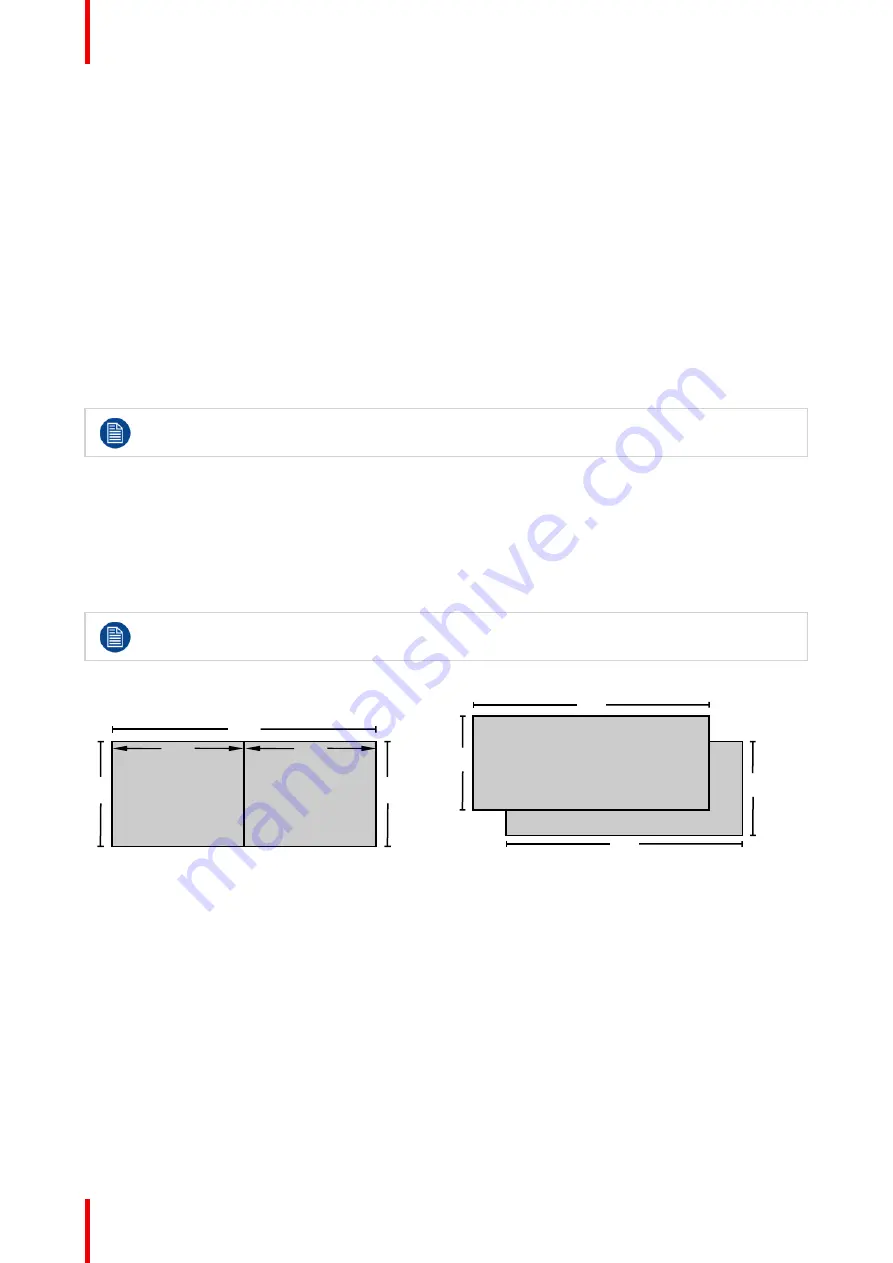
The resolution for each dual column channel can be up to 1920x2400 pixels.
The resolution for each dual sequential channel can be up to 2560x1600 pixels. (4K)
Change the EDID for each channel to the correct value. See chapter
“
Connector Settings
”
for EDID
setup.
Dual Column Input 2
Dual Column Input1
2400
2400
1920
1920
3840
Image 5
–
8 Dual Column Setup
Dual Sequential Input 2
Dual Sequential Input1
1600
2560
1600
2560
Image 5
–
9
Содержание Bragi
Страница 1: ...ENABLING BRIGHT OUTCOMES Installation Guide Bragi ...
Страница 25: ...25 R5911705 02 Bragi 2 1 Approved lenses 26 2 2 Replace a lens 27 2 3 Locking the lens position 29 Lenses 2 ...
Страница 34: ...R5911705 02 Bragi 34 250mm 250mm Image 3 1 Physical installation ...
Страница 48: ...R5911705 02 Bragi 48 Physical installation ...
Страница 50: ...R5911705 02 Bragi 50 4 1 Projector source and control connections Getting the projector started ...
Страница 52: ...R5911705 02 Bragi 52 4 1 2 Connector Specifications Getting the projector started ...
Страница 63: ...63 R5911705 02 Bragi 4 4 Power mode transitions Getting the projector started ...
Страница 73: ...73 R5911705 02 Bragi 4 7 User interface Getting the projector started ...
Страница 79: ...79 R5911705 02 Bragi Note You cannot change the EDID for SDI connectors Source menu ...
Страница 88: ...R5911705 02 Bragi 88 6 6 Gamma Types Image menu ...
Страница 93: ...93 R5911705 02 Bragi 6 8 Advanced image adjustments Image menu ...
Страница 104: ...R5911705 02 Bragi 104 Image menu ...
Страница 105: ...105 R5911705 02 Bragi Advanced picture adjustments 7 ...
Страница 112: ...R5911705 02 Bragi 112 Advanced picture adjustments ...
Страница 114: ...R5911705 02 Bragi 114 8 1 Lens Installation menu ...
Страница 121: ...121 R5911705 02 Bragi Image 8 11 Installation menu ...
Страница 122: ...R5911705 02 Bragi 122 8 4 Warping Installation menu ...
Страница 128: ...R5911705 02 Bragi 128 Image 8 22 Installation menu ...
Страница 137: ...137 R5911705 02 Bragi 8 5 Blending Installation menu ...
Страница 154: ...R5911705 02 Bragi 154 Installation menu ...
Страница 162: ...R5911705 02 Bragi 162 GUI Profiles ...
Страница 165: ...165 R5911705 02 Bragi 10 2 IR control System settings menu ...
Страница 180: ...R5911705 02 Bragi 180 System settings menu ...
Страница 184: ...R5911705 02 Bragi 184 GUI Status menu ...
Страница 186: ...R5911705 02 Bragi 186 3D ...
Страница 190: ...R5911705 02 Bragi 190 Index ...
Страница 191: ......


