


R5911705 /02
Bragi
108
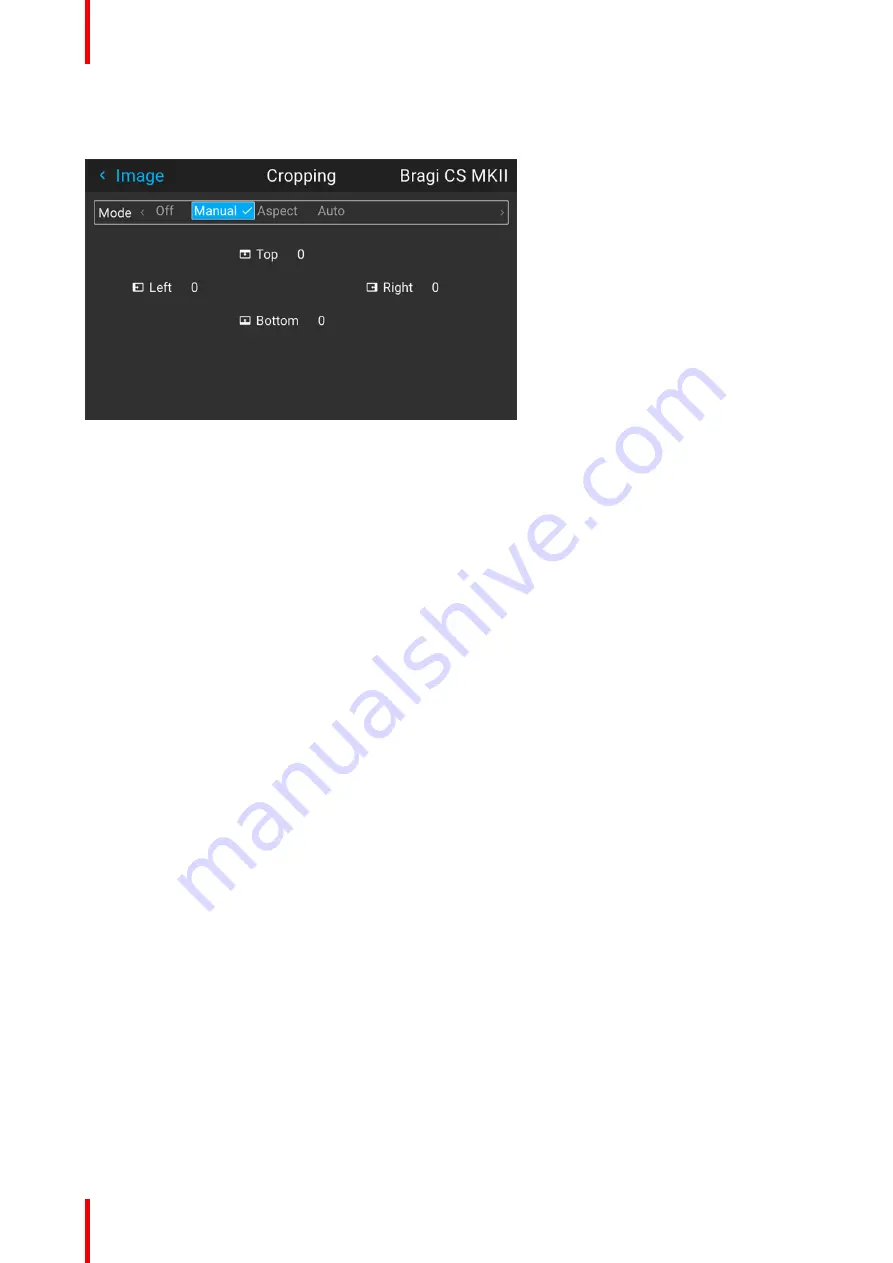
7.3 Manual Cropping
Image 7
–
2
When the preset values do not match the input format, the manual mode must be used
Enter the menu, and select manual. The OSD will show four numeric values that may be changed, and each
numeric value indicates the number of black display lines that shall be removed.
Select the
“
top
”
value, and enter a suitable numeric value. If necessary, do several iterations in order to match
the correct value.
Select the
“
bottom
”
value, and enter the same value as for the
“
top
”
.
Then the left and right sides must be adjusted. The value entered here must be equal to the vertical lines
removed, multiplied with the aspect ratio, in order to keep the correct correlation between the width and height
. Example: removed 200 lines in 16:9 format: 200 x (16/9) = number of lines to remove on each side.
To keep the subtitles
You can also use the manual cropping to include part of the bottom black bar just enough to include the
subtitles when that is being used.
Select the
“
top
”
value, and enter a suitable numeric value. If necessary, do several iterations in order to match
the correct value to remove the complete black bar.
Then do the same for the
“
bottom
”
value until you have removed just enough to still see the subtitles.
Содержание Bragi
Страница 1: ...ENABLING BRIGHT OUTCOMES Installation Guide Bragi ...
Страница 25: ...25 R5911705 02 Bragi 2 1 Approved lenses 26 2 2 Replace a lens 27 2 3 Locking the lens position 29 Lenses 2 ...
Страница 34: ...R5911705 02 Bragi 34 250mm 250mm Image 3 1 Physical installation ...
Страница 48: ...R5911705 02 Bragi 48 Physical installation ...
Страница 50: ...R5911705 02 Bragi 50 4 1 Projector source and control connections Getting the projector started ...
Страница 52: ...R5911705 02 Bragi 52 4 1 2 Connector Specifications Getting the projector started ...
Страница 63: ...63 R5911705 02 Bragi 4 4 Power mode transitions Getting the projector started ...
Страница 73: ...73 R5911705 02 Bragi 4 7 User interface Getting the projector started ...
Страница 79: ...79 R5911705 02 Bragi Note You cannot change the EDID for SDI connectors Source menu ...
Страница 88: ...R5911705 02 Bragi 88 6 6 Gamma Types Image menu ...
Страница 93: ...93 R5911705 02 Bragi 6 8 Advanced image adjustments Image menu ...
Страница 104: ...R5911705 02 Bragi 104 Image menu ...
Страница 105: ...105 R5911705 02 Bragi Advanced picture adjustments 7 ...
Страница 112: ...R5911705 02 Bragi 112 Advanced picture adjustments ...
Страница 114: ...R5911705 02 Bragi 114 8 1 Lens Installation menu ...
Страница 121: ...121 R5911705 02 Bragi Image 8 11 Installation menu ...
Страница 122: ...R5911705 02 Bragi 122 8 4 Warping Installation menu ...
Страница 128: ...R5911705 02 Bragi 128 Image 8 22 Installation menu ...
Страница 137: ...137 R5911705 02 Bragi 8 5 Blending Installation menu ...
Страница 154: ...R5911705 02 Bragi 154 Installation menu ...
Страница 162: ...R5911705 02 Bragi 162 GUI Profiles ...
Страница 165: ...165 R5911705 02 Bragi 10 2 IR control System settings menu ...
Страница 180: ...R5911705 02 Bragi 180 System settings menu ...
Страница 184: ...R5911705 02 Bragi 184 GUI Status menu ...
Страница 186: ...R5911705 02 Bragi 186 3D ...
Страница 190: ...R5911705 02 Bragi 190 Index ...
Страница 191: ......


