


1. Set the time on the DXM700.
2. Define the Network Interface settings by selecting either Ethernet or Cell on the Cloud Services screen.
3. If you selected Ethernet, configure your Ethernet connection by setting the IP settings on the Network screen.
4. Set the email and message parameters on the Mail and Messaging screen.
5. To send alert messages, define the threshold rule to use email.
6. To send log files, define the log file parameters.
8.5.1 Mail Server Authentication
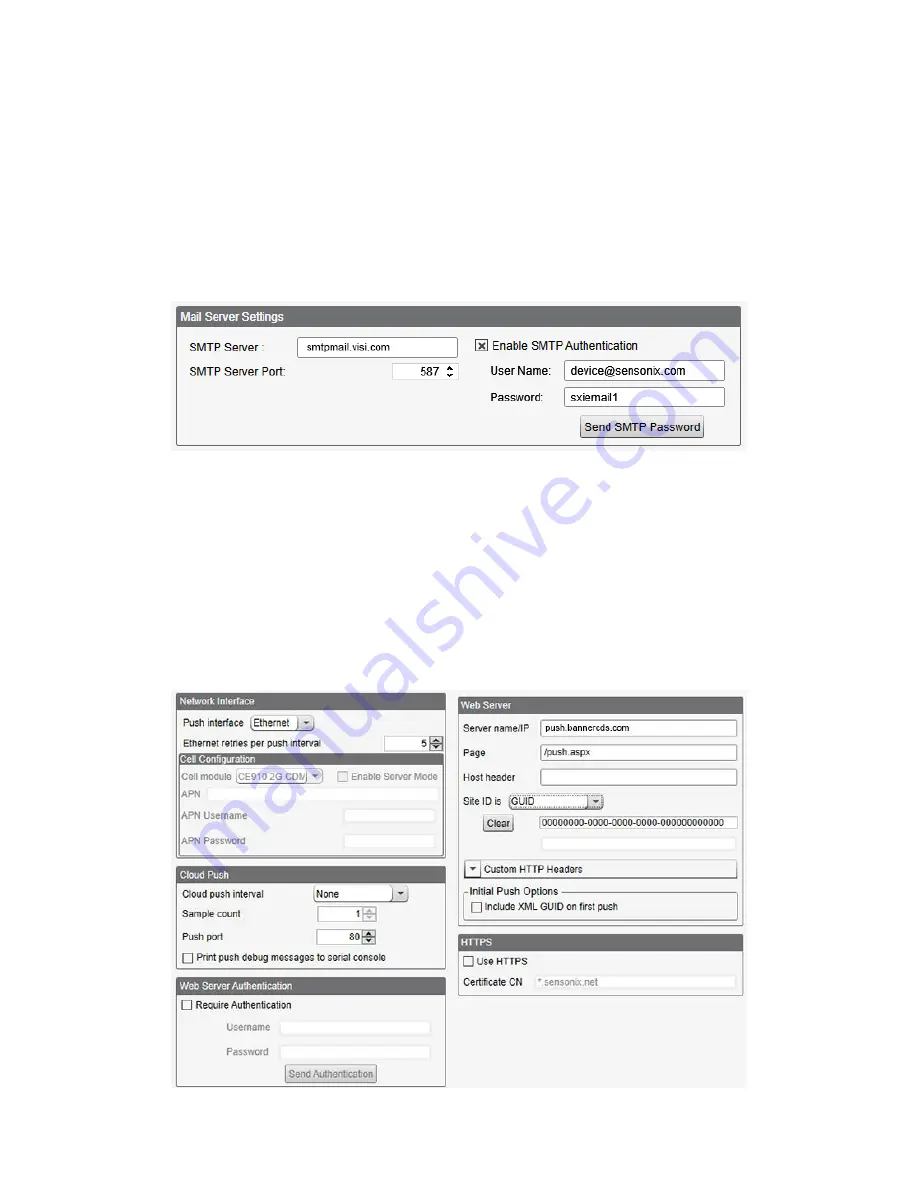
Complete the mail server settings to have the DXM700 send email alert messages or to email the log files.
The SMTP password is stored in the DXM700, not the XML configuration file. Use the Settings > Mail and Messaging screen
to complete this configuration.
Figure 28. Mail server settings
After selecting Enable SMTP Authentication for the first time, a pop-up box appears with additional instructions to complete
the mail server authentication process.
After entering the user name and password, click on Send SMTP Password to save the user name and password to the
DXM700. The DXM700 must be connected to the PC to complete this operation. If successful, a pop-up window appears,
asking to reboot the device. Select Yes to reboot the device.
8.5.2 Define the Network Interface Settings
On the Cloud Services screen, define the network connection settings by selecting Ethernet or Cell from the Network
Interface drop-down list. This determines how the DXM700 sends data.
When selecting Ethernet, provide the network parameters on the Network screen. If you don't require pushing data to a web
server, set the Cloud Push interval to zero.
Figure 29. Cloud Service screen
Sure Cross
®
DXM700-Bx Wireless Controller
52
www.bannerengineering.com - Tel: + 1 888 373 6767


