


Main Menu
Sub Menu
Description
ISM Radio
ISM Radio
08:25:45
-
> ISM Type: None
-
> Binding
-
> Site Survey
-
> ISM Slave ID : 0
↑
↓
ENTER
BACK
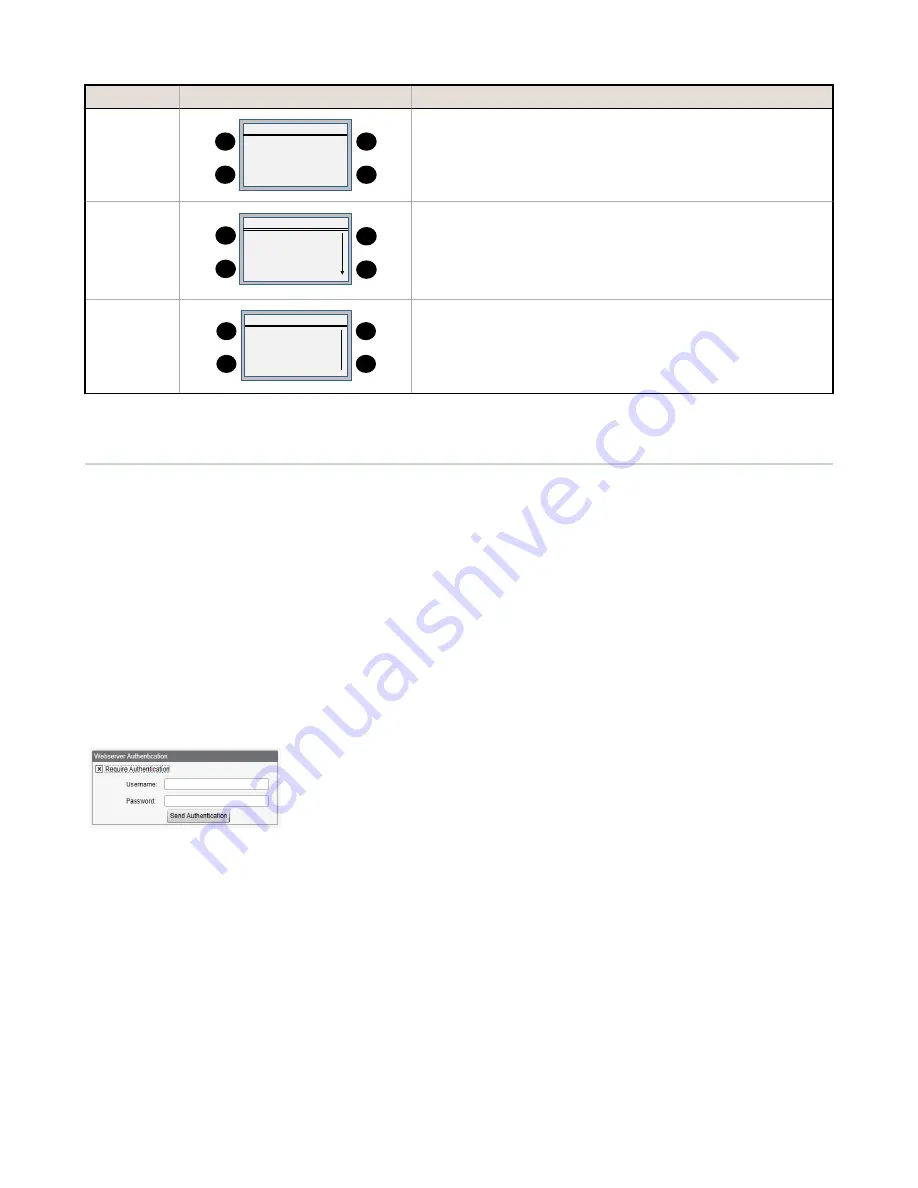
The ISM Radio menu allows the user to set the Modbus Slave ID of the
internal ISM radio, invoke binding, or run a site survey. The controller
automatically detects the ISM Type.
System
System
08:25:45
→
DXM Slave ID: -1
→
Provision Cell
→
Power: [dc / solar]
→
Restart!
ENTER
BACK
↑
↓
Use the System menu to change the Modbus Slave ID of the DXM
Controller, provision the internal cellular modem, select the incoming
power algorithm for battery charging, or force a restart of the DXM
Controller.
System Info
System Info
08:25:45
→
Controller
→
ISM Radio
→
Push
→
Ethernet
→
Cell
→
I/O Board
→
LCD Board
↑
↓
ENTER
BACK
The System Info menu displays the various settings of the DXM
Controller, firmware versions, and network settings.
5.5 Authentication Setup
The DXM Controller has three different areas that can be configured to require a login and password authentication.
•
Webserver/ Cloud Services Authentication
•
Mail Server Authentication
•
DXM Configuration Authentication
The webserver and mail server authentication depends upon the service provider.
5.5 Webserver/Cloud Services Authentication
The DXM Controller can be configured to send login and password credentials for every HTTP packet sent to the webserver.
This provides another layer of security for the webserver data.
Setup requires both the webserver and the DXM Controller to be given the same credentials for the login and password.
The webserver authentication username and password are not stored in the XML configuration file and must be stored in
the DXM Controller.
Ok
Define the login and password using the Settings > Cloud Services screen
of the DXM Configuration Tool, in the Webserver Authentication section
of the screen.
The first time you select Require Authentication, a pop-up box appears
with additional instructions. Since the data is not stored in the XML
configuration file, it is hidden from view of the DXM Configuration Tool.
After enter the username and password, click on Send Authentication to transmit the data directly to the DXM
Controller's non-volatile memory. The controller must be connected to the PC for this operation to succeed. If successful, a
pop-up window appears, asking to reboot the device. Select Yes to reboot the device.
DXM100 Controller Instruction Manual
www.bannerengineering.com - Tel: 763.544.3164
29