background image

2

232XSSD43800 Manual

B&B Electronics  -- PO Box 1040  -- Ottawa, IL  61350

PH (815) 433-5100  -- FAX (815) 433-5104

Specifications

Model:

232XSSD4

Size:  

10.1"w x 7.5"d x 3.3"h

Power:       

120VAC 60hz 16w

Connectors:  

Master - DB-25 female (RS-232 or RS-422)


Slave   - DB-25 male (RS-232 or RS-422/485)

Switching Baud Rate: from 300 to 38.4 Kbps

Baud Rate: 

Any baud rate up to 115.2 Kbps

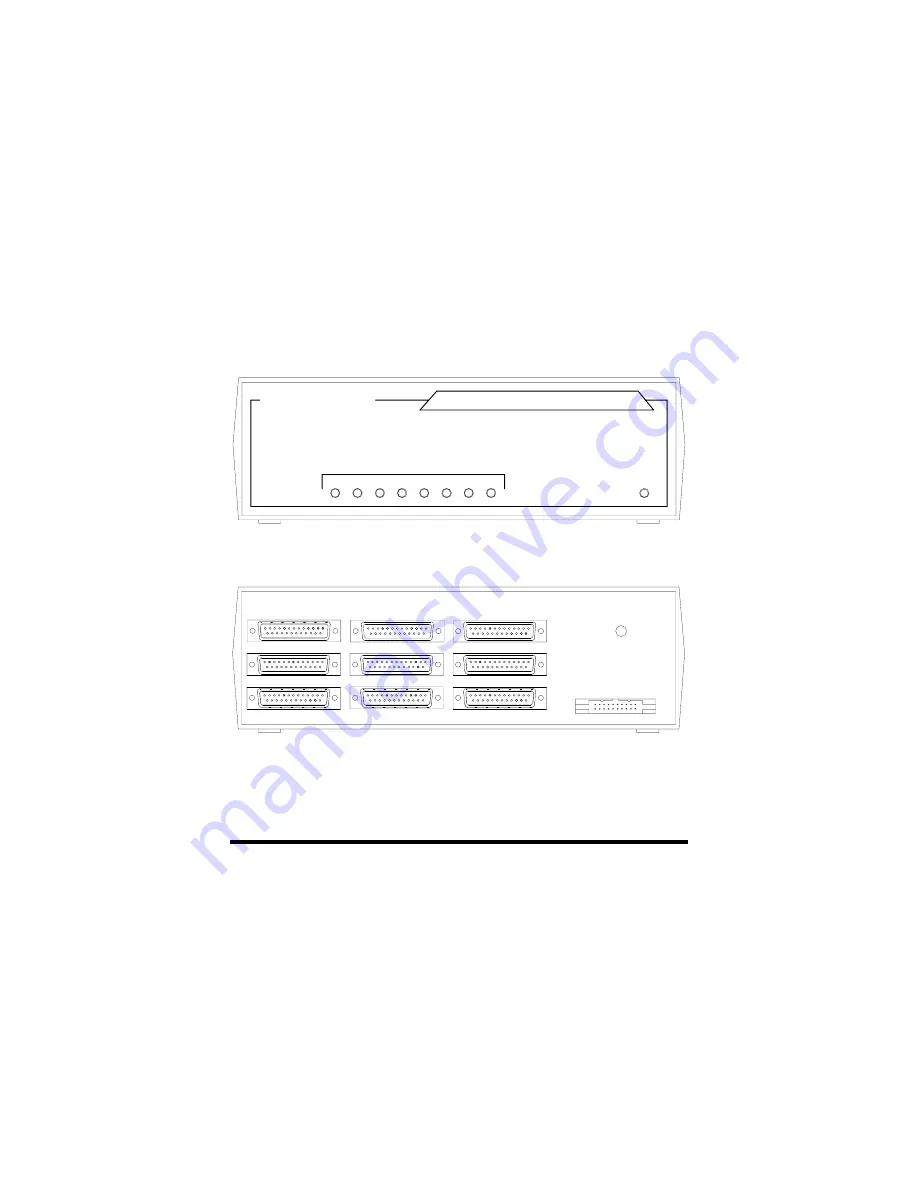
Front View

Rear View

Содержание 232XSSD4

Страница 1: ... International Headquarters B B Electronics Mfg Co Inc USA 707 Dayton Road P O Box 1040 Ottawa IL 61350 Phone 815 433 5100 General Fax 815 433 5105 Sales Fax 815 433 5109 Technical Support Fax 815 433 5104 Internet www bb elec com orders bb elec com support bb elec com European Headquarters B B Electronics Ltd Westlink Commercial Park Oranmore Co Galway Ireland Phone 353 91 92444 Fax 353 91 92445 ...

Страница 2: ... Switch Mode 13 Three Character Command String 13 Four Character Command String 15 Programming the User Defined Character 16 Smart Switch Port Combiner Mode 17 BINARY FILE TRANSFER 18 PORT SELECT TEST 18 CHAPTER 2 SOFTWARE 19 INTRODUCTION 19 WINDOWS SELECTOR PROGRAM INSTALLATION INSTRUCTIONS 19 SMART SWITCH SETUP 20 DEFAULT VALUES 20 SELECTING PORTS 21 PARAMETERS 21 UNINSTALLING WINDOWS SMART SWIT...

Страница 3: ...PORT B 1 CHART 3 MODEM DB25 CONNECTOR TO MASTER PORT B 2 CHART 4 DCE DEVICE W DB25 CONNECTOR TO PORTS A H DTE B 2 CHART 5 IBM PC DB25 CONNECTOR TO PORTS A H DTE B 3 CHART 6 IBM PC DB9 CONNECTOR TO PORTS A H DTE B 3 CHART 7 IBM PC DB25 CONNECTOR TO PORTS A H DTE B 4 CHART 8 IBM PC DB9 CONNECTOR TO PORTS A H DTE B 4 CHART 9 RS 422 485 4 WIRE DEVICE TO PORT A H CONFIGURED AS AN RS 422 485 PORT B 5 CH...

Страница 4: ...rity and 1 or 2 stop bits After the switch is made the 232XSSD4 is transparent to data flow There are nine red indicator LED s on the front of the 232XSSD4 Eight LED s represent ports A through H and indicate the selected port The ninth LED is the power on indicator Ten connectors are located on the back of the 232XSSD4 a twenty pin expansion bus connector a DB 25S female Master port connector and...

Страница 5: ...AX 815 433 5104 Specifications Model 232XSSD4 Size 10 1 w x 7 5 d x 3 3 h Power 120VAC 60hz 16w Connectors Master DB 25 female RS 232 or RS 422 Slave DB 25 male RS 232 or RS 422 485 Switching Baud Rate from 300 to 38 4 Kbps Baud Rate Any baud rate up to 115 2 Kbps Front View Rear View ...

Страница 6: ... to the Master Port of the Smart Switch to select a port the Smart Switch must be set to match the host s communication format This is accomplished by setting an eight position DIP switch labeled SW1 located inside the Smart Switch Refer to Figure 2 Switch positions 1 through 4 select the baud rate Switch position 5 selects 7 or 8 data bits Refer to Table 1 The remaining switch positions will be d...

Страница 7: ...E Data Communication Equipment device Each device will have inputs on pins that correspond to outputs on the same pins of the other device For example a DTE device transmits data out on pin 2 and a DCE device receives data in on pin 2 IBM PC s are DTE devices modems are DCE devices The Master port is shipped configured as a DCE port Table 1 Communication Configuration Switch DIP Switch 1 1 2 3 4 5...

Страница 8: ...232XSSD43800 Manual 5 B B Electronics PO Box 1040 Ottawa IL 61350 PH 815 433 5100 FAX 815 433 5104 Figure 2 Printed Circuit Board Outline ...

Страница 9: ...is connected to the Master port it should be configured as a DTE port Refer to cable charts in Appendix B The Master port is configured as either a DCE port or a DTE port by moving jumpers JP1 1 through JP1 7 JP1 is located inside the Smart Switch Refer to Figures 2 3 To configure the Master port as a DCE port jumpers JP1 1 through JP1 7 must be moved to the DCE position Refer to Table 2 To config...

Страница 10: ...removing its cover Table 2 DCE MASTER PORT CHART Pin Signal Description Signal Direction of DCE Master Port 2 TD Transmit Data Input 3 RD Receive Data Output 4 RTS Request to Send Input 5 CTS Clear to Send Output 6 DSR Data Set Ready Output 7 SG Signal Ground 8 CD Carrier Detect Output 20 DTR Data Term Ready Input 14 TD B Transmit Output 15 TD A Transmit Output 16 RD B Receive Input 17 RD A Receiv...

Страница 11: ... Data Output 3 RD Receive Data Input 4 RTS Request to Send Output 5 CTS Clear to Send Input 6 DSR Data Set Ready Input 7 SG Signal Ground 8 CD Carrier Detect Input 20 DTR Data Term Ready Output 14 TD B Transmit Output 15 TD A Transmit Output 16 RD B Receive Input 17 RD A Receive Input Pins 6 8 are tied together inside the 232XSSD4 and share the same input Refer to Figure 5 422 master port option o...

Страница 12: ... and signal direction information Also refer to Figure 5 for a simplified schematic showing the relationship between the Master port and any RS 232 port A H Refer to Appendix B for cable charts Table 4 DTE PORTS A H Pin Signal Description RS 232 Signal Direction of DTE Ports A through H 2 TD Transmit Data Output 3 RD Receive Data Input 4 RTS Request to Send Output 5 CTS Clear to Send Input 6 DSR D...

Страница 13: ...rt will be converted to balanced full duplex RS 422 or half duplex RS 485 signals with this option The 232XSSD4 comes standard with four RS 485 2 or 4 wire slave ports Refer to Appendix B for cable charts Table 5 RS 422 485 PORTS A H Pin Signal Description RS 422 485 Signal Direction of Ports A H 15 TD A Transmit Data Output 14 TD B Transmit Data Output 7 SG Signal Ground 17 RD A Receive Data Inpu...

Страница 14: ...ship between the Master port and a port configured with the RS 422 485 option NOTE This option only supports transmit and receive data signals TD RD from the Master port RS 422 RS 485 Mode The model 232XSSD4 comes standard with an automatic send data SD control of the RS 485 driver SD control automatically enables the RS 485 driver by sensing the leading edge of the first character transmitted fro...

Страница 15: ...ected To configure a port for RS 485 two wire mode both jumpers must be placed in the two wire 2 position for the corresponding port Refer to Figure 4 for these jumper locations The TD A and RD A lines need to be connected together also the TD B and RD B lines need to be connected to each other Giving you a Data A line and a Data B line A being and B being Handshake control RTS requires that the s...

Страница 16: ...in which it can select ports smart switch and smart switch port combiner Smart Switch Mode Position 6 of SW1 must be in the off position to enable this mode Refer to Figure 2 and Table 1 The Smart Switch is a listen only device It constantly monitors the serial data received on the Master port for a command control string A command can switch on or switch off any desired port The command control s...

Страница 17: ...ass through to the port A device and because characters 0 and E are printable they may appear on that device To turn any selected port off the first and second character of the command control string must be the user defined character The third character must be the ASCII EOT character decimal 4 Example 3 To turn off all ports with ASCII STX decimal 2 set as the user defined character Send to the ...

Страница 18: ...rt E of the 232XSSD4 address zero with ASCII STX set as the user defined character Send to Master port ESC STX 0 E 27 2 48 69 decimal Example 2 To turn on port B located at port expander 232PE address ten with ASCII STX set as the user defined character Send to Master Port ESC STX A B 27 2 65 66 decimal The turn off string also adds the ASCII ESC character to the front of the three character turn ...

Страница 19: ...tch 2 SW2 SW2 is located on the printed circuit board inside the 232XSSD4 Refer to Figure 2 SW2 is an eight position switch with each position equal to a certain weight Refer to Table 4 It is recommended that a non printable character be defined For example if you wish to use the ASCII NAK character as the user defined character which has a decimal value of 21 you would turn on switches 1 3 and 5 ...

Страница 20: ...XSSD4 would recognize this as a prompt for connection to the Master port The connection would be dropped as soon as the CTS line on port A was lowered At that time any of the other RS 232 ports on the 232XSSD4 can raise their CTS line to establish connection If port A is connected to the Master port and any of the other RS 232 ports on the 232XSSD4 raises their CTS line the data sent to the 232XSS...

Страница 21: ... select test Placing DIP switch 1 SW1 position 8 in the on position and powering up the 232XSSD4 starts this test Refer to Figure 2 It will test the port selection port expansion and address circuits for all sixty eight ports When the test is started each port will be individually turned on for one second starting with port A on the 232XSSD4 and ending with port D at address fifteen for a total te...

Страница 22: ...ne or by hitting a sequence of keys at the same time referred to as hot keys The XSSTSR requires 1K of memory Windows Selector Program Installation Instructions Method One Place the Windows disk in drive A Select Settings from the Start Button and click on Control Panel In the Control Panel Window double click on the Add Remove Programs Click on the Install button Follow the instructions of the se...

Страница 23: ...st time that the software is run After the proper Module i e PortMUX 232XS5 etc is selected then a window specific to that Module will appear and the user may personalize communication parameters as per their specific needs Comport Baud Rate and Data Bits Character Mode and User Defined Character may also be set for 232XSS and 232XS5 Modules Should the user wish to change the Module choice to anot...

Страница 24: ...the program PORTFIND EXE which is located on the disk To use PORTFIND EXE If you installed the software on your hard drive see the Installation section Type C and press the ENTER key Type CD SS UTIL and press the ENTER key Type PORTFIND and press the ENTER key Uninstalling Windows Smart Switch Selector Program Go to Control Panel and click on Add Remove Programs Click on Smart Switch and the click...

Страница 25: ...ogram follow these steps Type SETUP and press the ENTER key You will be prompted for parameters for descriptions refer to the Parameters section that are necessary for the XSSTSR to communicate with the Smart Switch The values in are the default values If this value is desired just press the ENTER key Enter Port Address 02F8 Enter Baud Rate 1 150 2 300 3 600 4 1200 5 2400 6 4800 7 9600 8 19200 9 3...

Страница 26: ... XSSTSR COM Method The XSSTSR COM method requires the same parameters for descriptions refer to the Parameters section as the SETUP EXE method except that they are all specified through the command line Each of these parameters begins with a command symbol followed by an option as defined in the following table Command Description Options A or a Port Address Hexadecimal Address 0 FFFFh B or b Baud...

Страница 27: ...er Defined Char 8 Data Bits 8 Command String 0 Hot Key Sequence 4 Type XSSTSR A03F8 B7 D8 P1 U8 C0 H4 and press the ENTER key Using this method every time you want to install the XSSTSR with different parameter settings than the default refer to the Default Values section the missing parameter must be specified Parameters The Port Address is the address where the serial communications port is loca...

Страница 28: ...M 4 02E8h The Baud Rate is the speed at which communication takes place between the XSSTSR and the Smart Switch It must be specified so that it is equal to SW1 on the Smart Switch The Number of Data Bits is the length of each character that gets sent from the XSSTSR to the Smart Switch This value must be specified so that it is equal to SW1 on the Smart Switch The Parity is a method of error detec...

Страница 29: ...en turning off ports Default Values If you type XSSTSR on the command line with no parameters or omit any parameters the default value of the missing parameter will be used The default values are Description Default Value Port Address 02F8h COM 2 Baud Rate 7 9600 Parity 0 No Parity Data Bits 8 8 Data Bits User Defined Char 2 STX CTRL B Command String 0 3 Character Hot Key Sequence 1 Left Shift ALT...

Страница 30: ...ter to indicate the location of the desired port This character is not required when turning ports off Command Line Method This method enables the user to select any Smart Switch port through the command line To specify a Smart Switch port through the command line you would type XSSTSR followed by the X command symbol and the letter of the port Left Shift Alt A to select port A Left Shift Alt B to...

Страница 31: ...s busy and that a port selection cannot be made CAUTION If the software package you are using for transmission is running at a fast baud rate 115200 the XSSTSR may not detect the Smart Switch port as busy and the transmission could be interrupted The XSSTSR does not detect when the 232XSSD4 port is receiving data Therefore if data is being received the Smart Switch port may still be changed Uninst...

Страница 32: ...4 4A J 106 6A j 11 B VT ctrl K 43 2B 75 4B K 107 6B k 12 C FF ctrl L 44 2C 76 4C L 108 6C l 13 D CR ctrl M 45 2D 77 4D M 109 6D m 14 E SO ctrl N 46 2E 78 4E N 110 6E n 15 F SI ctrl O 47 2F 79 4F O 111 6F o 16 10 DLE ctrl P 48 30 0 80 50 P 112 70 p 17 11 DC1 ctrl Q 49 31 1 81 51 Q 113 71 q 18 12 DC2 ctrl R 50 32 2 82 52 R 114 72 r 19 13 DC3 ctrl S 51 33 3 83 53 S 115 73 s 20 14 DC4 ctrl T 52 34 4 8...

Страница 33: ... DB25 Connector to Master Port Master port configured as a DCE port IBM PC Serial Port DB25 Connector Signal Direction 232XSSD4 Master Port DCE DB25 Connector 2 2 3 3 4 4 5 5 6 6 7 7 8 8 20 20 Pins 6 8 are tied together inside the 232XSSD4 and share the same output Chart 2 IBM PC DB9 Connector to Master Port Master port configured as a DCE port IBM PC Serial Port DB9 Connector Signal Direction 232...

Страница 34: ... 5 7 7 8 8 20 20 Pins 6 8 are tied together inside the 232XSSD4 and share the same input NOTE When using chart 3 above and connecting a DTE device to ports A H of the smart switch refer to Charts 7 and 8 Chart 4 DCE Device w DB25 Connector to Ports A H DTE Master port configured as a DCE port DCE Device Serial Port DB25 Connector Signal Direction 232XSSD4 Ports A H DTE DB25 Connector 2 2 3 3 4 4 5...

Страница 35: ...al Direction 232XSSD4 Ports A H DTE DB25 Connector 2 3 3 2 4 5 5 4 6 6 7 7 8 8 20 20 Pins are tied together inside the 232XSSD4 and share the same input Chart 6 IBM PC DB9 Connector to Ports A H DTE Master port configured as a DCE port IBM PC Serial Port DB9 Connector Signal Direction 232XSSD4 Ports A H DTE DB25 Connector 2 2 3 3 4 6 5 7 6 20 7 5 8 4 Pins 6 8 are tied together inside the 232XSSD4 ...

Страница 36: ...irection 232XSSD4 Ports A H DTE DB25 Connector 2 3 3 2 4 5 5 4 6 6 7 7 8 20 20 6 Pins 6 8 are tied together inside the 232XSSD4 and share the same input Chart 8 IBM PC DB9 Connector to Ports A H DTE Master port configured as a DTE port with a modem connected see Chart 3 IBM PC Serial Port DB9 Connector Signal Direction 232XSSD4 Ports A H DTE DB25 Connector 3 3 2 2 7 5 8 4 6 6 5 7 1 20 4 6 Pins 6 8...

Страница 37: ...e A NOTE Make sure the port s set up jumpers are in the proper position for four wire communications Chart 10 RS 485 2 Wire Device to Port A H Configured as an RS 485 Port RS 485 2 Wire Device Signal Direction 232XSSD4 Ports A H DB25 Connector Data A 15 TD A Data B 14 TD B Signal Ground 7 SG If the device being connected uses and in place of B and A the replaces the B and the replaces the A Place ...

Страница 38: ...ovide reasonable protection against harmful interference when the equipment is operated in a commercial environment This equipment generates uses and can radiate radio frequency energy and if not installed and used in accordance with the instructions may cause harmful interference to radio communications Operation of this equipment in a residential area is likely to cause harmful interference in w...

Отзывы: