Applications 5-7
MN1917
5.5.3
Inserting the ActiveX control
The floating Toolbox contains a number of standard tools that can be used to construct new forms. However, the
Mint ActiveX control is a special control so it must be added to the Toolbox before it can be used.
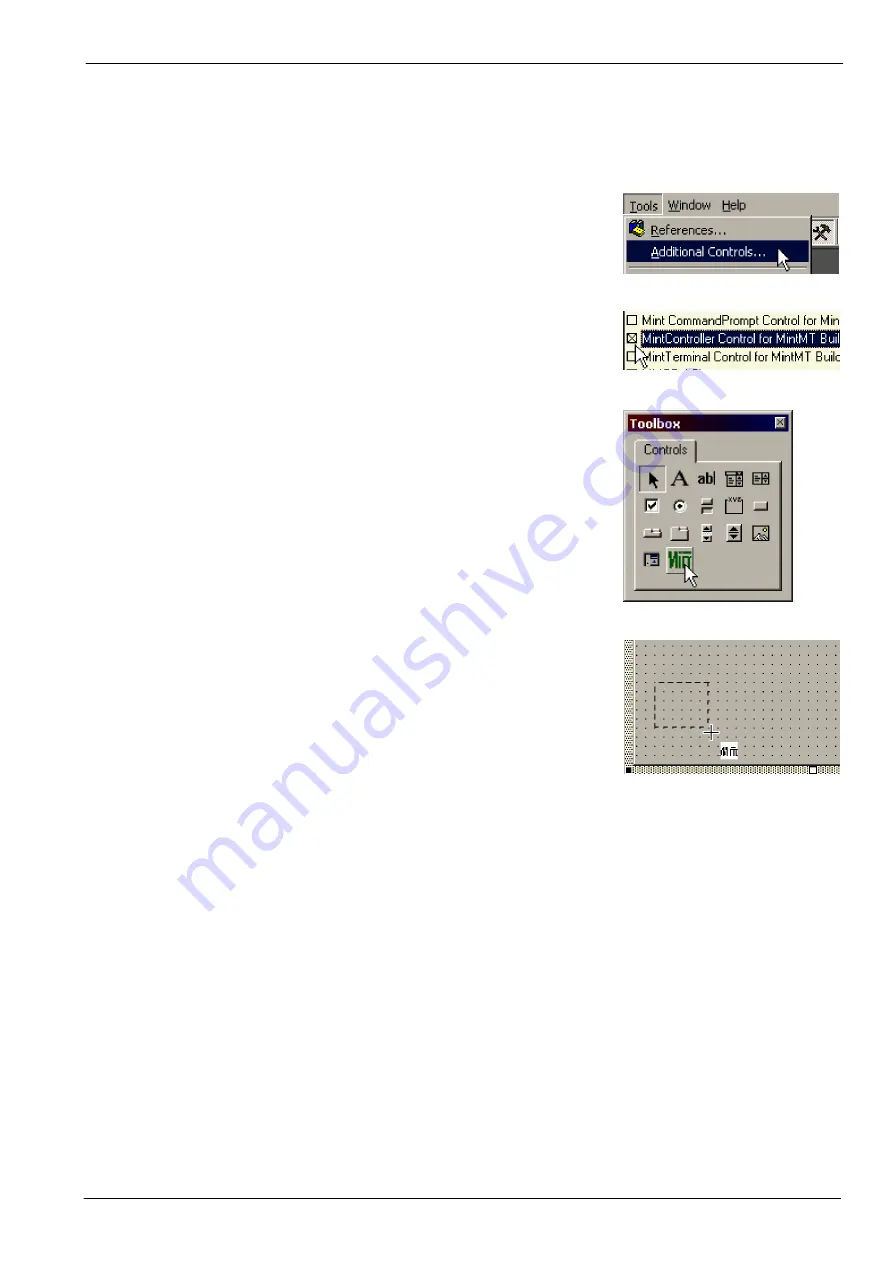
1. On the menu, click Tools, Additional Controls.
2. Scroll down the list and check the box next to
‘MintController Control for MintMT...’.
Do not select any of the other Mint options.
3. Click
OK
. The Mint ActiveX Control will now appear
as a new button in the Toolbox.
4. Click the Mint Controller button to select it.
Then, in UserForm1, click and drag to draw a small
box. When you release the mouse, a MintController
object will be placed on the form.
The presence of the MintController object on the form means that it can now be referenced by Visual Basic program
code, which will be added in the following sections. The object represents a file called MintControls.ocx, which is
installed on the PC at the same time as WorkBench v5.
You might wish to drag the object to the corner of the form to leave room for further controls. The form can be made
larger by clicking on a blank area to select it, then dragging its bottom-right corner handle.
Содержание Flex+DriveII
Страница 1: ...Flex DriveII Demonstration Unit SERVO DRIVE Operating Manual 03 02 MN1917...
Страница 2: ......
Страница 6: ...1 2 General Information MN1917...
Страница 8: ...2 2 Introduction MN1917...
Страница 22: ...4 8 Basic Demonstrations MN1917...
Страница 34: ...6 2 Specifications MN1917...
Страница 40: ...Index MN1917...
Страница 41: ......


