background image

40

If the Image Data Cannot Be Saved

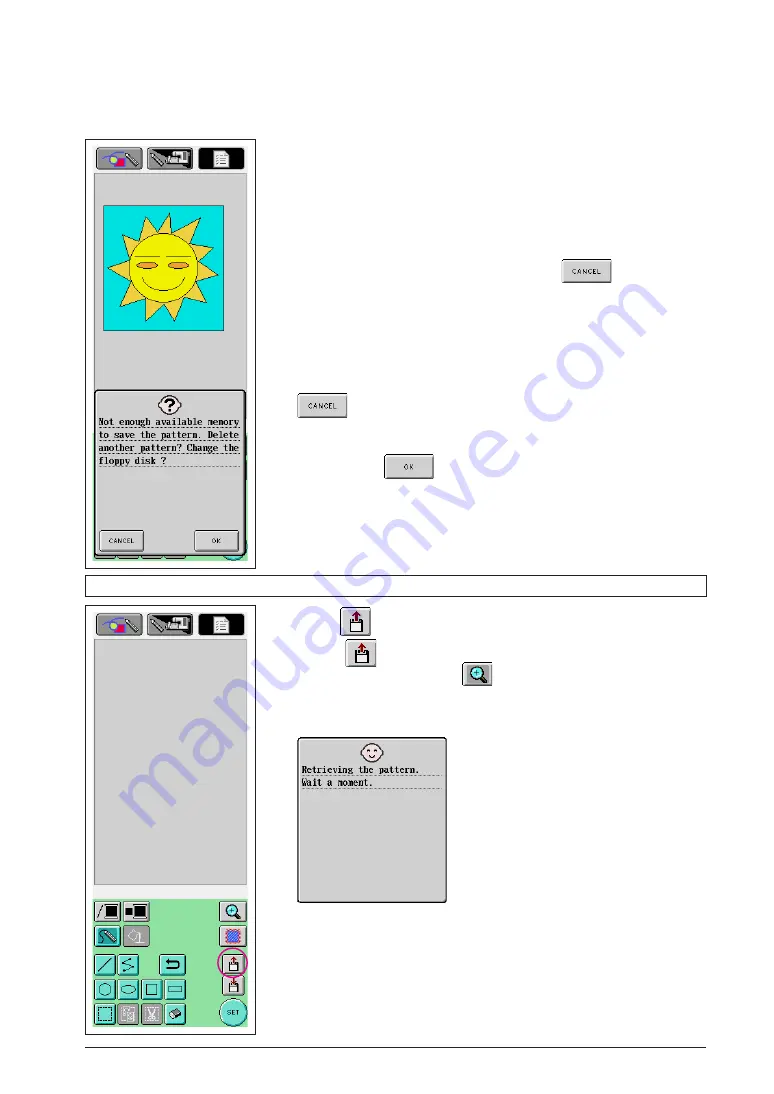
If the screen shown at the left appears, the image data cannot be
saved because either the floppy disk is full or the embroidery data
being saved is larger than the amount of space available. To be
able to save the image data on the floppy disk, previously saved
image data must be deleted.

*

To replace the floppy disk or quit saving, press 

.

Image data is deleted in the same way that embroidery data is
deleted. For details, refer to page 36.

*

Data cannot be saved on the floppy disk in the following cases. Press

, and then change the floppy disk.

When saving onto a floppy disk containing only data other than image
data, such as embroidery data, and a list of image data does not appear

even when 

 is pressed.

When saving onto a floppy disk containing only data other than image
data, such as embroidery data, and the new image data is not saved
even when other image data is deleted.

Recalling Image Data

1

Press 

 in the pattern-drawing screen.

*

The 

 key is not available when the pattern is displayed in the

enlarged area. Press the 

 key to close the enlarged area.

2

The following message appears.

Caution

Do not turn off the machine while this message is displayed,

otherwise saved data may be lost. In addition, do not try to remove

the floppy disk while recalling data, otherwise the disk may be

damaged.

Содержание On Screen Designer

Страница 1: ...oidery Data Creation Software Instruction Manual Before using this software be sure to read this Instruction Manual for information on the correct use of the software Keep this Instruction Manual in a safe place for future reference ...

Страница 2: ...ng machine For details on using the sewing machine functions to edit embroidery patterns refer to the Instruction Manual for the sewing machine Important Use of this software for unauthorized duplication of optional embroidery cards or newspapers magazines etc for commercial purposes may be unlawful and violate copyright laws This application is protected by copyright laws The use and duplication ...

Страница 3: ...reen and then embroider it The created embroidery patterns can be resized combined with characters and images and freely arranged in the sewing machine s embroidering or embroidery editing screen in the same way that built in embroidery patterns are Embroidery patterns that can be created with this software Lines of the drawing are sewn with satin stitches and areas are sewn with fill stitches The...

Страница 4: ...ts program version meets the following requirements Models ESG ESG2 and ESG3 Program version Ver 3 0 or later The program version can be checked by pressing Setting key For more details refer to the Instruction Manual provided with the sewing machine 1 Displayed here For upgrade information consult with your Babylock dealer or visit our website at www babylock com ...

Страница 5: ...ds this software and starts it up from floppy disks In addition data created with this application is stored on the floppy disks Follow the precautions below when handling the floppy disks Be sure to use Windows formatted 2HD floppy disks Data on floppy disks may be lost due to normal wear of the disks We recommend that you back up important data Do not insert a floppy disk containing pattern data...

Страница 6: ...o ON If the sewing machine is turned on with a floppy disk inserted the machine checks the software on the floppy disk and then starts it up 1 Turn on the sewing machine 2 Press and then press to display the next screen 3 Press so that it changes to and then press 4 Turn off the machine SETTING THE SEWING MACHINE TO START UP THE SOFTWARE ...

Страница 7: ... shown at the left appears If a floppy disk that does not contain the application is inserted the Utility Stitch screen appears 4 Press the icon for the application On Screen Designer starts up Startup takes about 20 seconds Caution Do not turn off the machine or eject the floppy disk while the application is starting up otherwise the disk may be damaged Caution After startup we recommend ejecting...

Страница 8: ...he Screen Press and to adjust the brightness of the screen so that adjustments can be clearly viewed To make the screen lighter press To make the screen darker press Buzzer When set to ON a beeping sound is produced each time a key is pressed Press so that it changes to The screen brightness and the buzzer settings depend on the settings of the sewing machine If the settings are changed in On Scre...

Страница 9: ...ing screen page 12 2 Add color to the pattern page 24 3 Specify the stitching settings Specify the width of the satin stitches and the sewing direction of the fill stitches page 29 4 Convert the image data to embroidery data The embroidery data check screen appears page 33 5 Save the embroidery data in the sewing machine s memory or on a floppy disk page 35 ...

Страница 10: ... up the freehand line key is selected This key is not but can be selected This key cannot be selected Key functions Press this key when you want to begin creating a new pattern When this key is pressed the currently displayed data is deleted and the first screen displayed when On Screen Designer is started up appears Press this key to close On Screen Designer and use the sewing machine When this k...

Страница 11: ...ey to fill areas with color When a thread color for an area is selected this key becomes available indicating that an area can be filled with color Press this key to display an enlargement of a specified section Press this key to specify stitching settings Shrinkage adjustment the width of satin stitches the sewing direction of fill stitches and the stitch density can be specified Press this key t...

Страница 12: ...d The amount of time needed to change threads is not included 7 The types of embroidery frames that can be used are shown The icons for the embroidery frames that can be used appear in color 8 The size of the pattern is displayed Key functions Press this key to show the part of the pattern that will be sewn with the next thread color when checking the sewing order Each press of this key shows the ...

Страница 13: ...d text on paper with a pen Drawing Lines Freehand 1 Press so that it changes to When the application is started up this key already appears as 2 Draw the images with the pen With the freehand line tool lines can be drawn freely however circles and straight lines cannot be drawn perfectly If one of the other graphics keys is selected perfect circles and straight lines can be drawn The procedures fo...

Страница 14: ... what you want the drawn line can be erased so that it can be drawn again There are many ways of erasing lines but here we will explain how to use To undo the last drawing operation press The last operation that was performed is undone and the drawing returns to the condition before that operation was performed Notes can be pressed at any time while the image is being drawn For example if a line i...

Страница 15: ...u are finished drawing the line A straight line is drawn connecting the last point to the starting point 1 2 3 4 5 6 7 8 9 0 A B C D E F G H I J K L M To draw straight lines that are connected Each time you touch the screen with the pen a straight line is drawn connecting the last point that was touched to the next point that is touched Each time the screen is touched a straight line is added to t...

Страница 16: ...ifferent place and then move them In addition so that the left and right eyebrows and eyes will be the same size after drawing one side we will copy them to draw the other side The ellipse is drawn with the starting point as the center the horizontal length of the line connecting the starting point and ending point as the horizontal radius and the vertical length of the line connecting the startin...

Страница 17: ... is the desired length 3 When the line is the desired length remove the pen from the screen To draw a straight line A straight line is drawn connecting the starting point with the ending point The length can be adjusted as desired until the pen is removed from the screen 1 Starting point 2 Ending point 2 1 ...

Страница 18: ...s drawn with the straight line connecting the starting point and the ending point as the diagonal The selected area is the part within that frame The size can be adjusted as desired until the pen is removed from the screen An angled selection frame like the one shown at the right cannot be drawn 1 Starting point 2 Ending point 3 Selected area 123456789012345678901234567890 123456789012345678901234...

Страница 19: ...e screen Notes If the section could not be moved to the desired location again touch inside the selection frame with the pen and then move the section to the desired location 7 Moving Before moving press so that it changes to and then select the section to be moved Refer to page 17 1 Follow the procedure described in 5 Selecting to select the section to be moved 2 Touch inside the red frame select...

Страница 20: ... line using press so that it changes to and then select the section to be erased Refer to page 17 Lines can also be erased by selecting the key Refer to page 21 1 Follow the procedure described in 3 Drawing an Ellipse to draw an ellipse 2 Follow the procedure described in 5 Selecting to select the section to be erased For this example select the top half of the ellipse 3 Press The lines within the...

Страница 21: ...is drawn with the line connecting the starting point and the ending point as the diagonal An angled rectangle like the one shown at the right cannot be drawn 1 Starting point 2 Ending point Use to draw squares The square is drawn with all sides having the length of the longest side of a rectangle whose diagonal is a line connecting the starting point and the ending point An angled square like the ...

Страница 22: ...9 however to delete detailed sections or if the desired area cannot be surrounded by a selection frame press Use the appropriate method as necessary Deleting Lines Using 1 Press so that it changes to 2 Touch the screen appears Drag the pen back and forth to trace along the area that you want to erase The area traced with is erased Notes If the erase key is used the area can easily be erased if it ...

Страница 23: ...of the pattern in the pattern drawing area that you want to enlarge 3 The blue frame moves to the part of the pattern that was selected and that part is shown enlarged in the enlarged area Notes To change the area that is displayed drag the pen along the screen to move the blue frame 4 The pattern can be edited from within the enlarged area The operations are performed in the same way that they ar...

Страница 24: ... Once the drawing is finished add colors as desired If no colors are to be added continue with the procedure described in 3 Specifying Stitching Settings on page 29 If a stitching method is not to be specified continue with the procedure described in 4 Converting to Embroidery Data on page 33 To clear the entire area and start a new drawing press All data that had been drawn is erased and the scre...

Страница 25: ...or of the lines in the pattern and changes to the selected color To quit selecting a color press The line color can also be selected before the line is drawn or while it is being drawn The color of the lines in the pattern can be changed even after a line color is selected After the color of an area is selected the color of the lines cannot be changed To change the color of the lines undo all oper...

Страница 26: ...howing the desired color For this example select yellow To quit selecting a color press Caution The color selected for the lines is not available in the palette of colors for the areas The color selected for the lines cannot be selected for an area If you wish to embroider the area with the same color as the lines select a different color in the pattern but use the same color of threadwhenembroide...

Страница 27: ...rea is filled with the color Caution Color can only fill an outlined area If the desired area is not filled with color or if an area that you did not want to fill with color is filled correct the lines Refer to Color Is Not Added on page 27 In addition a very small area thin area cannot be filled with color In this case continue pressing until the drawing returns to the condition before the first ...

Страница 28: ...eas are outlined Correcting Example The background was filled with color when we tried to fill just the rays of the sun Because the rays of the sun are not completely enclosed in lines we must search for the openings and close them 1 Press so that it changes to The blue frame and the enlarged area appear The section of the pattern within the blue frame is shown enlarged within the enlarged area 1 ...

Страница 29: ...new one press All data that had been drawn is erased and the screen appears as it did when On Screen Designer was started up see page 42 To close the application and use the sewing machine press All data that had been drawn is erased see page 43 To save created data continue with the procedure described in Saving Image Data on page 39 4 Within the enlarged area close the opening in the line 5 Chan...

Страница 30: ...age 39 1 Displaying the Stitching Settings Screen 1 Press 2 The screen shown at the left appears 1 Reduces the size of the pattern The size of the drawn pattern can be changed Refer to page 32 2 Specifies the width of the satin stitches used to sew the lines of the drawing Refer to page 30 3 Specifies the sewing direction for fill stitches Refer to page 30 4 Specifies the stitch density Refer to p...

Страница 31: ...r by 0 5 mm A setting between 1 0 mm and 3 0 mm in 0 5 mm units can be specified Setting examples 1 0mm 2 0mm 3 0mm 3 Specifying the Sewing Direction of Fill Stitches 1 Press or beside The default setting is when the application is started up Each press of changes the setting in the following order Press to reverse the order of Setting examples Notes If the size of the created pattern is larger th...

Страница 32: ...dard 110 fine Notes It is recommended that a finer stitch density be selected if a detailed drawing is created If areas of the embroidery shrinks when a trial embroidery of the design is sewn specify a coarser stitch density Continue sewing trial embroidery while adjusting the stitch density 2 After the desired settings are specified press The screen returns to the one displayed before the stitch ...

Страница 33: ...de Press once to reduce the size to 70 Press again to reduce the size to 50 To return the size to the original size 100 press 3 Press The screen returns to the one displayed before the stitch settings screen was displayed After the stitching settings are selected convert the image data to embroidery data To clear the entire area and start a new drawing press All data that had been drawn is erased ...

Страница 34: ...cated to be converted to embroidery data Press to return to the pattern drawing screen and then correct the data In this screen the number of thread colors and the number of stitches in the created pattern can be checked For details on the various displays refer to Embroidery Data Check Screen on page 11 To change the pattern press to change the embroidery data back to image data and display it in...

Страница 35: ...as it will be embroidered appears 1 Press these keys to display the pattern in the various sizes of embroidery frames The embroidery frames that appear in white on the gray keys cannot be selected 2 Press this key to display the pattern enlarged 3 Press to return to the previous screen ...

Страница 36: ...s 2 Select where you wish to save the data To save the data in the machine s memory press To save the data on a floppy disk insert a floppy disk into the floppy disk drive slot and then press Be sure to use a Windows formatted 2HD floppy disk The floppy disk must not be write protected When saving data onto a floppy disk save the data in the format for embroidery data The file name must have the e...

Страница 37: ...the screen shown at the left appears the embroidery data cannot be saved because either the machine s memory or floppy disk is full or the embroidery data being saved is larger than the amount of space available To be able to save the embroidery data previously saved embroidery data must be deleted To quit saving press Deleting Saved Data 1 Press If data is to be deleted from a floppy disk the fol...

Страница 38: ...If a pattern is selected to be deleted the size of the data for the selected pattern is displayed 2 The medium where the data is saved and the amount of available space is displayed Sewing machine Floppy disk 3 Each page of the list shows 15 embroidery patterns To view the next page press To view the previous page press 4 The page number for the displayed list and the total number of pages are dis...

Страница 39: ... onto a floppy disk containing data other than embroidery data such as image data it may not be possible to save the new embroidery data even after embroidery data is deleted In this case press and then change the floppy disk If the embroidery data was saved successfully the previous screen automatically appears Saving embroidery data takes approximately 10 seconds Caution Do not turn off the mach...

Страница 40: ... image data we recommend write protecting the floppy disk to prevent the data from accidentally being erased Caution Do not insert anything other than floppy disks into the floppy disk drive slot otherwise the floppy disk drive may be damaged Do not insert a floppy disk containing pattern data other than those savedusingourapplication Only pmdand phcdatacanbeused 2 Press The key is not available w...

Страница 41: ...he floppy disk When saving onto a floppy disk containing only data other than image data such as embroidery data and a list of image data does not appear even when is pressed When saving onto a floppy disk containing only data other than image data such as embroidery data and the new image data is not saved even when other image data is deleted Recalling Image Data 1 Press in the pattern drawing s...

Страница 42: ...f pages are displayed If there is only one page 1 and 2 do not appear To quit recalling press 1 2 1 3 2 6 The selected image data is displayed 1 When pressed the selected image data is deleted 2 The size of the selected image data is displayed 3 The amount of space available on the floppy disk is displayed Caution Before the image data is recalled the currently displayed data is deleted Be sure to...

Страница 43: ...n Designer was started up 1 Press 2 The following message appears 3 To delete the data press To quit deleting press 4 The screen appears as it did when the application was started up Caution Before resetting the screen the currently displayed data is deleted Be sure to save any necessary data before resetting the screen ...

Страница 44: ... If a floppy disk containing the application was inserted the application screen or a screen allowing you to select a machine appears If this occurs press the button for the sewing machine Caution Before closing the application the currently displayed data is deleted Be sure to save any necessary data before closing the application You can close the application to use the sewing machine without tu...

Страница 45: ...he data with shrunken areas and then press The screen shown at the left appears 2 Press or beside To lengthen the stitching press To shorten the stitching press Each press of makes the stitching longer by 0 1 mm Each press of makes the stitching shorter by 0 1 mm A setting between 0 0 mm and 2 0 mm in 0 1 mm units can be specified Notes Normally the default setting is used Continue sewing trial em...

Страница 46: ... its format cannot be identified 2 This message appears if the floppy disk cannot be formatted 3 This message appears if the pattern cannot be saved on the floppy disk 4 This message appears if the pattern on the floppy disk cannot be read 5 This message appears if or is pressed but a floppy disk is not inserted 6 This message appears if you try to save a pattern when the floppy disk is write prot...

Страница 47: ...ll be deleted 9 This message appears if the storage space is full and data cannot be saved 14 This message appears when the floppy disk is being reformatted 15 This message appears image data is being converted to embroi dery data 16 This message appears when image data is being converted to embroidery data but the data is too compli cated to be converted 17 This message appears when the number of...

Отзывы: