2 - 49
Main parts
Basics of Assembly
Basics
3
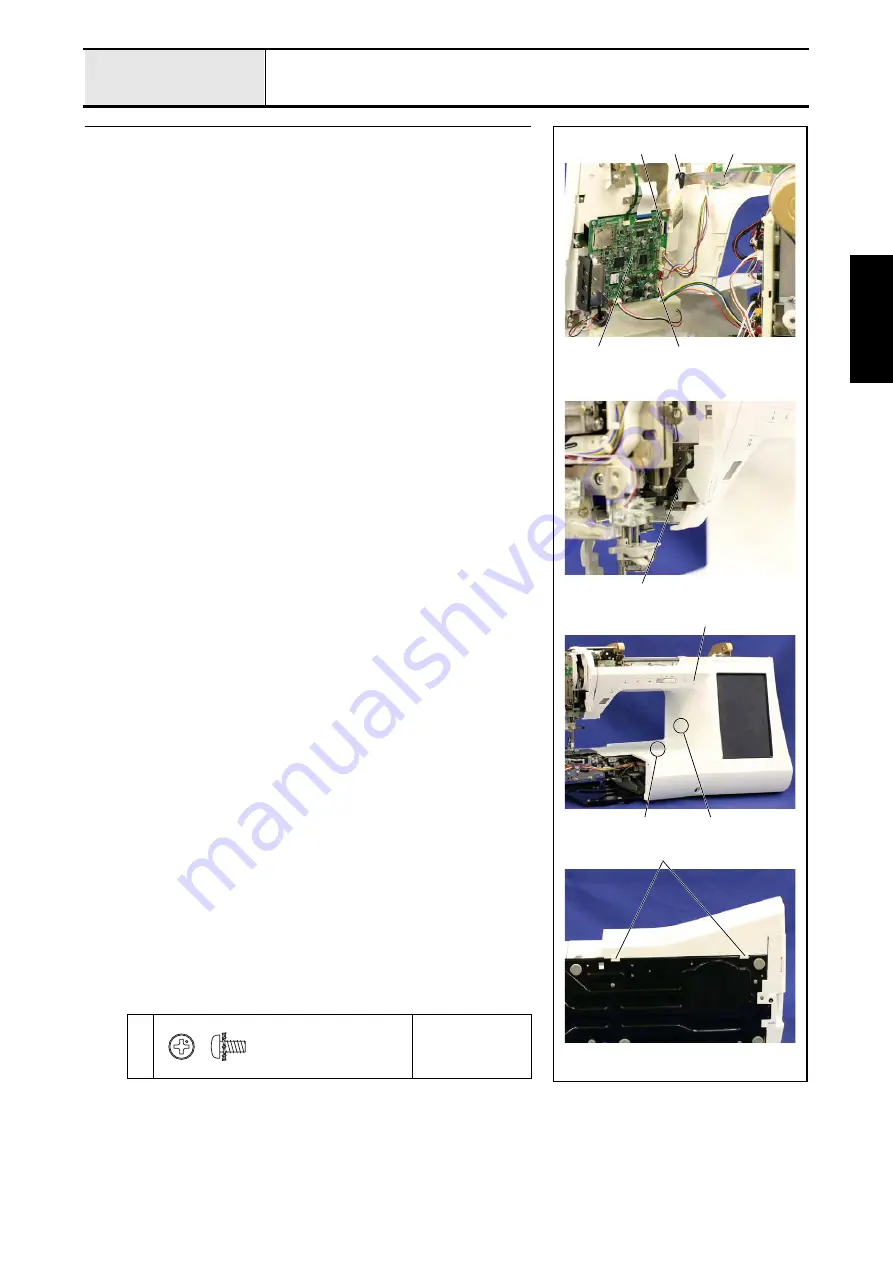
Attachment of Front cover assy
1. Attach the connector
1
of the lead wire assy main-panel to the panel PCB
assy.
2
.
2. Attach the FFC
3
to the panel PCB assy.
2
.
*Key point
• Connect the FFC
3
to the connector
4
of the panel PCB
assy.
2
in the state that the blue surface of the FFC
3
is
outside, and then lock it.
3. Set the FFC
3
to the clamp assy.
5
, and then close the clamp assy.
5
,
and lock it.
4. Set the front cover
6
, and then secure it with the screw
1
.
*Key point
• Check that the 2 hooks
7
hang on the base plate assy..
• Check that the hook
8
and
9
hang on the rear cover assy..
→
Refer to 3 - 228 "Assembly of Front cover assy".
1
Torque
0.59 – 0.78 N·m
1
9
6
8
7
2
3
5
4
1
Screw, Pan (S/P washer)
M3X6F
18
Содержание Ellisimo BLSO
Страница 1: ...3...
Страница 2: ...xvi 4...
Страница 29: ...31...
Страница 35: ...Tacony Corp 10 2008 2 3 In the case that the parts separate please assemble as shown 37...
Страница 37: ...39...
Страница 55: ...4 35 Camera calibration 57...
Страница 65: ...67...


