


1.4
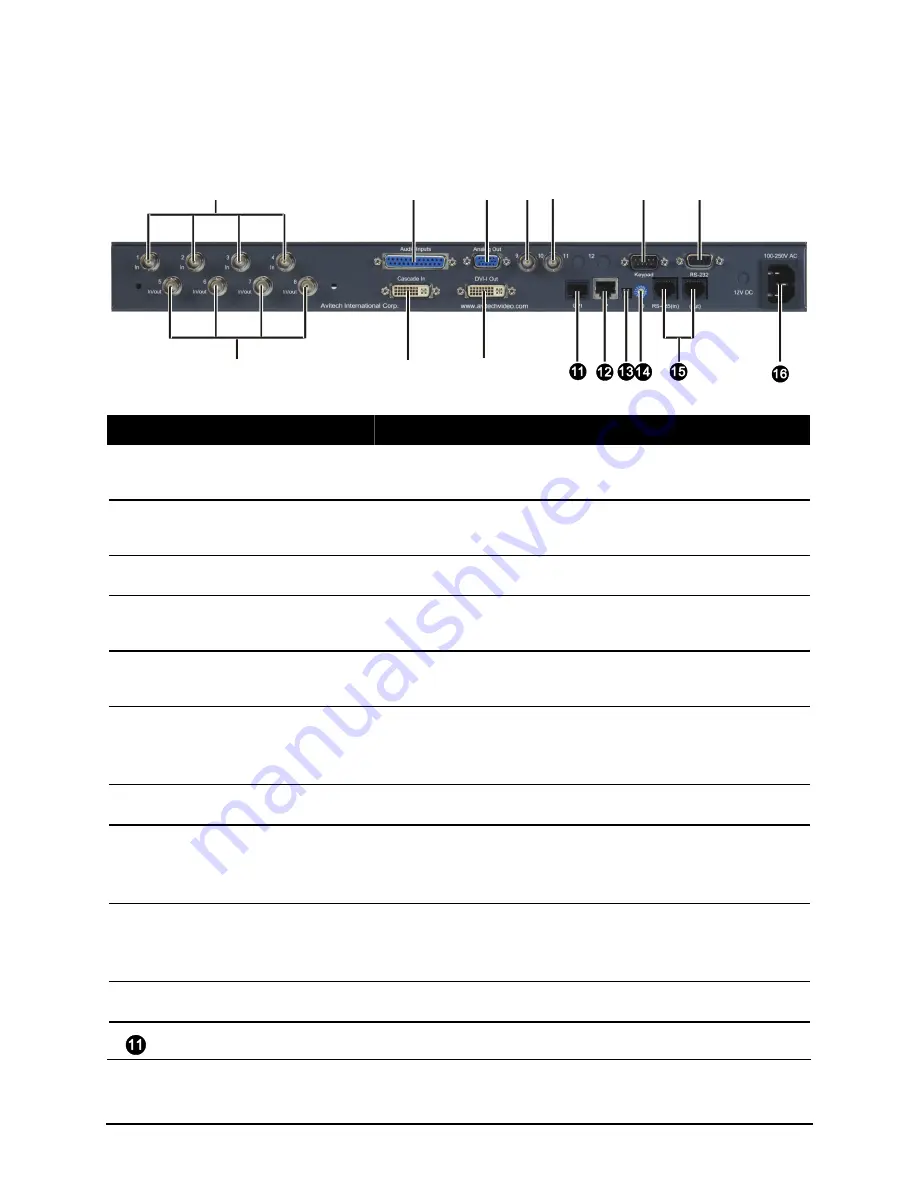
Identifying the Rear Hardware Components
Ref
Label/Component
Description
In 1 / 2 / 3 / 4
BNC connectors for HD / SD-SDI / composite video
inputs.
Audio Inputs
Connector for up to four analog stereo pairs / AES
audio inputs.
Analog Out
VGA connector for output to monitor display.
Audio monitoring
cascade 9
BNC connector for audio cascading input.
Audio monitoring output
10
BNC connector for analog audio output.
Keypad
RS-232 connector for signal from optional TACP
(Touch-screen Control Panel) or numerical
Simplified Control Panel (SCP) keypad.
RS-232
RS-232 connector for signal from PC.
In/out 5 / 6 / 7 / 8
BNC connectors for HD / SD-SDI / composite video
input loop (passive for analog video, active for digital
video).
Cascade In
DVI-I connector for multimedia input
(cascade from other MCC-8004 / ACC-8000 /
VCC-8000 series device).
DVI-I Out
DVI-I connector for output to monitor display.
GPI
RJ-50 connector for GP input/output.
5
Содержание MCC-8004 series
Страница 1: ...User s Manual MCC 8004 series Revision 1 0 July 2009 ...
Страница 48: ...Allows you to adjust the Font Color B G background Color and font Size for all labels in the group 37 ...
Страница 49: ...For an Individual Window 1 Right click the mouse on a window and select Label to enter the text 38 ...
Страница 74: ...Layout 6 Briefing cycle between presets for a slideshow effect Help Menu 63 ...
Страница 97: ...2 Click Save File on the Option window 86 ...
Страница 99: ...Loading File 1 In the Option menu click Load File 88 ...
Страница 100: ...2 Select a saved file then click OK to load the preset 89 ...
Страница 101: ...Making Adjustments 1 In the Option menu click Adjustment 90 ...
Страница 103: ...Audio Delay 1 In the Option menu click Check Audio 2 When the following screen appears click the audio Check option 92 ...


