


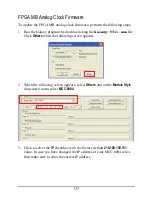


3.
Click to select the
IP
checkbox with the factory default
210.100.100.151
value. In case you have changed the IP address of your MCC-8004 series
then make sure to enter the correct IP address.
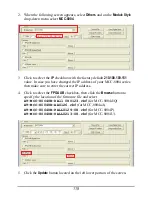
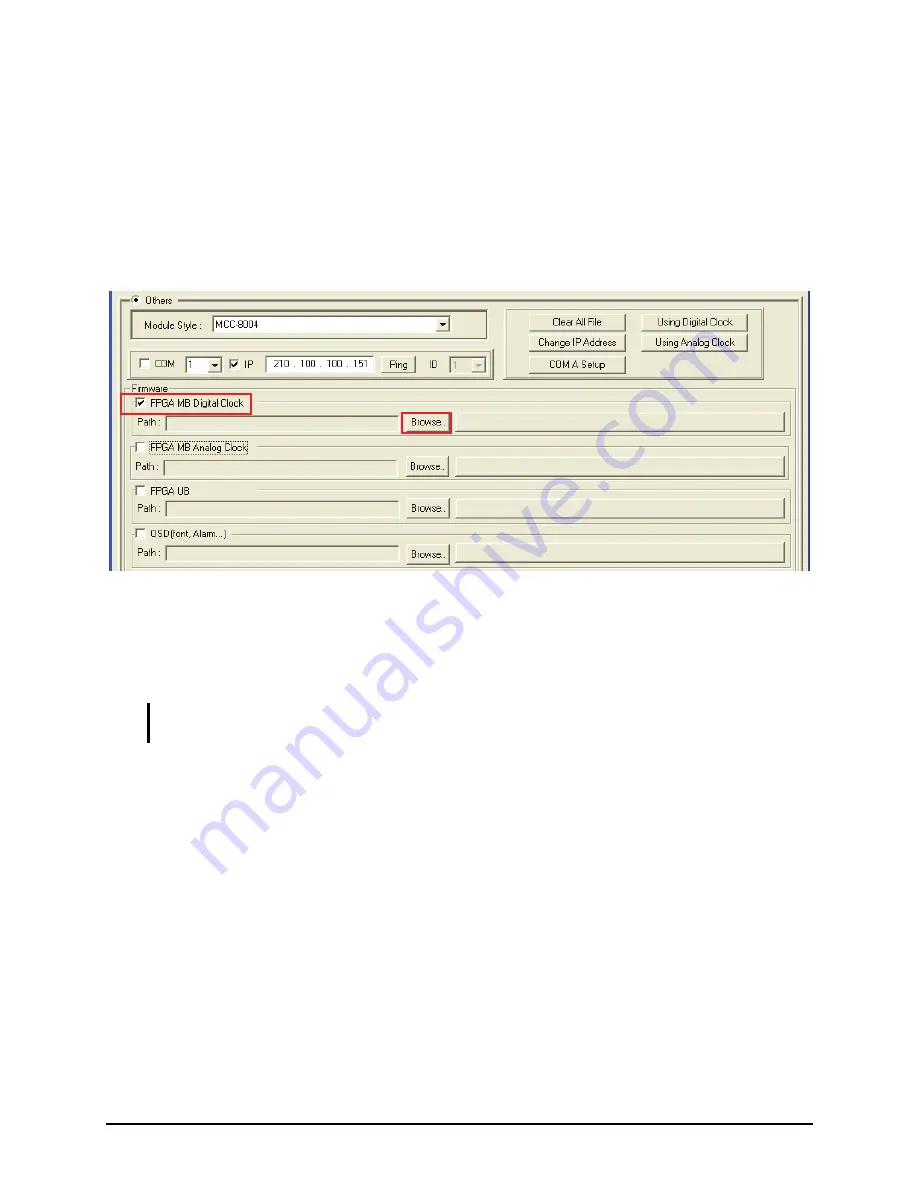
4.
Click to select the
FPGA MB Digital Clock
item, then click the
Browse
button
to specify the location of the firmware file and select
AT-MCC-8004MB-D 080123.rbf
(for MCC-8004d/Q)
AT-MCC-8004MB-D0123-08.rbf
(for MCC-8004a/aA/P/U).
5.
Click the
Update
button located on the left lower portion of the screen.
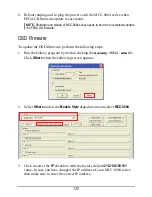
6.
Reboot (unplug and re-plug the power cord) the MCC-8004 series when
FPGA MB Digital Clock firmware update is successful.
NOTE:
Shutdown and startup of MCC-8004 series needs to be done to completely update
the FPGA MB Digital Clock firmware.
116
Содержание MCC-8004 series
Страница 1: ...User s Manual MCC 8004 series Revision 1 0 July 2009 ...
Страница 48: ...Allows you to adjust the Font Color B G background Color and font Size for all labels in the group 37 ...
Страница 49: ...For an Individual Window 1 Right click the mouse on a window and select Label to enter the text 38 ...
Страница 74: ...Layout 6 Briefing cycle between presets for a slideshow effect Help Menu 63 ...
Страница 97: ...2 Click Save File on the Option window 86 ...
Страница 99: ...Loading File 1 In the Option menu click Load File 88 ...
Страница 100: ...2 Select a saved file then click OK to load the preset 89 ...
Страница 101: ...Making Adjustments 1 In the Option menu click Adjustment 90 ...
Страница 103: ...Audio Delay 1 In the Option menu click Check Audio 2 When the following screen appears click the audio Check option 92 ...


