


User
’s Manual
7-21
7.5
The Color Dropout Tab
7.5.1
Color Dropout Selection
The [
Color Dropout
] tab allows you to select either green, red, blue, or a color of your
choice to remove the details of the selected color from a scanned image. This feature is used
to sharpen your text when using OCR (Optical Character Recognition) software. Note this
feature applies only to the gray or black and white image.
Choice: None, Auto, Remove Red, Remove Green, Remove Blue, Custom
-
None
: Does not remove any color.
-
Auto
: Automatically outputs the image with the details of the primary color removed.
-
Remove Red/Remove Green/Remove Blue
: Outputs the image with the details of the
specified color removed.
-
Custom
: Specify the color you wish to remove by entering its RGB (Red, Green, and Blue)
value respectively.
Advanced Options:
-
Quality Mode
: Range: 0~20. Default: 10
When [Quality Mode] is selected, you can determine the color to be dropped out using the
[Filter Threshold] slider. A lower value will drop more of the selected color out, while a
higher value will leave more of the selected color in.
-
Normal Mode
: Use an optimized setting to determine the color.
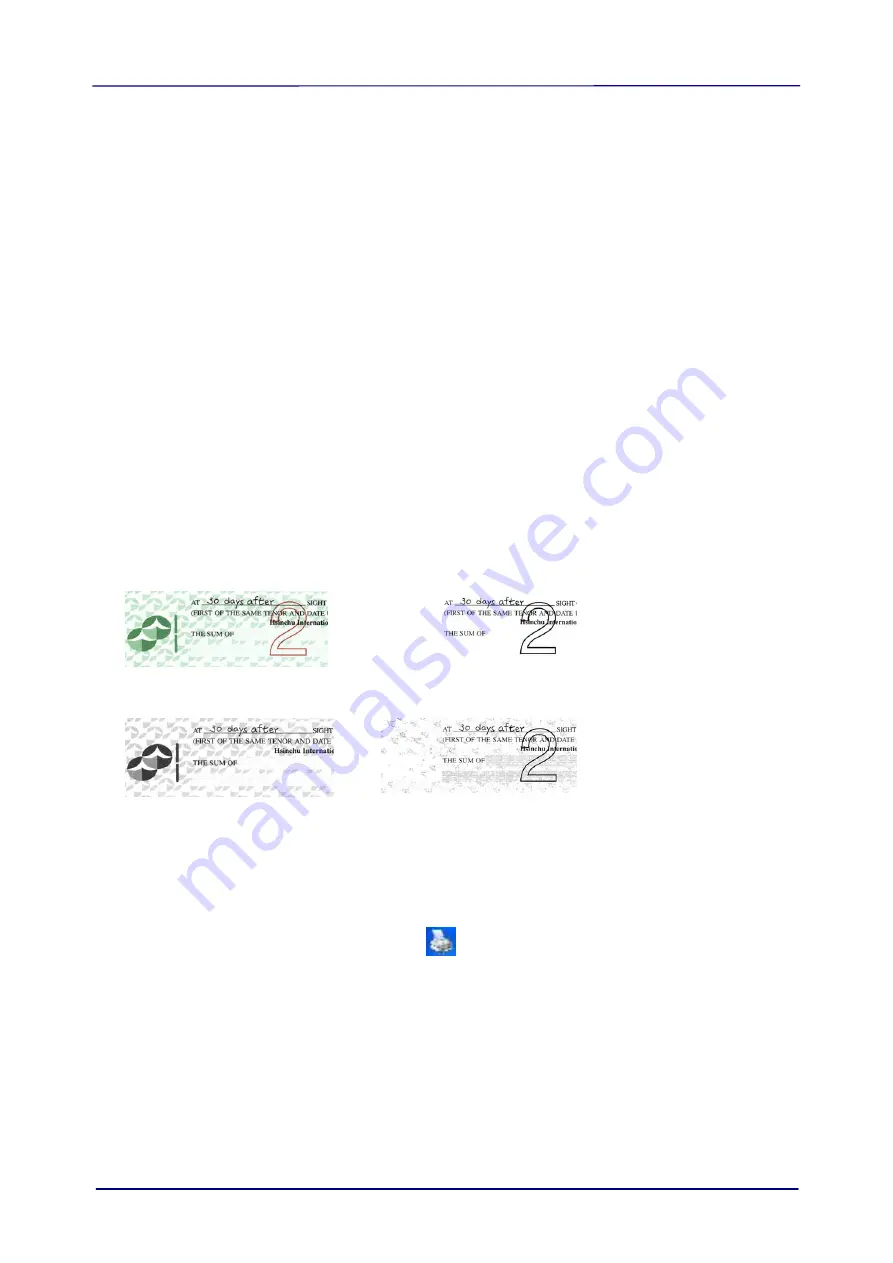
Original
Auto/Remove Green
(normal mode)
Remove Red (normal mode)
Remove Green (quality
mode: Threshold: 18)
Preview the color dropout result:
To preview the color dropout result, please follow these steps:
1.
Click the [
Scanner Properties
] icon (
) on the upper left corner, and choose [
Tab
]
to show available tab names.
2.
Choose [
Preview
] to show the Preview tab.
3.
Click the [
Preview
] tab to show the Preview page.
4.
Load your document to the scanner and click the [
Preview
] button to get a preview
image.
5.
On the [Image] tab, click [Gray] or [Black and White] image mode and then choose
[Custom] on the [Color Dropout] tab. A [Preview window] button will be displayed.
6.
Click the [
Preview window
] button to prompt the [
Preview
] window with the
previewed image.


