


Operation
3-16
Creating Your Filing Profile (Destination)
To send the scanned image to a filing destination, it is necessary to
set up a few frequently used filing destinations. You can use the
homepage of the AM6120 or the supplied Network Setup Tool to set
your filing profiles (destination). The filing profiles include your
filing protocol, directory, file name, and other scanning settings for
your scanned image.
Note that you can use only the home page of this machine or the
Network Setup Tool to create your filing profiles. It is not allowed
to use the control panel to create your filing profiles. About how to
use the Network Setup Tool, please refer to the online help of the
Network Setup Tool.
Creating Your Filing Profile (Destination)By the
Homepage of the AM6120
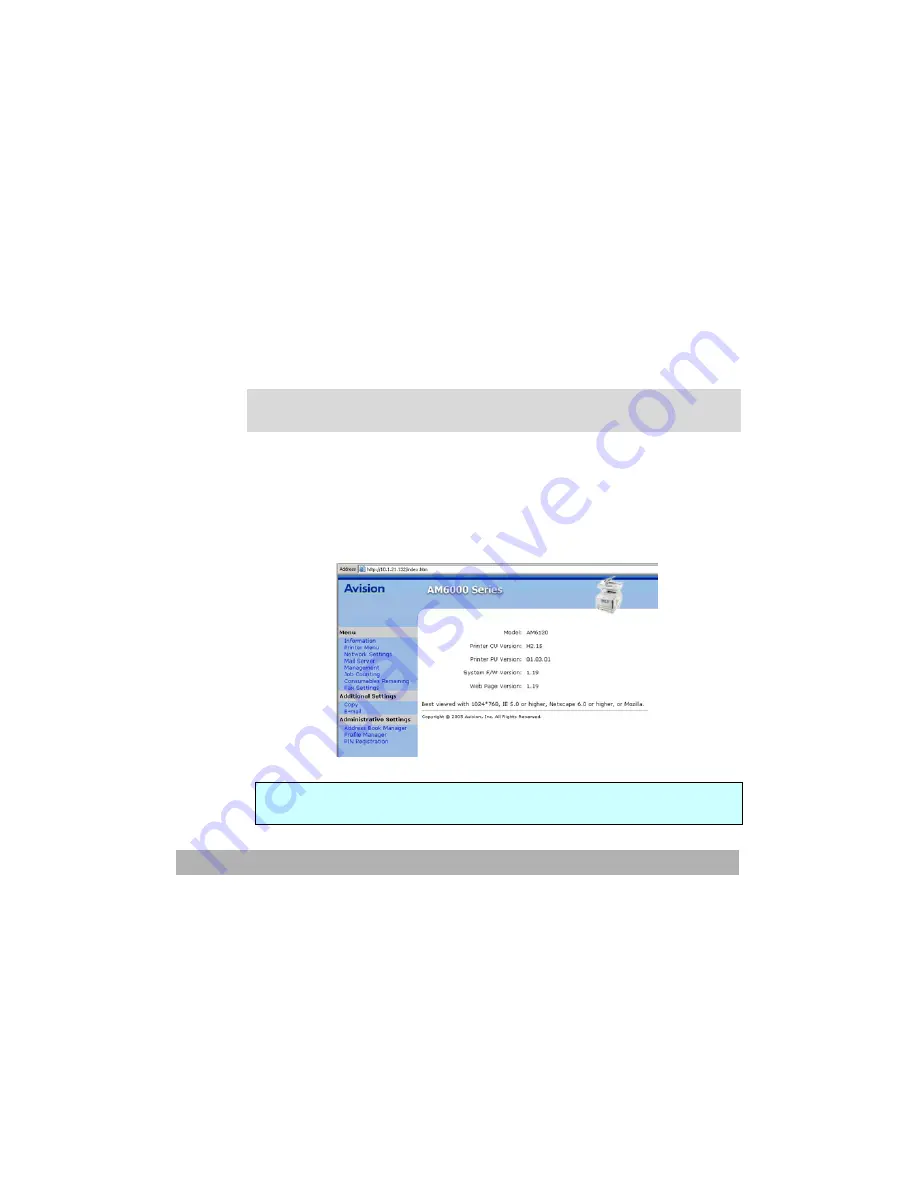
1. Start your browser such as Netscape Communicator 6.0 or above
or Microsoft I.E. 5.0 or above.
2. Type the IP address of the AM6120 in the URL address. The
following homepage appears.
(For example, http://10.1.21.132)
Note:
It is best viewed the homepage with resolution of 1024 x 768 dpi.
Содержание AM6120
Страница 1: ...AM6120 Color MFP...
Страница 31: ...2 3 INSTALLING THE AM6120 PRINTER 1 Remove the handler to lift the box 2 Remove the protective material...
Страница 34: ...Installing Your Machine 2 6 7 Place the printer upon the installation base 26...
Страница 35: ...2 7 8 Turn the lock switch to Unlocked position...
Страница 36: ...Installing Your Machine 2 8 9 Remove the protective tape paper cushion 10 Open multi purpose tray...
Страница 37: ...2 9 11 Remove the tape and paper 12 Close the multi purpose tray...
Страница 38: ...Installing Your Machine 2 10 13 Open the protective plastic bag...
Страница 39: ...2 11 14 Place the AM6120 scanner to the support of the printer and move it backward...
Страница 40: ...Installing Your Machine 2 12 15 Move the lock switch to Locked position...
Страница 41: ...2 13 16 Turn the lock switch on the scanner to the Unlcoked position...
Страница 42: ...Installing Your Machine 2 14 17 Press the release button to open the cover...
Страница 43: ...2 15 18 Pull the release lever to raise the image drum 5...
Страница 44: ...Installing Your Machine 2 16 19 Open the image drum 20 Remove paper and protective film...
Страница 45: ...2 17 21 Close the drum and move 4 levers to the p position 5 22 Close the printer top cover...
Страница 46: ...Installing Your Machine 2 18 23 Pull out the output tray 24 Adjust the paper size in the paper tray...
Страница 47: ...2 19 25 Insert the printing paper 26 Make sure the paper size properly fit in the tray...
Страница 48: ...Installing Your Machine 2 20 27 Gently pull back the paper tray...
Страница 50: ...Installing Your Machine 2 22 26...
Страница 63: ...2 35 6 Choose AM6120P and then click Next 7 Choose AM6120P as your printer name and then click Next...
Страница 67: ...2 39 5 The system is installin the software Click Next to continue 6 Click Finish to complete the installtion...
Страница 71: ...2 43 3 Read the license and then choose Yes to continue 4 Choose your destination and then click Next...
Страница 188: ...5 39 1 12 Finally close the top cover and press down firmly at both sides so that the cover latches closed...


