


Chapter 2: Controls and Connectors
3
chapter 2
Controls and Connectors
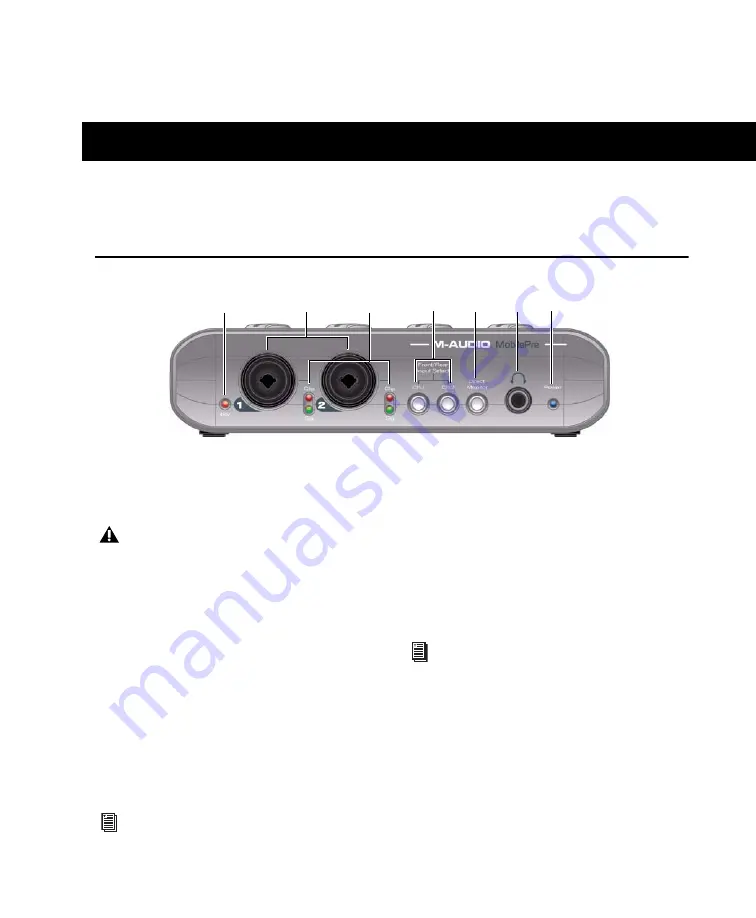
Front Panel
1
Phantom Power Indicator (48V)
This red LED
illuminates when the Phantom Power switch
(back panel) is set to the “on” position.
2
Microphone/Instrument Inputs
These con-
nectors accept either a standard XLR micro-
phone cable, or high-impedance 1/4-inch TS
instrument cable.
3
Signal/Clip Indicators
The green LED indi-
cates the presence of a signal at the correspond-
ing input. The red LED indicates “clipping” or
distortion.
4
Front/Back Input Buttons
These buttons al-
low selection of the front or back panel inputs
for their corresponding channels.
5
Direct Monitor Button
This button switches
Direct Monitoring on and off, which provides a
latency-free mix of the input signal and the out-
put of your music software. When Direct
Monitoring is switched off, you must use the
monitoring option in your music software.
6
Headphone Output
Connect your stereo head-
phones to this 1/4-inch output. Set the volume
using the top panel Headphone control knob.
7
Power Indicator
This blue LED indicates that
MobilePre is receiving power from the USB port
on the host computer.
2
3
4
5
6
1
7
Although phantom power can be used
safely with most microphones, it may dam-
age some ribbon microphones. Always turn
off phantom power and wait at least ten
seconds before connecting a ribbon micro-
phone.
For more information, refer to “Setting Your
Recording Levels” on page 12.
For more information, refer to “Direct Mon-
itoring” on page 12
Содержание MobilePre
Страница 1: ...MobilePre User Guide...
Страница 10: ...MobilePre User Guide 6...
Страница 20: ...MobilePre User Guide 16...


