HDX-192 Cooling Kit Installation
2
6
Using the handle, slowly slide the core partially out, locate the
interior catch on the right side of the tray, and press it to release
the core from the chassis.
7
Slowly slide the core out of the E6L chassis completely, and
place it on your work surface.
Removing HDX-192 Cards
You must first remove the retaining bracket before removing
HDX-192 cards.
To remove the DSP card retaining bracket:
1
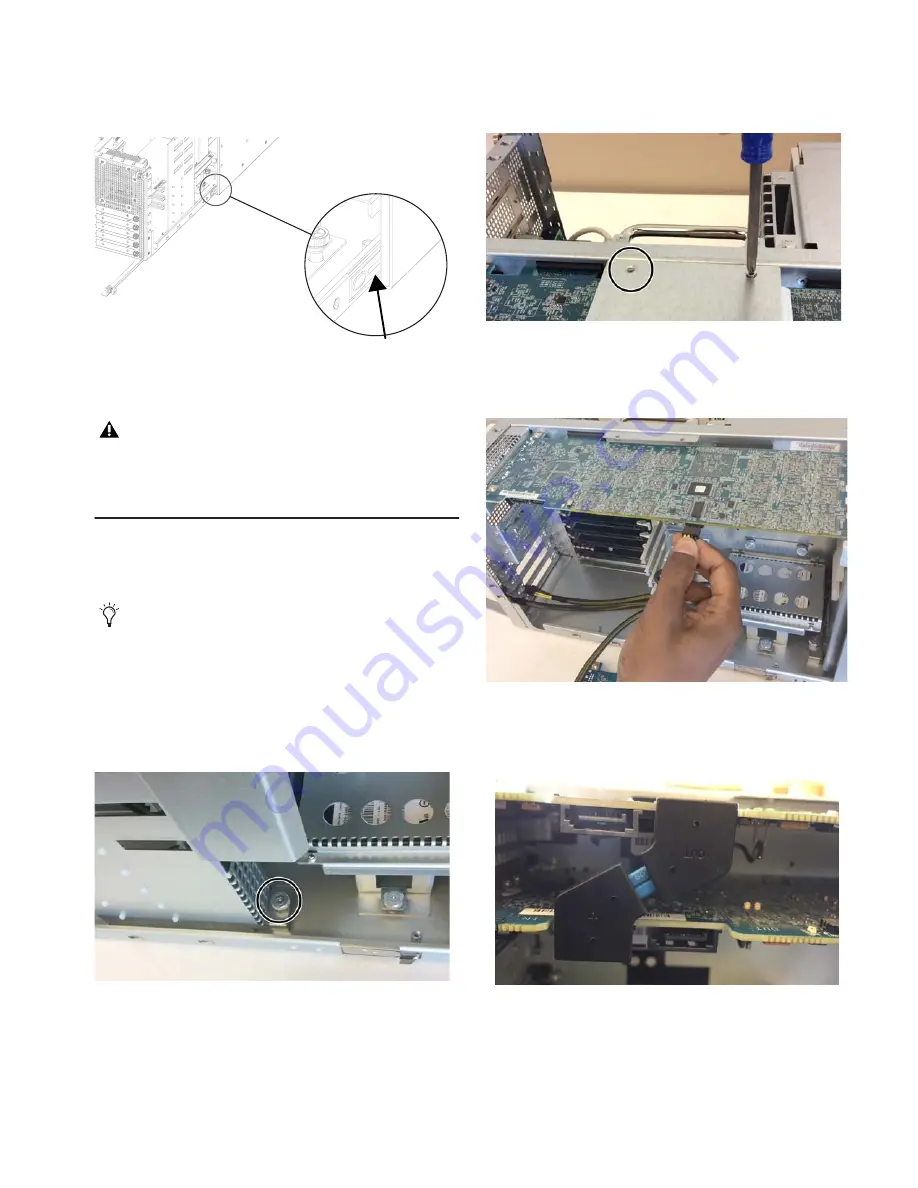
Looking inside the core from the right side, locate the DSP as-
sembly retaining bracket.
2
Locate the thumbscrew that secures the bracket to the bottom
of the unit and loosen it completely.
3
Locate the two Phillips head screws on the top of the bracket,
use a #2 Phillips screwdriver to remove them, carefully re-
move the bracket, and set them all aside.
4
Disconnect the power cables connected to any HDX-192
cards. Pinch the tab on the underside of the connector to re-
lease it from its port.
5
If there are two or more HDX-192 cards present, disconnect
each HDX TDM cable (custom SATA cables) from between
pairs of HDX-192 cards.
Figure 3. Location of the interior catch
The core will not slide out of the E6L chassis until the
latches are fully extended and the catch has been released.
If you experience any resistance, make sure the latches are
fully extended before pulling.
Throughout this guide, cables, cable colors, and hardware
components shown may differ from your E6L.
Figure 4. HDX card Bracket thumbscrew
Figure 5. Removing one of two HDX card bracket screws
Figure 6. Disconnecting the power cable from an HDX card
Figure 7. HDX TDM cable connecting two HDX-192 cards
Содержание HDX-192 Cooling Kit
Страница 8: ...HDX 192 Cooling Kit Installation 8...


