EZTouch I/O
Jr.
13 / 52
Mounting Instructions
Before mounting your new
EZTouch I/O
Jr. unit, please verify you have
the
necessary items:
·
EZTouch I/O
Jr. unit
·
4 DIN clip assemblies
·
a Phillips #1 screwdriver (or equivalent)
CAUTION: Tighten DIN Clips to a maximum of 1.5 inch-pounds to
provide a proper seal. EZAutomation assumes no responsibility for
"liquids" damage to the unit or other equipment within the enclosure
because of improper installation.
When ready to proceed:
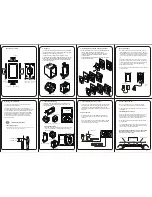
1.
Prepare the DIN clip assembly first by placing the nut on the screw.
Insert the screw into the DIN clip in the non-threaded end first using the
Phillips #1 screwdriver if necessary. Leave a gap between the DIN clip
and the head of the screw.
2.
After ensuring the cut-out is sized properly and allows for adequate
ventilation, place the
EZTouch I/O
Jr. unit into the cut-out horizontally.
3.
Once in place, use the hooks on the DIN clip to locate the DIN clip
assembly onto the side of the
EZTouch I/O
Jr. unit. Tighten the screw
into
place. Then rotate the nut until it is snug against the DIN clip
to
prevent it from vibrating loose. Repeat this process with the other
3
DIN clip assemblies until the
EZTouch I/O
Jr. unit is secure.
Содержание EZTouch I/O Jr.
Страница 1: ...Copyright 2012 by AVG Automation All Rights Reserved EZTouch I O Jr ...
Страница 12: ...EZTouch I O Jr 12 52 Mounting Information Front View and Side View Top View and Cut out Dimensions ...
Страница 19: ...EZTouch I O Jr 19 52 Digital I O Specifications Analog Voltage Specifications and Wiring ...
Страница 20: ...EZTouch I O Jr 20 52 Analog Current Specifications and Wiring ...
Страница 21: ...EZTouch I O Jr 21 52 ...
Страница 23: ...EZTouch I O Jr 23 52 Pinout Information for 26 Pin Connector ...
Страница 24: ...EZTouch I O Jr 24 52 Pinout Information for 44 Pin Connector ...


