Cumberland TL-4250-WL
2 PC Toilet / Pièce de deux toilettes
7
06
Attach the decorative caps on each side of the
bowl.
Fixer les capuchons décoratifs de chaque côté de la
cuvette.
05
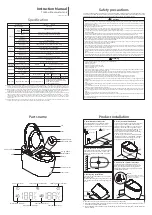
Insert screws and plastic inserts through the
mounting hole on the sides of the toilet bowl
and tighten until it catches the mounting
bracket holes. (F5)
CAUTION: DO NOT OVERTIGHTEN.
Insérer la vis dans le trou de fixation se situant
sur le côté de la cuvette de toilette et serrer
jusqu’à ce qu’ils rejoignent les fixations. (F5)
ATTENTION: NE PAS SERRER
F5