background image

4

. ASSEMBL

Y

1.


Rem

o

ve the scooter from the packaging box.

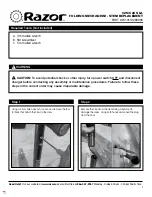
Move the kickstand out. With one hand on the pole and 

one hand on the deck, place the scooter on the ground. 

It should stand on its own with the kickstand out.

2. Unfold the pole and push it until you hear a click. 

Confirm that it is fully locked into place and the safety

lock pin is secured completely. 

3. Firmly connect the wires inside the handlebar and the 

pole. Slide the handlebar onto the pole. Be aware of the 

correct orientation. 

4. Tightly install the 4 screws with the included hex wrench.

5. Unlock the battery compartment underneath the deck 

with the key provided.

6. After fully charging your Power Share batteries, insert 

both batteries into the battery compartment.

Safety Lock Pin

WARNING!

Keep


plastic


covering


away


from


children


to


avoid


suffocation.

Содержание POWER SHARE CTS36ABU1

Страница 1: ...Original Instruction Manual IMPORTANT Read this manual instruction carefully and keep it for future reference...

Страница 2: ...CONTENTS 1 SAFETY WARNINGS 2 SCOOTER WALKAROUND 3 DASHBOARD 4 ASSEMBLY 5 CHARGING 6 HOW TO RIDE 7 FOLDING AND CARRYING 8 MAINTENANCE 9 SPECIFICATIONS 10 CONTACT...

Страница 3: ...azards inherent with this product Comply with local laws and regulations when riding this product Do not ride where prohibited by local law When braking rapidly you risk serious injury due to loss of...

Страница 4: ...ons when riding this product DO NOT ride on sidewalks motorways or highways Avoid The Following Actions When braking rapidly you risk serious injury due to loss of traction and falls Watch your speed...

Страница 5: ...Support Do not modify the scooter Doing so will void any applicable warranties and may put you at increased risk of serious injury or death DO NOT ride up and down stairs DO NOT use a mobile device or...

Страница 6: ...are included If any components are missing please contact customer service After verifying all components are present and in good condition you can assemble CAUTION Remember to power off your scooter...

Страница 7: ...i h Battery Level The battery charge level is indicated by the 5 barsonthe display Error Codes Motor Failure Error code E1 willflashfrom the speed display Brake Failure Error code E2 willflashfrom the...

Страница 8: ...ace and the safety lock pin is secured completely 3 Firmly connect the wires inside the handlebar and the pole Slide the handlebar onto the pole Be aware of the correct orientation 4 Tightly install t...

Страница 9: ...it is damaged or see trace of water Always power off your Electric Kick Scooter before removing the batteries 6 HOW TO RIDE WARNING Always wear protective gear such as a helmet knee pads and elbow pad...

Страница 10: ...he electric scooter will not accelerate until you manually reach a speed of approx 1 5 MPH for your safety 4 Slow down by releasing the throttle and brake by squeezing the brake lever 5 Tilt your body...

Страница 11: ...ing lock lever 2 Pull the buckle out and fold the handlebar down until it aligns with the opening on the deck 3 When the scooter is folded and inserted into the deck lift it by the pole to carry Safet...

Страница 12: ...he scooter If you notice any play in the pole i e swaying or moving back and forth you likely need to tighten the screws you installed during assembly 8 Error Codes Check the Display for error codes I...

Страница 13: ...t 20 battery range can be half that the same battery using at 22 Battery range will recover when the temperature rises NOTE Remember to charge the battery after each use Completely draining the batter...

Страница 14: ...Braking System A Weighted sound pressure level Unfold 1149X 4 9 7 X 1 2 3 6 mm Fold 1 1 4 9 X 4 9 7 X 4 8 0 mm 38 5lbs 17 4 kg 220lbs 100 kg 8 5 Air filled Max 50 psi 14 Years 3 94 6 56 ft 15Mph 25Mi...

Страница 15: ...ing to riding maintenances and safety or errors faults with your Electric Kick Scooter Aventon 1950 S Grove Ave Building B Ontario CA 91761 Contact us directly by checking https support aventon com co...

Страница 16: ...Dual port battery charger EN Chargeur de batterie double emplacement F Cargador de bater a de puerto doble ES P02 P06 P10 WA3884...

Страница 17: ...Dual port battery charger EN 2 2 1 3...

Страница 18: ...ever there is no guarantee that interference will not occur in a particular installation If this equipment does cause harmful interference to radio or television reception which can be determined by t...

Страница 19: ...ery pack to determine if the charger is OK If the new battery charges correctly then the original pack is defective and should be returned to a service center or recycling service center If the new ba...

Страница 20: ...y pack in the charger or before attempting to clean PROBLEM SOLUTION I CANNOT FIT THE BATTERY PACK INTO THE BATTERY CHARGER WHY a Check if the charger and the battery pack are specifically designed fo...

Страница 21: ...Chargeur de batterie double emplacement F 6 2 1 3...

Страница 22: ...u fabricant peut causer des interf rences nuisibles aux communications radio En fonction des installations r alis es il n est cependant pas garanti que toute interf rence soit exclue Si cet quipement...

Страница 23: ...mineux indiquent des probl mes voir tableau ci dessous Dans ce cas ins rez un nouveau bloc pile pour d terminer si le chargeur fonctionne Si la nouvelle batterie se charge correctement cela signifie q...

Страница 24: ...le dans le chargeur ou avant le nettoyage PROBLEMES ET SOLUTIONS POURQUOI NE PUIS JE PAS INS RER LE BLOC PILE DANS LE CHARGEUR a Le chargeur et les outils contenus dans cet emballage sont sp cialement...

Страница 25: ...Cargador de bater a de puerto doble ES 10 2 1 3...

Страница 26: ...una interferencia da ina a la comunicaci n radial Sin embargo no existen garant as de que no ocurra interferencia alguna en una instalaci n en particular Si este equipo produce interferencia da ina a...

Страница 27: ...troduzca una bater a nueva para determinarsi el cargador est bien Si la nueva bater a carga cor rectamente la bater a original est defectuosa y se debe devolver a un centro de servicio o de servicio d...

Страница 28: ...dos espec ficamente para trabajar juntos b La bater a se inserta en el cargador en una sola direcci n D vuelta la bater a hasta que pueda ser insertada en la ranura La luz verde parpadeando debe encen...

Страница 29: ......

Страница 30: ......

Страница 31: ...Copyright 2020 Positec All Rights Reserved Copyright 2020 Positec Tous droits r serv s Derechos reservados 2020 Positec Todos los derechos reservados AR03029302...

Отзывы: