


Avem Quirks
National Service Support Line:
1800 658 120
8
Step 3.
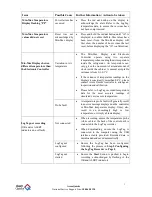
Connecting the USB interface
The sockets for the USB communication ports are typically located at the rear of the computer.
Please ensure that the software has been installed prior to connecting the USB Interface Cradle
to the computer, as the software installation also installs the drivers required to successfully
connect and use the USB Interface Cradle.
Step 4.
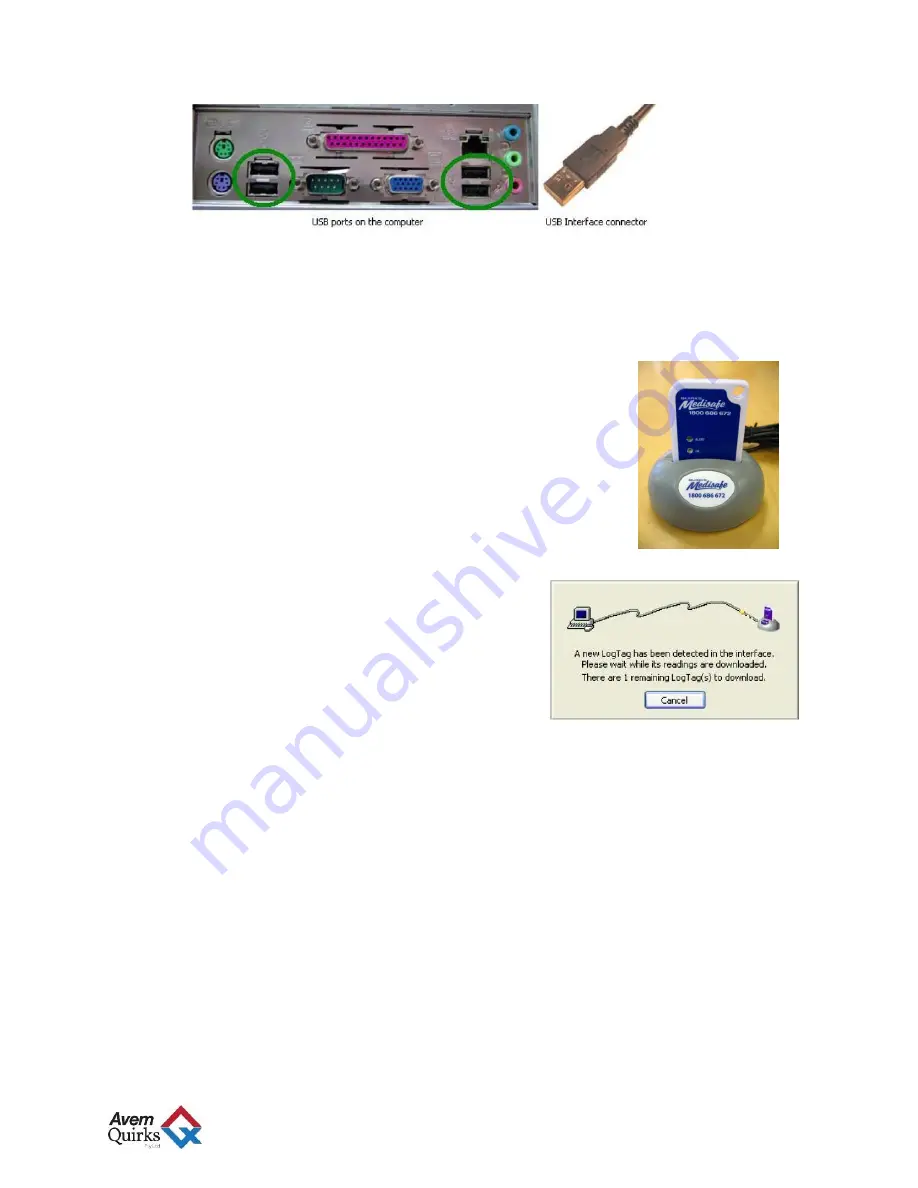
Using the LogTag with USB interface
The LogTag recorder fits into the Interface Cradle slot with the front
of the LogTag facing towards the front label of the Interface Cradle
with the contacts on the reverse side, as shown in the picture to the
right.
When placing the LogTag into the Interface Cradle slot, you should be
able to feel a very slight resistance as the contacts "grab" the LogTag.
This is normal. Removal of the LogTag will cause a slight clicking
noise as the contacts snap back into their "unloaded position".
Please note: If the LogTag recorder has readings stored
within its memory, the software will automatically start
to download the data and will also display an animated
picture during the download process, similar to the
following picture (please ensure the LogTag Analyser
software is open before inserting the LogTag recorder
in the USB interface).
The download process can be stopped by clicking on
the "Cancel" button below the download animation or by pressing the "Esc" key.
Step 5.
Configuring the LogTag Recorder
i.
From the Menu Bar, locate “LogTag” sub-menu and then click and select
Wizard
.
ii.
A window will open with actions list, welcoming you to the
LogTag Access Wizard
.
(This will assist you in setting up your LogTag, particularly for the first time.) Please
note that the LogTag Interface must be plugged in to the PCs USB Port and that the
LogTag must be completely inserted into the interface.
iii.
Click the
Next
button at the bottom of the window.


