Installing Avaya IP Agent for Windows Terminal Services
58 Avaya IP Agent Installation and User Guide
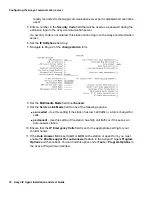
4. Read the entire Software License Agreement carefully and select the
Yes
button if you
understand and agree to the terms. Selecting
No
will cause the installation program to
exit.
5. Select the
Next
button.
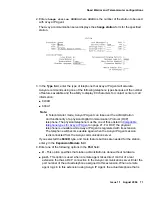
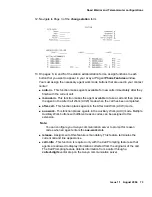
Avaya IP Agent displays the
IP Endpoint Options
window. The Telecommuter
configuration is the only valid option for Avaya IP Agent on the Windows Terminal
Services platform.
Note:
Note:
The
Share Station Login information between users
feature is not
available for the Windows Terminal Services version of Avaya IP Agent
6. Select the
Next
button.
The installation program displays the
Choose Destination Location
window.
7. If you want to install Avaya IP Agent in a folder other than the default, click the
Browse
button in the
Destination Folder
dialog box and select a new location.
8. When you are satisfied with the folder in which Avaya IP Agent will be installed, select
the
Next
button.
The installation program displays the
Setup Type
window.
9. In the
Setup Type
window, select one of the following options and then select the
Next
button:
●
Typical
- This option installs the basic options in English as well as in the language
of your Microsoft Windows operating system. Proceed to Step 13.
●
Custom
- This option installs the basic options in English as well as in any language
you choose. Selecting this option and then the
Next
button will display the
Select
Language Components
window where you specify the software language
components to install. Proceed to the next step.
10. Indicate the language components to install by selecting the check box next to the
option.
When selecting the language components to install, ensure that the
Space Required
does not exceed the
Space Available
that is indicated at the bottom of the window.
11. Select the
Next
button.
The installation program displays the
Select Program Folder
window.
12. Use the
Select Program Folder
window to specify the folder name that will appear in
the
Start
menu through one of the following methods:
●
You can accept the default Avaya IP Agent folder name that appears in the
Program Folders
field.
●
You can enter a different folder name in the
Program Folders
field.
●
You can select an existing folder in the
Existing Folders
field in which to install the
Avaya IP Agent Start menu shortcuts.
Содержание IP Agent
Страница 1: ...Avaya IP Agent Release 5 0 Installation and User Guide Issue 1 2 April 2005 ...
Страница 26: ...Introduction 26 Avaya IP Agent Installation and User Guide ...
Страница 52: ...Installing Avaya IP Agent for PC based configurations 52 Avaya IP Agent Installation and User Guide ...
Страница 62: ...Installing Avaya IP Agent for Windows Terminal Services 62 Avaya IP Agent Installation and User Guide ...
Страница 166: ...Using VuStats 166 Avaya IP Agent Installation and User Guide ...
Страница 176: ...Using a Public Directory with Avaya IP Agent 176 Avaya IP Agent Installation and User Guide 5 Select the OK button ...
Страница 178: ...Using a Public Directory with Avaya IP Agent 178 Avaya IP Agent Installation and User Guide ...
Страница 194: ...Screen pops 194 Avaya IP Agent Installation and User Guide ...
Страница 244: ...Dialog Reference 244 Avaya IP Agent Installation and User Guide ...
Страница 252: ...Language support 252 Avaya IP Agent Installation and User Guide ...
Страница 268: ...Troubleshooting 268 Avaya IP Agent Installation and User Guide ...
Страница 286: ...286 Avaya IP Agent Installation and User Guide ...


