Basic operation
Issue 4 July 2001
7
■
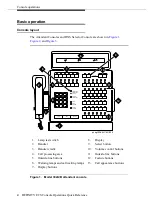
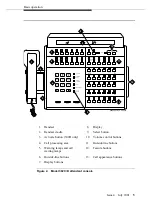
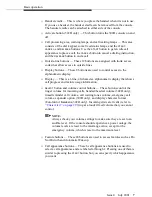
Handset cradle — This is where you place the handset when it is not in use.
If you use a headset, the handset cradle can be removed from the console.
The handset cradle can be attached to either side of the console.
■
Activate button (302D only) — This button turns the 302D console on and
off.
■
Call processing area, warning lamps, and call waiting lamps — This area
consists of the dial keypad, some fixed status lamps, and the
START
,
CANCEL
, and
RELEASE
buttons. Use the
START
button to get an idle call
appearance to place a call, the
CANCEL
button to cancel a dialing instruction,
and the
RELEASE
button to end a call.
■
Outside-line buttons — These 12 buttons are assigned with trunk access
codes that allow access to outside lines.
■
Display buttons — These 8 buttons are used to control access to the
alphanumeric display.
■
Display — This is a 1-line, 40-character, alphanumeric display that shows
call progress and feature usage information.
■
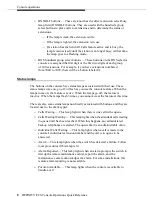
SELECT
button and volume control buttons — These buttons control the
ringer volume for incoming calls, handset/headset volume (302D only),
timed reminder call volume, call waiting tones volume, emergency call
volume, expander option (302D only), and display character format
(Eurofont or Katakana; 302D only). Incoming crisis alert calls (refer to
‘‘Crisis Alert’’ on page 29
) ring at a louder fixed volume that you cannot
control.
NOTE:
Always check your volume settings to make sure they are set to an
audible level. If the console should experience a power outage, the
volume levels are reset to the mid-range value, except for the
emergency volume, which is reset to the maximum level.
■
Feature buttons — These 24 buttons are used to access features such as Do
Not Disturb and Automatic Wakeup.
■
Call appearance buttons — These 6 call appearance buttons are used to
select a call appearance and are labeled
A
through
F
. Pressing one of them is
similar to pressing the
START
button, but you can specify which appearance
you want.


