


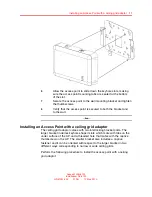

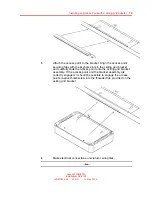


Installing an Access Point with a ceiling grid adaptor
17
6
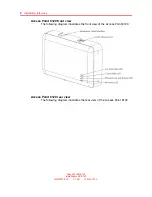
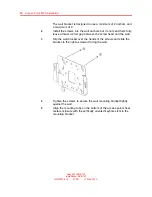
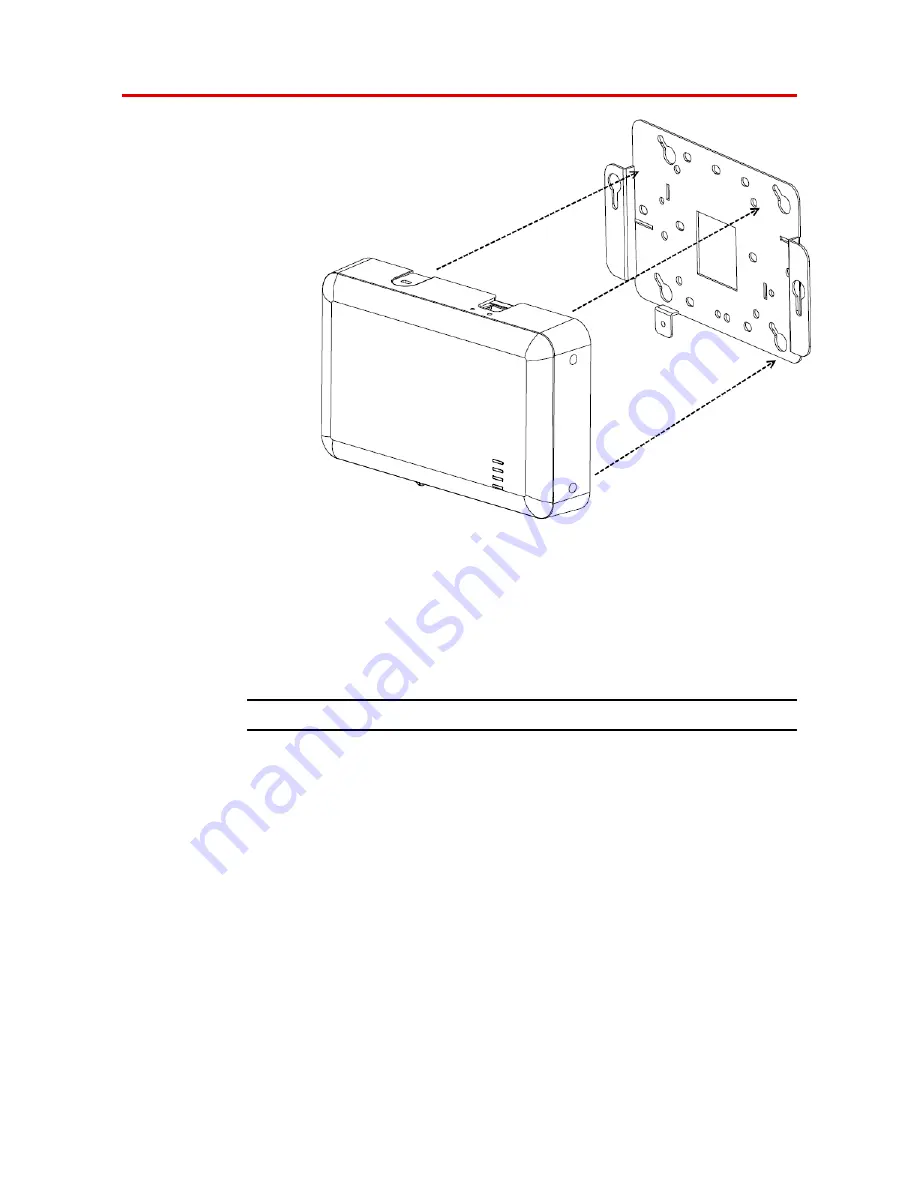
Allow the access point to slide down the keyhole slots, making
sure the access point mounting tabs are seated at the bottom
of the slot.
7
Secure the access point to the wall mounting bracket and tighten
the thumbscrews.
8
Verify that the access point is secured to both the bracket and
to the wall.
--End--
Installing an Access Point with a ceiling grid adaptor
The ceiling grid adaptor comes with two interlocking bracket parts. The
larger bracket includes keyhole shaped slots which mate with tabs on the
under surface of the AP and a threaded hole that mates with the captive
thumbscrew on the AP. The smaller bracket also includes a captive
fastener and it can be oriented with respect to the larger bracket in two
different ways corresponding to narrow or wide ceiling grids.
Perform the following procedure to install the access point with a ceiling
grid adaptor:
Avaya WLAN 8100
Installation–AP 8120
NN47251-302
01.AD
10 May 2010
.
Содержание AP 8120
Страница 1: ...Avaya WLAN 8100 Installation AP 8120 Release 1 0 Document Revision 01 AD NN47251 302 ...
Страница 4: ... ...
Страница 20: ...20 Access Point 8120 installation Avaya WLAN 8100 Installation AP 8120 NN47251 302 01 AD 10 May 2010 ...
Страница 22: ...22 Installation tools and utilities Avaya WLAN 8100 Installation AP 8120 NN47251 302 01 AD 10 May 2010 ...