


15
.
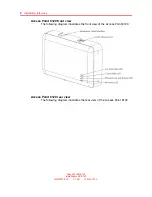
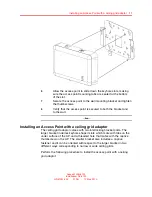
Access Point 8120 installation
This section contains procedures for the installation of the Access Point
8120.
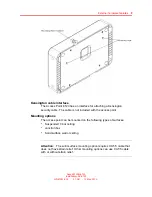
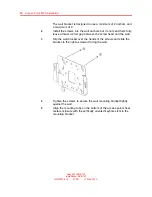
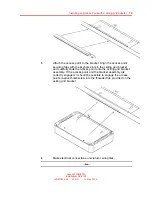
Mounting a wireless LAN access point on a wall
The mounting bracket is designed to use wall anchors with threaded
section diameters ranging between 3.5mm and 4.5mm. If wall anchors
have threaded diameters greater than 3.5mm, only the two mounting holes
marked ‘A’ may be used. If wall anchors have threaded diameters of less
than 3.5mm, the holes marked ‘A’ and the holes marked ‘B’ may be used.
All wall anchors must have a head diameter of less than 10mm or the wall
mounting bracket cannot be installed over them.
Perform the following procedure to mount a wireless LAN access point on
a wall:
Procedure steps
Step
Action
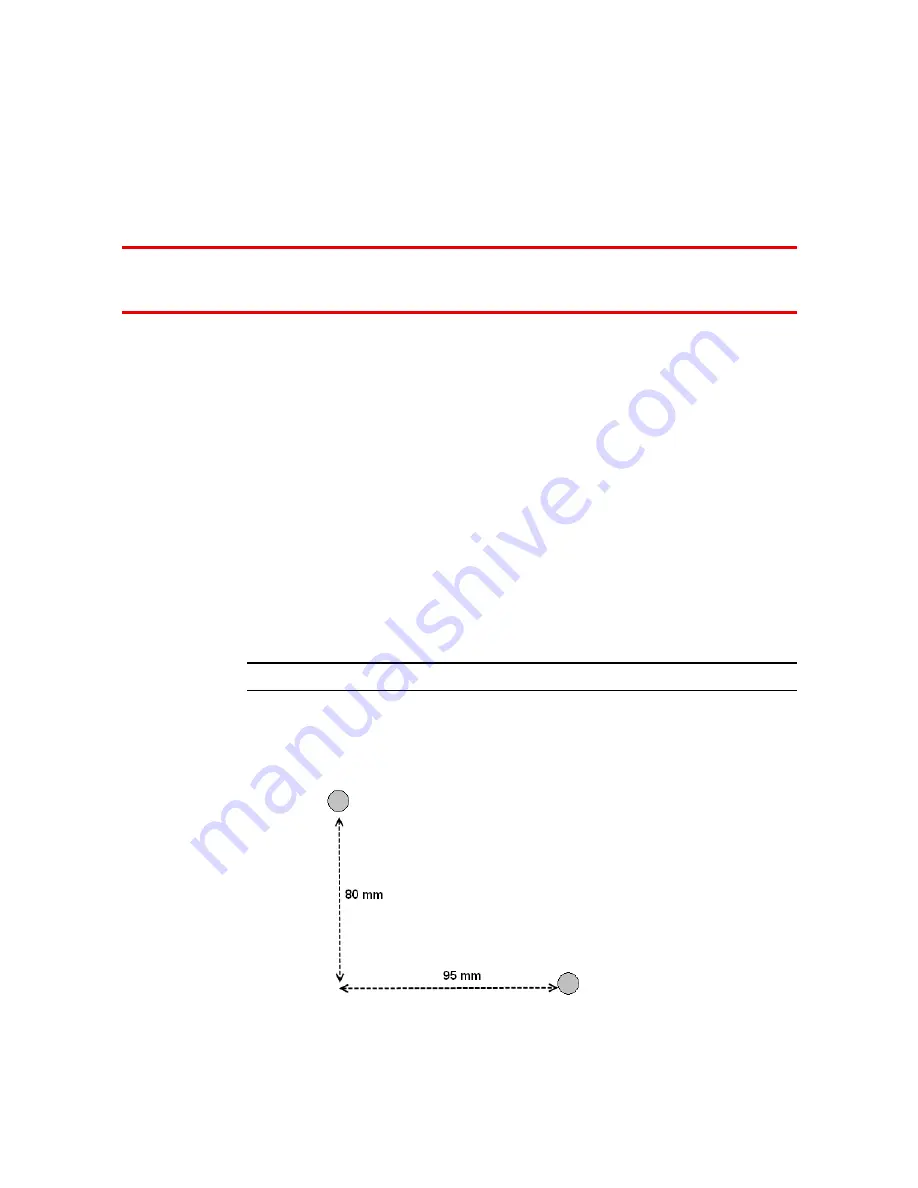
1
Locate the appropriate position of the wall anchors. The wall
anchors should be 95mm apart horizontally and 80mm apart
vertically.
Avaya WLAN 8100
Installation–AP 8120
NN47251-302
01.AD
10 May 2010
.
Содержание AP 8120
Страница 1: ...Avaya WLAN 8100 Installation AP 8120 Release 1 0 Document Revision 01 AD NN47251 302 ...
Страница 4: ... ...
Страница 20: ...20 Access Point 8120 installation Avaya WLAN 8100 Installation AP 8120 NN47251 302 01 AD 10 May 2010 ...
Страница 22: ...22 Installation tools and utilities Avaya WLAN 8100 Installation AP 8120 NN47251 302 01 AD 10 May 2010 ...