6
Video Inputs:
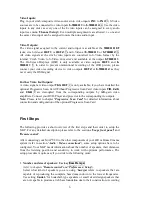
Plug in your cinch/composite video sources into video inputs
IN 1
to
IN 4
3. S-Video
sources are to be connected to video inputs
S-VIDEO 1
to
S-VIDEO 4
4. Use the video
inputs in any order as every one of the 8 video inputs can be assigned to every audio
input (see menu
'Channel Setup'
). Even multiple assignments are allowed, i.e. one and
the same video input can be assigned to more than one audio input.
Video Outputs:
The video signal assigned to the current audio input is available at the
VIDEO OUT
jacks; cinch video at
OUT 1
or
OUT 2
7 and S-Video at
S-VIDEO 1
or
S-VIDEO 2
6.
All video signals at the cinch video inputs are converted to S-Video format by the
internal 'Cinch Video to S-Video Converter' and available at the output
S-VIDEO 1
.
The On Screen Displays (OSD) is only available at video outputs
OUT 1
and
S-
VIDEO 1
5. In order to prevent unintentional recording of the OSD picture, please
connect your video recording device to video outputs
OUT 2
or
S-VIDEO 2
as they
never carry the OSD signal.
Further Video In-/Outputs:
A video signal at video output
VGA OUT
1 is only available, if you have installed the
optional Progressive Scan Card. Without Progressive Scan Card video inputs
Y/R
,
Cr/G
and
Cb/B
2 are decoupled from the corresponding outputs by 0dB-gain video
amplifiers. Connect your DVD-Player and projector to the corresponding in-/outputs.
Note:
Please refer to chapter
'Progressive Scan Card'
for detailed information about
connection and configuration of the optional Progressive Scan Card.
First Steps
The following provides a short overview of the first steps and their order to setup the
MAP. For any detailed description please refer to the sections
'Usage front panel'
and
'Remote control'
.
After connecting your MAP V2.0 to the other components of your Hifi or Home Cinema
system (refer to section
'Audio / Video connections'
), some setup options have to be
configured. Your MAP needs information about the number of speakers, their distances
from the listening position and sensitivity to work with optimum performance. The
setup procedure is quite easy if you stick to the following order:
1.
Number and size of speakers: Use key
Bass Manager
(refer to chapters
'Remote control'
and
'Preferences / Setup'
)
Select what kind of speakers you are using. '
Large
' refers to speakers that are
capable of reproducing the complete bass domain down to the lowest frequencies.
Use setting '
Small
' for bookshelf-type speakers or small sized design speakers that
are not capable to produce a rich bass foundation due to their construction. According


