29
Installation Manual
Model M6400, M6800
THE DIRECTOR
™
Signal Processing Tab
Equalization of each zone’s sonic good-
ness affects both channels within each
zone. First select the zone of interest
using the row of 8 buttons along the top
of the signal processing display. Please
see a later section for a discussion of the
methods and benefits of equalization,
and see the notes below regarding saving
your settings. Equalization can be very
powerful, however it takes some work to
adjust properly, and like makeup, it can
easily be done wrong. It is much easier
and more accurate, if you have some in-
strumentation/audio analysis gear. Please
see our website for details of our fine
audio analyzer products that will take the
guesswork out of successfully setting the
EQ in each zone.
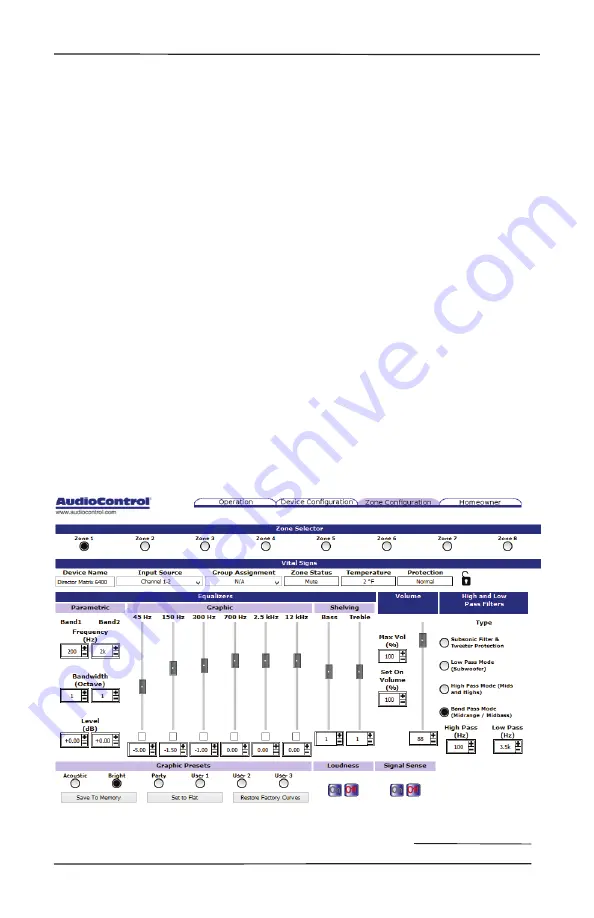
Vital Signs:
This line displays a quick view
of the device name, input source,
group, zone status, temperature, and
protection status.
Graphic EQ:
Adjustment of the graphic
EQ of the selected zone is done by
dragging the EQ sliders to the desired
position, or by clicking where you want
the position/ value to be, or by clicking
the +/- buttons. Note that the sliders
can be moved down as well as up, and
this is not a sign of weakness.
Parametric EQ:
In addition (or sub-
traction) to the graphic EQ sliders,
there are two separate parametric
equalizers per zone, for the ultimate
in room-acoustics problem solving
(or problem creating). Each para-
metric EQ has adjustments for the
frequency, width, and the level boost
or cut. For an example of their use, if a
certain frequency sets all the dentures
rattling in an old folk’s home, a
narrow-width filter can be tried at the
denture-rattling-onset-frequency, with
a cut in the level.
Signal Processing Tab


