DPX16: Instructions for Basic Operation and Installation
Page 5
G
ETTING
S
TARTED
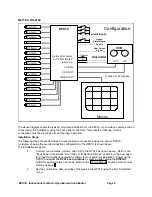
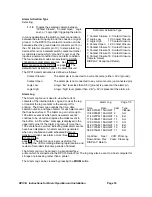
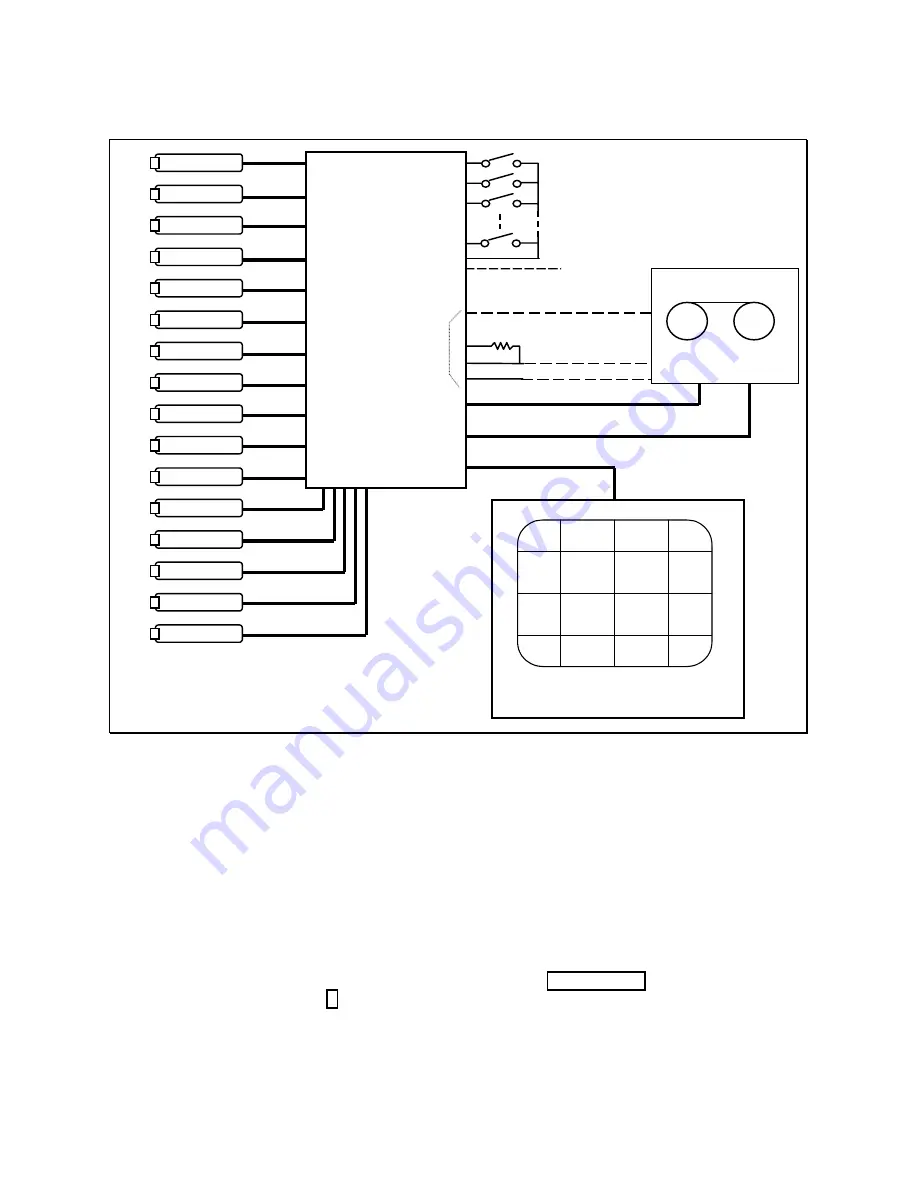
The above diagram shows the typical 16-camera installation for the DPX16. Up to sixteen cameras can be
connected to the multiplexer using the back panel connectors. Note that the VCR and monitor
connections must be as shown above for proper operation.
Installation Steps
The following steps should be followed to ensure proper connection and set up of your DPX16.
A diagram showing the overall connection configuration of the DPX16 is shown above.
The installation steps are:
1.
Connect your cameras, monitor, and VCR to the DPX16 as shown above. Refer to the
“Back Panel Connections” and “Video Termination Switches” sections on the next page
for proper connections and switch settings for your particular installation. Power up the
DPX16 and enter the DPX16 set up menus by pressing and holding the DISPLAY
button for approximately 3 seconds. Refer to the “Set Up Menus” section of the manual
starting on page 9.
2.
Set the current time, date, and day of the week in the DPX16 using the “Set Time/Date”
menu.
Alarm Inputs
Camera
Camera
Camera
10K
(Optional)
Alarm Out
DPX16
Configuration
VIDEO OUT
VCR-IN
Camera
Camera
Camera
Camera
Camera
VCR OUT
VCR
OUT
IN
Optional for alarm
or VCR activated
recording
Monitor
Cam Switch
Signal
Camera
Camera
Camera
Camera
Camera
Camera
Camera
Camera
S-Video or Composite
Freeze/
Alarm Master
Enable


