19
L. Install cables
1.
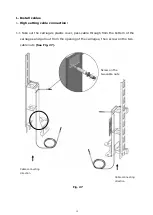
High setting cable connection:
1.1 Take out the
carriage’s
plastic cover, pass cable through from the bottom of the
carriages and pull out from the opening of the carriages, then screw on the two
cable nuts
(See Fig. 27).
Cable connecting
direction
Cable connecting
direction
Fig. 27
Screw on the
two cable nuts
Содержание Atlas PV-10HPX
Страница 1: ...1 Model PV10PX Revised 05 25 2021 ...
Страница 10: ...10 D Install parts of extension columns See Fig 16 Fig 16 24 26 20 42 25 37 41 ...
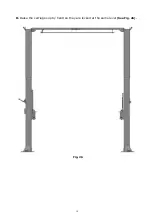
Страница 18: ...18 K Raise the carriages up by hand so they are locked at the same level See Fig 26 Fig 26 ...
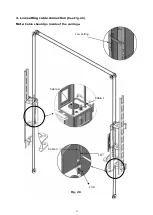
Страница 20: ...20 1 2 Connecting cable for high setting See Fig 28 Cable 1 Cable 2 Cable 1 High setting Fig 28 ...
Страница 22: ...22 Install power unit See Fig 30 Fig 30 ...
Страница 30: ...30 IV EXPLODED VIEW Model 211SAC Fig 43 ...
Страница 38: ...38 4 5 POWER UNIT EXPLODED VIEW 220V 60Hz Single Phase Fig 48 ...


