


Inputs can have customized labels and these labels appear on ATEM advanced panels and on
the multi view. Long and short labels need to be entered.
A short 4 character name is used to identify the video input on the source names display of the
software control panel. The longer names support up to 20 characters and are displayed in
various dropdown source selection boxes on the software control panel, the multi view
windows on screen labels and on the advanced panel.
To change an input name, click in the text field, enter the text and select set. The input name
will be updated on the multi view, software control panel and advanced panel if one is
connected. It’s a very good idea to change both the short and long labels at the same time,
so they match. For example Camera 1 would be entered in as a long label and CAM1 as the
short label.
HyperDeck Settings
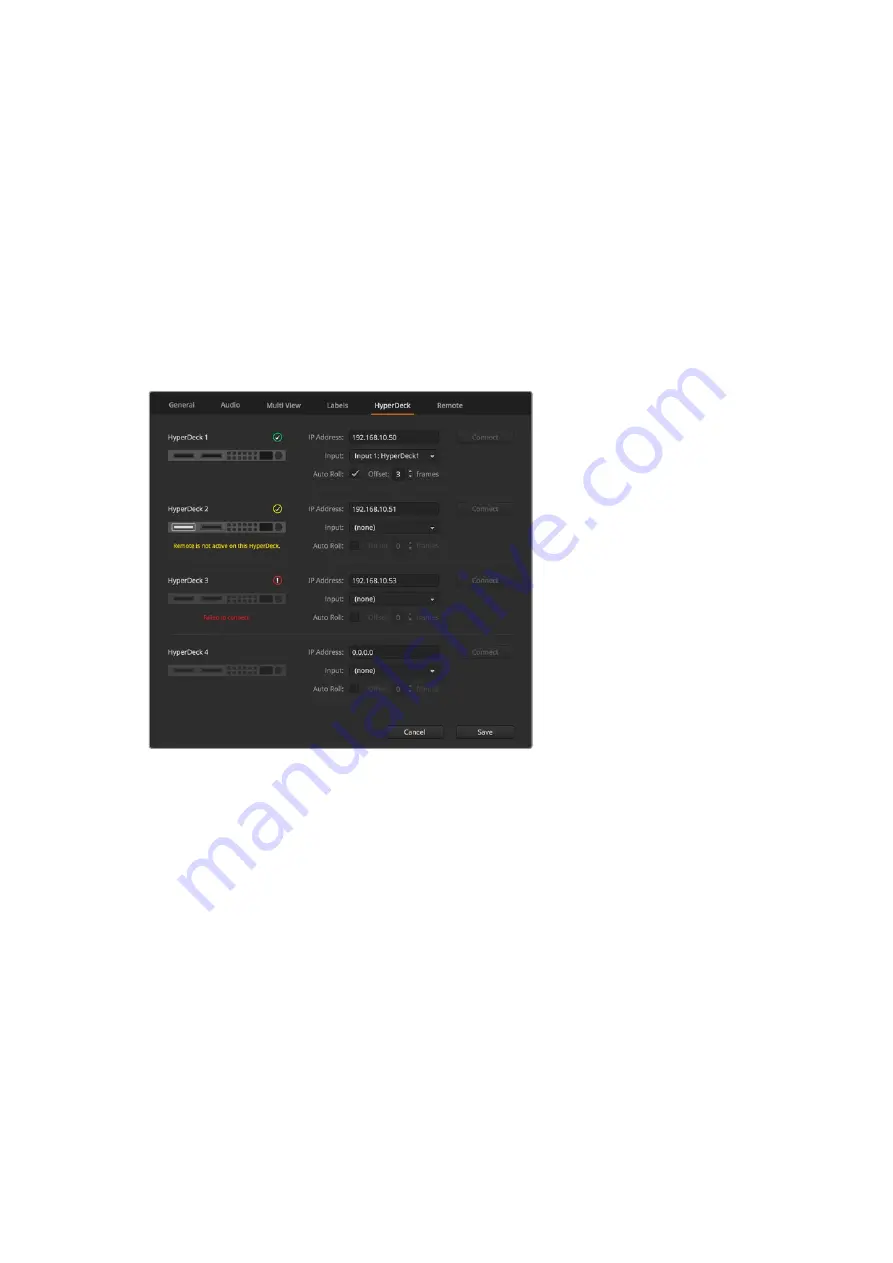
HyperDeck settings
Connect up to 4 Blackmagic HyperDeck Studio disk recorders and control them using ATEM
Software Control. When connecting HyperDecks, use these settings to configure the IP
Address, select the inputs your HyperDecks are connected to, turn the auto roll feature for each
deck on or off and set their frame offset settings so they can switch cleanly.
Status indicators appear above and below each deck so you can see if they are successfully
connected and if their remote buttons are active.
For detailed information on setting up Blackmagic HyperDecks with your ATEM switcher and
setting the ‘HyperDeck’ configuration settings, refer to the ‘HyperDeck Control’ section of
this manual.
Remote Settings
If your switcher has an RS-422 port, you can select how it is used with the ‘remote’ checkbox.
The options are disabled, VISCA and GVG, where GVG sets it to use GVG100, a common
legacy interface for communicating with equipment such as linear editing suites.
71
Using ATEM Software Control


