background image

ASUS RS160-S5/PX4

7-15

7.3 

LAN driver installation

This section provides instructions on how to install the Intel

®

 Gigabit LAN controller 

drivers on a Windows

®

 Server OS.

To install the LAN controller drivers:

1.  Restart the computer, and then log on with Administrator privileges.

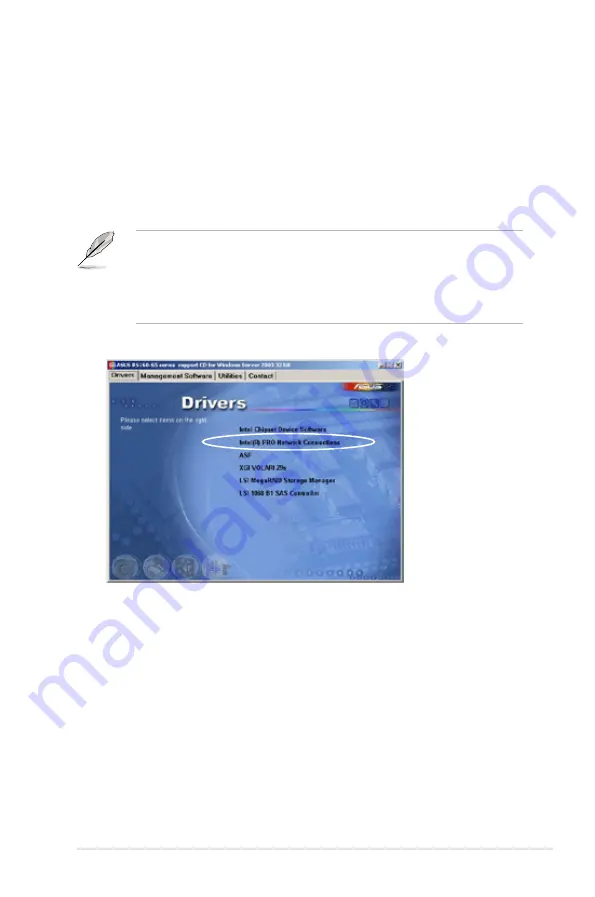
2.  Insert the system support CD to the optical drive. The CD automatically 

displays the Drivers menu if Autorun is enabled in your computer.

•  Windows

®

 automatically detects the LAN controllers and displays a New 

Hardware Found window. Click 

Cancel

 to close this window.

•  If Autorun is NOT enabled in your computer, browse the contents of the 

support CD to locate the file ASSETUP.EXE from the BIN folder. Double-

click the ASSETUP.EXE to run the CD.

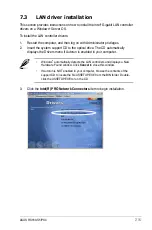
3.  Click the 

Intel(R) PRO Network Connectors

 item to begin installation.

Содержание RS160-E4 - 0 MB RAM

Страница 1: ...1U Rackmount Server RS160 S5 PX4 User Guide ...

Страница 2: ...tion of business and the like even if ASUS has been advised of the possibility of such damages arising from any defect or error in this manual or product Specifications and information contained in this manual ae furnished for informational use only and are subject to change at any time without notice and should not be construed as a commitment by ASUS ASUS assumes no responsibility or liability f...

Страница 3: ...Chassis cover 2 2 2 1 1 Removing the front cover 2 2 2 1 2 Removing the rear cover 2 4 2 1 3 Installing the top cover 2 5 2 2 Central Processing Unit CPU 2 6 2 2 1 Installing the CPU 2 6 2 2 2 Installing the CPU heatsink and airduct 2 9 2 3 System memory 2 10 2 3 1 Overview 2 10 2 3 2 Memory mirroring and sparing technology 2 12 2 3 3 Installing a DIMM 2 15 2 3 4 Removing a DIMM 2 15 2 4 Hard disk...

Страница 4: ...oard Info 4 1 Motherboard layout 4 2 4 2 Jumpers 4 4 4 3 Internal connectors 4 8 Chapter 5 BIOS setup 5 1 Managing and updating your BIOS 5 2 5 1 1 Creating a bootable floppy disk 5 2 5 1 2 AFUDOS utility 5 3 5 1 3 ASUS CrashFree BIOS 3 utility 5 6 5 2 BIOS setup program 5 7 5 2 1 BIOS menu screen 5 8 5 2 2 Menu bar 5 8 5 2 3 Navigation keys 5 8 5 2 4 Menu items 5 9 5 2 5 Sub menu items 5 9 5 2 6 ...

Страница 5: ...1 5 7 Boot menu 5 33 5 7 1 Boot Device Priority 5 33 5 7 2 Boot Settings Configuration 5 34 5 8 Exit menu 5 35 Chapter 6 RAID configuration 6 1 Setting up RAID 6 2 6 1 1 RAID definitions 6 2 6 1 2 Installing hard disk drives 6 2 6 2 LSI Corporation MPT Setup Utility 6 3 6 2 1 Integrated Mirroring IM volume 6 3 6 2 2 Integrated Mirroring Enhanced IME volume 6 7 6 2 3 Integrated Striping IS volume 6...

Страница 6: ...iver installation 7 15 7 4 VGA driver installation 7 19 7 5 Management applications and utilities installation 7 21 7 5 1 Running the support CD 7 21 7 5 2 Drivers menu 7 21 7 5 3 Management Software menu 7 22 7 5 4 Utilities menu 7 22 7 5 5 Contact information 7 22 ...

Страница 7: ... harmful interference to radio or television reception which can be determined by turning the equipment off and on the user is encouraged to try to correct the interference by one or more of the following measures Reorient or relocate the receiving antenna Increase the separation between the equipment and receiver Connect the equipment to an outlet on a circuit different from that to which the rec...

Страница 8: ...server carefully read all the manuals included with the server package Before using the server make sure all cables are correctly connected and the power cables are not damaged If any damage is detected contact your dealer as soon as possible To avoid short circuits keep paper clips screws and staples away from connectors slots sockets and circuitry Avoid dust humidity and temperature extremes Pla...

Страница 9: ...ions This chapter describes how to install optional components into the barebone server 4 Chapter 4 Motherboard information This chapter gives information about the motherboard that comes with the server This chapter includes the motherboard layout jumper settings and connector locations 5 Chapter 5 BIOS information This chapter tells how to change system settings through the BIOS Setup menus and ...

Страница 10: ... emphasize a word or a phrase Key Keys enclosed in the less than and greater than sign means that you must press the enclosed key Example Enter means that you must press the Enter or Return key Key1 Key2 Key3 If you must press two or more keys simultaneously the key names are linked with a plus sign Example Ctrl Alt D Command Means that you must type the command exactly as shown then supply the re...

Страница 11: ...1 ASUS RS160 S5 PX4 This chapter describes the general features of the chassis kit It includes sections on front panel and rear panel specifications Chapter 1 Product introduction ...

Страница 12: ...he system does not include a USB floppy drive You may have to use a USB floppy drive when creating a SAS SATA RAID driver disk Refer to Chapter 7 for details Model Name RS160 S5 PX4 Chassis ASUS R11 1U Rackmount Chassis Motherboard ASUS DSEB DG SAS RS160 S5 Server Board Component 1 x 650W Single Power Supply 1 x SATAII SAS Backplane ASUS BP4LX R10 with 1 x 1 port mini SAS to 4 port SATA cable 4 x ...

Страница 13: ... Size 512MB 1GB 2GB and 4GB Expansion Slots Total PCI PCI X PCI E Slots 1 Slot Type 1 x PCIe x16 slot Full Height Half Length Additional Slot 1 1 x SO DIMM socket for optional ASMB3 SOL PLUS Storage SAS Controller LSI 1068 PCI X 8 port SAS controller LSI Integrated RAID 0 1 1E support HDD Bays I internal A or S will be hot swappable 4 x Hot swap SAS SATA II HDD Bays Networking LAN Intel 6321 Intel...

Страница 14: ... Management Solution Out of Band Remote Hardware ASMB3 SOL PLUS Optional Software ASUS ASWM 2 0 Dimension HH x WW x DD 686mm x 444mm x 43 4mm Net Weight Kg CPU DRAM HDD not inclu ded 15 Kg Power Supply 650W Single Power Supply Environment Operation temperature 10 C 35 C Non operation temperature 40 C 70 C Non operation humidity 20 90 Non condensing ...

Страница 15: ...ower socket and rear fans The middle part includes the I O shield with openings for the rear panel connectors on the motherboard The ports for the PS 2 keyboard PS 2 mouse USB VGA serial port and Gigabit LAN do not appear on the rear panel if motherboard is not present Hot swap HDD bays Optical drive Rack screw Rack screw USB ports LAN2 LED HDD Access LED LAN1 LED Message LED Power button Power LE...

Страница 16: ...US CD DVD ROMs fit the optical drive bay 1 PCI Express x16 riser card bracket 2 Power fans 3 ASUS DSEB DG SAS RS160 S5 server board 4 Power supply 5 System fans 6 SATA II SAS backplane ASUS BP4LX R10 7 Hot swap HDD tray 1 Connects to SATA1 port Port 0 8 Hot swap HDD tray 2 Connects to SATA1 port Port 1 9 Hot swap HDD tray 3 Connects to SATA1 port Port 2 10 Hot swap HDD tray 4 Connects to SATA1 por...

Страница 17: ...ng System is normal no incoming event ASWM indicates a HW monitor event Location LED OFF ON Normal status Location switch is pressed Press the location switch again to turn off LAN LEDs OFF Blinking ON No LAN connection LAN is transmitting or receiving data LAN connection is present ACT LINK LED SPEED LED Status Description Status Description OFF No link OFF 10 Mbps connection GREEN Linked ORANGE ...

Страница 18: ... SATAII SAS HDD power ON RED ON SATAII SAS HDD not present RED Blinking SAS only 1 HDD has failed and should be swapped immediately slow blinking 2 times sec 2 RAID rebuilding fast blinking 10 times sec HDD Activity LED GREEN Blinking Read write data from into the SATAII SAS HDD HDD Status LED HDD Activity LED ...

Страница 19: ...ASUS RS160 S5 PX4 2 This chapter lists the hardware setup procedures that you have to perform when installing or removing system components Chapter 2 Hardware setup ...

Страница 20: ...Firmly hold the front cover and slide it toward the front panel for about half an inch until it is disengaged from the chassis 2 Loosen the two thumbscrews on the rear panel to release the rear cover from the chassis 4 Released a drive tray by pushing the spring lock to the right Then firmly hold the tray level and pull all the drive trays out of the bay Thumbscrews ...

Страница 21: ...ivity LED Locator LED cable and USB cable from the connectors under the front cover 7 Disconnect the SATA cable and the power plug from the connectors on the back of the drive 8 Leave the front cover aside 5 Then push the front cover as arrow show ...

Страница 22: ...toward the rear panel for about half an inch until it is disengaged from the chassis 3 Lift the cover from the chassis 1 2 inch distance 1 Loosen the two thumbscrews on the rear panel to release the top cover from the chassis 2 1 2 Removing the rear cover Thumbscrews ...

Страница 23: ...t half an inch from the front panel 3 Slide the cover toward the front until it snaps in place 4 Tighten the thumbscrews on the rear to secure the cover 2 Make sure that the side markings on the cover two on each side are aligned to the grooves on the chassis Grooves Side markings 2 1 3 Installing the top cover Thumbscrews ...

Страница 24: ...if you see any damage to the PnP cap socket contacts motherboard components ASUS will shoulder the cost of repair only if the damage is shipment transit related Keep the cap after installing the motherboard ASUS will process Return Merchandise Authorization RMA requests only if the motherboard comes with the cap on the LGA771 socket The product warranty does not cover damage to the socket contacts...

Страница 25: ...g sure that the gold triangle is on the bottom left corner of the socket The socket alignment key should fit into the CPU notch Alignment key Gold triangle mark Load plate A B 2 Press the load lever with your thumb A then move it to the left B until it is released from the retention tab Retention tab Load lever This side of the socket box should face you PnP cap A B To prevent damage to the socket...

Страница 26: ... fits in only one correct orientation DO NOT force the CPU into the socket to prevent bending the connectors on the socket and damaging the CPU 6 Close the load plate A then push the load lever B until it snaps into the retention tab A B ...

Страница 27: ... 2 Twist each of the four screws with a Philips cross screwdriver just enough to attach the heatsink to the motherboard When the four screws are attached tighten them one by one to completely secure the heatsink 2 2 2 Installing the CPU heatsink and airduct To install the CPU heatsink 1 Carefully place the heatsink on top of the installed CPU ...

Страница 28: ...DDR2 DIMMs on an FB DIMM socket Note that an FB DIMM socket has an Advanced Memory Buffer AMB chip that allows memory to CPU connection at gigabit speed The figure illustrates the location of the FB DIMM sockets DSEB DG SAS RS160 S5 240 pin FB DIMM sockets DIMM_11 DIMM_10 112 Pins 128 Pins DIMM_21 DIMM_20 DIMM_31 DIMM_30 DIMM_01 DIMM_00 Rank population DIMM 21 DIMM 20 DIMM 11 DIMM 10 DIMM 01 DIMM ...

Страница 29: ...s to use Memory architecture 1 single DIMM DIMM_00 single channel 2 one pair DIMM_00 DIMM_10 dual channel 4 two pairs DIMM_00 DIMM_10 DIMM_20 DIMM_30 Quadri channel 6 three pairs DIMM_00 DIMM_10 DIMM_20 DIMM_30 DIMM_01 DIMM_11 Quadri channel 8 four pairs DIMM_00 DIMM_10 DIMM_20 DIMM_30 DIMM_01 DIMM_11 DIMM_21 DIMM_31 Quadri channel ...

Страница 30: ...a slot position must match each other but aren t required to match adjacent slot positions And the total memories size will be the half of all installed memories The below two memory configurations were required to operate in mirrored mode 1 Configuration 1 Mirroring Four memories population DIMM 00 Slot 0 Channel 0 MCH Branch 0 DIMM 01 Slot 1 Channel 0 DIMM 10 Slot 0 Channel 1 DIMM 11 Slot 1 Chan...

Страница 31: ...e failing DIMM rank is disabled and the spared DIMM rank will be used in its place Refer to 4 4 2 Chipset Configuration and configure the options of Branch Specific Sparing to enable the memory sparing functions And the default BIOS setting is disabled Each branch contains its own sparing engine and can be enabled or disabled separately This motherboard does not support rank sparing across branche...

Страница 32: ...2 Ranks Rank 0 512 MB Rank 1 512 MB Rank 0 512 MB Rank 1 512 MB Sparing Memory space 1024 MB 1024 MB DIMM_01 1024MB 2 Ranks DIMM_11 1024MB 2 Ranks Rank 0 1024 MB Rank 1 1024 MB Rank 0 1024 MB Rank 1 1024 MB Sparing Memory space 1024 MB 1024 MB Total Memory 4096 MB Two DIMM per channel two ranks ...

Страница 33: ...into the socket until the retaining clips snap back in place and the DIMM is properly seated A FB DIMM is keyed with a notch so that it fits in only one direction DO NOT force a DIMM into a socket to avoid damaging the DIMM The FB DIMM sockets do not support DDR2 DIMMs DO NOT install DDR2 DIMMs to the FB DIMM sockets 2 3 4 Removing a DIMM To remove a DIMM 1 Simultaneously press the retaining clips...

Страница 34: ...lease a drive tray by pushing the spring lock to the right then pulling the tray lever outward The drive tray ejects slightly after you pull out the lever 2 Firmly hold the tray lever and pull the drive tray out of the bay 3 Take note of the drive tray holes Each side has three holes to fit different types of hard disk drives Use two screws on each side to secure the hard disk drive 4 Place a SATA...

Страница 35: ...tray is correctly placed when its front edge aligns with the bay edge 7 Repeat steps 1 to 6 if you wish to install a second SATAII SAS drive When installed the SATAII SAS connector on the drive connects to the SATAII SAS interface on the backplane 8 Connect the bundled SATAII SAS cables to the connectors on the SATAII SAS backplane Refer to section 2 7 SATAII SAS backplane cabling for information ...

Страница 36: ...racket You need to remove the bracket if you want to install PCI Express x16 expansion cards To install a PCI Express x16 card 3 Place the riser card bracket on a flat and stable surface then remove the screw from the slot bay 2 Firmly hold the riser card bracket and then pull it up to detach it from the PCI Express x16 slot on the motherboard 1 Unscrew the riser card bracket ...

Страница 37: ...of the holes on the riser card bay The two pegs on the riser card bracket should match these holes to ensure that the bracket is properly in place Pegs on the riser card bracket 2 Align the riser card bracket with the expansion card to the PCI Express x16 slot on the motherboard 3 Press the riser card bracket until the golden connectors completely fit the slot and the bracket aligns with the rear ...

Страница 38: ...Chapter 2 Hardware setup 2 20 4 Secure the riser card bracket with a screw 5 Connect the cable s to the card if applicable ...

Страница 39: ...vers for the expansion card These IRQs are usually available for ISA or PCI devices Standard Interrupt assignments IRQ Priority Standard function 0 1 System Timer 1 2 Keyboard Controller 2 Programmable Interrupt 3 11 Communications Port COM2 4 12 Communications Port COM1 5 13 6 14 Floppy Disk Controller 7 15 8 3 System CMOS Real Time Clock 9 4 ACPI Mode when used 10 5 IRQ Holder for PCI Steering 1...

Страница 40: ...to motherboard 3 SAS backplane power connector from power supply 4 System fan connectors from motherboard FRNT_FAN1 3 and CPU_FAN1 2 to system fans 5 SAS connectors from motherboard to SAS backplane board 6 Panel connector from motherboard to front I O board 7 USB connector from motherboard to front I O board 8 Auxiliary panel connector from motherboard to front I O board 1 2 3 5 4 6 2 4 4 7 8 ...

Страница 41: ...nnect the SAS HDDs Connects a 8 pin plug from power supply Connects the SATA cable from SAS1 port on the MB Connects the SATA cable from SAS1 port on the MB Connects the SATA cable from SAS1 port on the MB Connects the SAS cable from SAS1 port on the MB ...

Страница 42: ...ve components This section tells how to remove the following components 1 System fans 2 Power supply module 3 Optical drive 4 Motherboard 2 8 1 System fans The system comes with four units of 40 mm 56 mm 15500 rpm fans two unit of 40 mm 28 mm 15500 rpm fans Refer to the illustration below for location of the system fans 40 mm x 28 mm system fan 40 mm x 56 mm system fans 40 mm x 28 mm system fan ...

Страница 43: ...the side system fans 1 Disconnect the system fan cable from the connector on the motherboard 2 Lift the fan then set aside To uninstall the center system fans 1 Disconnect the system fan cables from the fan connectors on the motherboard You may need to remove the riser card bracket for easier system fan cable disconnection ...

Страница 44: ...e should point towards the rear panel 2 Connect the system fan cable to the fan connector on the the motherboard To reinstall the center system fans 1 Insert the fan to the fan cage The airflow directional arrow on the fan side should point towards the system rear panel 2 Connect the system fan cable to the fan connector on the motherboard ...

Страница 45: ... the motherboard and other system devices 4 Slide the power supply forward for about half an inch then carefully lift it out from the chassis 3 From the rear panel remove the two screws that secure the power supply from the chassis 2 Use a Phillips cross screwdriver to remove the screws that secure the front end of the power supply ...

Страница 46: ... that secure the optical drive to its metal bracket 2 Use a Phillips screwdriver cross to remove the three screws that secure the drive 3 Use a Phillips screw driver cross to remove the two screws that secure the backplane with the drive Then remove the backplane from the drive To reinstall the optical drive follow the instructions in the previous chapter in a reverse order When installing a new o...

Страница 47: ...om the motherboard including the CPU and heatsink riser card bracket and DDR DIMMs Refer to the corresponding sections for instructions on removing these components 3 Use a Philips cross screwdriver to remove the screws that secure the motherboard to the base of the chassis Refer to the illustration below for the location of the motherboard screws 4 Carefully lift the motherboard out of the chassi...

Страница 48: ...the motherboard until the rear panel ports fit in place 3 Use a Phillips cross screwdriver to secure the motherboard with nine 9 screws in the holes as shown in the illustration in the previous section 4 Reconnect all the required cables to the motherboard See section 2 6 Cable connections for details 5 Reinstall all the devices that you have previously removed ...

Страница 49: ...ASUS RS160 S5 PX4 2 This chapter describes how to install the optional components and devices into the barebone server Chapter 3 Installation options ...

Страница 50: ... and bolt type screws 3 2 Rack rails assembly To assemble the rack rails 1 Determine the depth of the rack where you wish to install the system 2 Match one long and one short rail to your desired length and fix them together using four 4 pairs of nuts and bolts 3 Repeat step 2 to assemble the other rail pair Nuts Bolts Left pair Right pair Front ends Rear ends Nuts on outer side Bolts on inner sid...

Страница 51: ...space where you attached the rail 6 Remove the screws from the rear 1U space and align the rear end holes 7 Drive in two screws on the outer holes to secure the rear end 8 From the rack front find the corresponding 1U space for the second rail pair 9 Repeat steps 2 to 7 to attach the second rail pair When properly installed the rack rails appear as shown 3 Align the front end holes of a rack rail ...

Страница 52: ...both sides and insert the rear panel side to the front end of the rack rail then carefully push the server all the way to the back until the front panel fits the front end of the rack and the rack screws on the server match the middle hole on the rack 2 Tighten the two rack screws to secure the server to the rack Rack screw ...

Страница 53: ...ASUS RS160 S5 PX4 Chapter 4 Motherboard info This chapter includes the motherboard layout and brief descriptions of the jumpers and internal connectors ...

Страница 54: ...ATA5 SATA6 SAS2 SAS1 CLRTC1 RECOVERY1 FRNT_FAN1 FRNT_FAN2 VGA_EN1 LAN_EN1 Intel 82573L SB_PWR1 PCIX5 LAN34 ATXPWR1 DDR FB DIMM_31 64 72 bit 240 pin module DDR FB DIMM_30 64 72 bit 240 pin module PCI2 PCIE3 SATA3 SATA4 SATA1 SATA2 Intel 82573L Intel 82563EB XGI Volari Z9s FRNT_FAN3 FRNT_FAN4 FAN_SEL1 FAN_SEL2 LAN_EN4 DDR FB DIMM_01 64 72 bit 240 pin module DDR FB DIMM_00 64 72 bit 240 pin module DD...

Страница 55: ...1 4 8 2 Serial ATA connectors 7 pin SATA1 6 4 8 3 IDE connector 40 1 pin PRI_IDE1 4 9 4 SAS connectors 4 10 5 SAS LSI1068 ports LED connector 18 1 pin SASLED1 4 11 6 Hard disk activity LED connector 4 pin HDLED1 4 11 7 USB connectors 10 1 pin USB34 4 12 8 CPU and system fan connectors 4 pin CPU_FAN1 2 REAR_FAN1 2 FRNT_FAN1 2 3 4 4 12 9 Serial port connectors 10 1 pin COM2 4 13 10 Power supply SMBu...

Страница 56: ...t position Removing the cap will cause system boot failure If the steps above do not help remove the onboard battery and move the jumper again to clear the CMOS RTC RAM data After the CMOS clearance reinstall the battery DSEB DG Series SAS RS160 S5 Clear RTC RAM CLRTC1 Normal Default Clear CMOS 1 2 2 3 To erase the RTC RAM 1 Turn OFF the computer and unplug the power cord 2 Move the jumper cap fro...

Страница 57: ...N_EN4 These jumpers allow you to enable or disable the onboard Intel 82563EB Gigabit LAN controller and the onboard Intel 82573L Gigabit LAN controllers Set to pins 1 2 to activate the Gigabit LAN feature DSEB DG SAS RS160 S5 VGA setting VGA_EN1 1 2 2 3 Enable Default Disable DSEB DG SAS RS160 S5 LAN setting LAN_EN1 1 2 2 3 Enable Default Disable 1 2 2 3 Enable Default Disable LAN_EN3 1 2 2 3 Enab...

Страница 58: ...d storage setting 3 pin SAS_EN1 This jumper allows you to enable or disable the onboard LSI1068 SAS controller Set the jumper to pins 1 2 to enable the SAS function default If you use a 4 pin fan but set the jumper to pin 2 3 the fan you installed may not work If you use a 3 pin fan but set the jumper for a 4 pin fan the fan control will not work and the fan you installed will always run at full s...

Страница 59: ...Prepare a floppy disk that contains the original or latest BIOS for the motherboard DSEB DG ROM and the AFUDOS EXE utility 2 Set the jumper to pins 2 3 3 Insert the floppy disk then turn on the system to update the BIOS 4 Shut down the system 5 Set the jumper back to pins 1 2 6 Turn on the system DSEB DG SAS RS160 S5 BIOS recovery setting RECOVERY1 Default Normal BIOS Recovery 1 2 2 3 ...

Страница 60: ... on the floppy ribbon cable to PIN 1 FLOPPY1 DSEB DG SAS RS160 S5 Floppy disk drive connector PIN1 2 Serial ATA connectors 7 pin SATA1 SATA2 SATA3 SATA4 SATA5 SATA6 These connectors are for the Serial ATA signal cables for Serial ATA hard disk drives SATA2 SATA1 DSEB DG SAS RS160 S5 SATA connectors SATA4 SATA3 SATA6 SATA5 GND RSATA_TXP1 RSATA_TXN1 GND RSATA_RXN1 RSATA_RXP1 GND GND RSATA_TXP2 RSATA...

Страница 61: ...ay connector for an Ultra DMA 100 66 IDE master device hard disk drive If you install two hard disk drives you must configure the second drive as a slave device by setting its jumper accordingly Refer to the hard disk documentation for the jumper settings Pin 20 on the IDE connector is removed to match the covered hole on the Ultra DMA cable connector This prevents incorrect insertion when you con...

Страница 62: ...I and Serial ATA SATA Each connector supports one device DSEB DG SAS RS160 S5 MINI SAS connectors To connect the SAS cable Plug in the SAS cable to the SAS connector until the cable lock snaps in place 1 2 To disconnect the SAS cable 1 With your thumb push down the cable lock to release 2 While still keeping your thumb s grip on the cable lock carefully pull away the cable from the connector ...

Страница 63: ...LED1 ACT_LED0 FLT_LED0 PIN1 ACT_LED1 FLT_LED1 ACT_LED2 FLT_LED2 ACT_LED3 FLT_LED3 ACT_LED4 GND ACT_LED5 FLT_LED4 FLT_LED5 ACT_LED6 FLT_LED6 ACT_LED7 FLT_LED7 6 Hard disk activity LED connector 4 pin HDLED1 This connector is used to connect to a hard disk drive active LED connector on the SAS or RAID card DSEB DG SAS RS160 S5 storage card activity LED connector HDLED1 PIN1 ADD_IN_CARD NC NC ADD_IN_...

Страница 64: ...the fan cables to the fan connectors on the motherboard making sure that the black wire of each cable matches the ground pin of the connector DO NOT forget to connect the fan cables to the fan connectors Insufficient air flow inside the system may damage the motherboard components These are not jumpers DO NOT place jumper caps on the fan connectors DSEB DG SAS RS160 S5 Fan connectors CPU_FAN1 CPU_...

Страница 65: ...opening at the back of the system chassis The serial port module is purchased separately DSEB DG SAS RS160 S5 Serial port connectors PIN 1 COM2 10 Power supply SMBus connector 5 pin PSUSMB1 This connector is for the power supply SMB cable if your power supply supports the SMBus function DSEB DG SAS RS160 S5 Power supply SMBus connector PSUSMB1 3 3V Remote Sense GND NC I2C_7_DATA I2C_7_CLK ...

Страница 66: ...o connect the 24 8 4 pin power plugs otherwise the system will not boot up Use of a PSU with a higher power output is recommended when configuring a system with more power consuming devices The system may become unstable or may not boot up if the power is inadequate You must install a PSU with a higher power rating if you intend to install additional devices 12V DC GND 12V DC GND DSEB DG SAS RS160...

Страница 67: ...system warning speaker The speaker allows you to hear system beeps and warnings 4 Hard disk drive activity LED Red 2 pin IDE_LED This 2 pin connector is for the HDD Activity LED Connect the HDD Activity LED cable to this connector The IDE LED lights up or flashes when data is read from or written to the HDD 5 ATX power button soft off button Green 2 pin PWRSW This connector is for the system power...

Страница 68: ...or triggers and sends a high level signal to these leads to record a chassis intrusion event The default setting is short CASEOPEN and GND pin by jumper cap to disable the function 4 Locator LED 2 pin LOCATORLED1 and 2 pin LOCATORLED2 These leads are for the locator LED1 and LED2 on the front panel Connect the Locator LED cables to these 2 pin connector The LEDs will light up when the Locator butt...

Страница 69: ...ASUS RS160 S5 PX4 5 1 Chapter 5 BIOS setup This chapter tells how to change the system settings through the BIOS Setup menus Detailed descriptions of the BIOS parameters are also provided ...

Страница 70: ... disk in case you need to restore the BIOS in the future Copy the original motherboard BIOS using the ASUS Update or AFUDOS utilities 5 1 1 Creating a bootable floppy disk 1 Do either one of the following to create a bootable floppy disk DOS environment a Insert a 1 44MB floppy disk into the drive b At the DOS prompt type format A S then press Enter Windows environment a Insert a 1 44 MB floppy di...

Страница 71: ...n displays may not be the same as shown 1 Copy the AFUDOS utility afudos exe from the motherboard support CD to the bootable floppy disk you created earlier 2 Boot the system in DOS mode then at the prompt type afudos o filename where the filename is any user assigned filename not more than eight alphanumeric characters for the main filename and three alphanumeric characters for the extension name...

Страница 72: ...event system boot failure Updating the BIOS file To update the BIOS file using the AFUDOS utility 1 Visit the ASUS website www asus com and download the latest BIOS file for the motherboard Save the BIOS file to a bootable floppy disk Write the BIOS filename on a piece of paper You need to type the exact BIOS filename at the DOS prompt 2 Copy the AFUDOS utility afudos exe from the motherboard supp...

Страница 73: ...FAT16 or 32 system file before updating the BIOS To format the USB flash drive to a FAT32 16 system file 1 Insert the USB flash drive to an available USB port 2 From the Windows desktop click Start then select My Computer 3 Right click the USB flash drive icon then select Format from the menu 4 From the File system field select FAT32 or FAT16 then click the Start button To update the BIOS file 1 C...

Страница 74: ...he original or updated BIOS file to the floppy disk drive 3 The utility will automatically recover the BIOS It resets the system when the BIOS recovery finished Recovering the BIOS from a USB flash drive To recover the BIOS from a USB flash drive 1 Remove any floppy disk from the floppy disk drive and turn the system 2 Insert the USB flash drive with the original or updated BIOS file to one USB po...

Страница 75: ...m Press Del during the Power On Self Test POST to enter the Setup utility otherwise POST continues with its test routines If you wish to enter Setup after POST restart the system by pressing Ctrl Alt Delete or by pressing the reset button on the system chassis You can also restart by turning the system off and then back on Do this last option only if the first two failed The Setup program is desig...

Страница 76: ... boot configuration Exit For selecting the exit options and loading default settings To select an item on the menu bar press the right or left arrow key on the keyboard until the desired item is highlighted 5 2 3 Navigation keys At the bottom right corner of a menu screen are the navigation keys for that particular menu Use the navigation keys to select items in the menu and change the settings 5 ...

Страница 77: ...e value of a field select it then press Enter to display a list of options Refer to 5 2 7 Pop up window 5 2 7 Pop up window Select a menu item then press Enter to display a pop up window with the configuration options for that item 5 2 8 Scroll bar A scroll bar appears on the right side of a menu screen when there are items that do not fit on the screen Press the Up Down arrow keys or Page Up Page...

Страница 78: ...ion 5 2 1 BIOS menu screen for information on the menu screen items and how to navigate through them V02 61 C Copyright 1985 2006 American Megatrends Inc BIOS SETUP UTILITY Main Advanced Server Security Boot Exit Use ENTER TAB or SHIFT TAB to select a field Use or to configure system Date System Date Tue 06 10 2008 System Time 11 07 30 Floppy A Disabled IDE Configuration Primary IDE Master Not Det...

Страница 79: ...orted by the Southbridge chip If you want to use the Serial ATA hard disk drives as Parallel ATA physical storage devices keep the default setting IDE If you want the Serial ATA hard disk drives to use the Advanced Host Controller Interface AHCI set this item to AHCI The AHCI allows the onboard storage driver to enable advanced Serial ATA features that increases storage performance on random workl...

Страница 80: ...MO drive Configuration options Not Installed Auto CD DVD ARMD LBA Large Mode Auto Enables or disables the LBA mode Setting to Auto enables the LBA mode if the device supports this mode and if the device was not previously formatted with LBA mode disabled Configuration options Disabled Auto V02 61 C Copyright 1985 2006 American Megatrends Inc BIOS SETUP UTILITY Main Primary IDE Master Device Hard D...

Страница 81: ...A2 MWDMA0 MWDMA1 MWDMA2 UDMA0 UDMA1 UDMA2 UDMA3 UDMA4 S M A R T Auto Sets the Smart Monitoring Analysis and Reporting Technology Configuration options Auto Disabled Enabled 32Bit Data Transfer Enabled Enables or disables 32 bit data transfer Configuration options Disabled Enabled 5 3 6 System Information This menu gives you an overview of the general system specifications The BIOS automatically de...

Страница 82: ...Ratio Actual 8 Max 8 Cache L1 64KB L2 4096KB ID uCode 06FBh 0B4h CPU2 Brand N A Speed N A Ratio N A Cache N A ID uCode N A Select Screen Select Item F1 General Help F10 Save and Exit ESC Exit V02 61 C Copyright 1985 2006 American Megatrends Inc BIOS SETUP UTILITY Main System Memory Information Type DDR2 533 Total Memory 512MB DIMM_00 512MB AMB Temperature 58 C DIMM_01 N A DIMM_10 N A DIMM_11 N A D...

Страница 83: ... sections may cause system to malfunction CPU Configuration Chipset Configuration PCI PnP Configuration USB Configuration Peripheral Configuration ACPI Configuration Power On Configuration Hardware Monitor Select Screen Select Item Enter Go to Sub Screen F1 General Help F10 Save and Exit ESC Exit V02 61 C Copyright 1985 2006 American Megatrends Inc BIOS SETUP UTILITY Advanced Configure advanced CP...

Страница 84: ...n Technology allows a hardware platform to run multiple operating systems separately and simultaneously enabling one system to virtually function as several systems Configuration options Disabled Enabled CPU TM function Enabled This function enables the overheated CPU to throttle the clock speed to cool down Configuration options Disabled Enabled Execute Disable Bit Capability Enabled Allows you t...

Страница 85: ...d Size Auto PCIE4 Slot Payload Size Auto Select Screen Select Item Change Option F1 General Help F10 Save and Exit ESC Exit Sequencing allocates address branch 0 then 1 Interleaving interleaves branch across branches Mirroring mirrors branch space between branches Single Channel forces single ch 0 MCH Branch Mode Branch Interleave Allows you to select the MCH branch mode Configuration options Bran...

Страница 86: ...ng 4 1 Allows you to select the Branch 0 Rank Interleave Configuration options 1 1 2 1 4 1 Branch 1 Enabled Allows you to enable or disable the Branch 1 If you set this item to Disabled Branch 0 and the following two items will be grayed out Configuration options Disabled Enabled Branch Specific Sparing Disabled Allows you to enable or disable the DIMM sparing feature Configuration options Disable...

Страница 87: ...56B PCIE4 Slot Payload Size Auto Allows you to set the maximum TLP payload size for the PCI Express port Configuration options Auto 128B 256B Intel VT d Configuration V02 61 C Copyright 1985 2006 American Megatrends Inc BIOS SETUP UTILITY Advanced Intel VT d Disabled Select Screen Select Item Change Option F1 General Help F10 Save and Exit ESC Exit Intel VT d function enable Intel VT d Disabled Al...

Страница 88: ...mmed Default will always be set to AUTO where bus speed will be decided based on the capabilities of the device on that bus ESB2 PCI X Hub Configuration PCI Bus Frequency Auto Allows you to select the PCI bus speed When you set this item to Auto the device will run at the speed based on its capability Configuration options Auto 33 Mhz PCI 66 Mhz PCI 66 Mhz PCI X M1 100 Mhz PCI X M1 133 Mhz PCI X M...

Страница 89: ... the Plug and Play devices not required for boot Configuration options No Yes Palette Snooping Disabled When set to Enabled the pallete snooping feature informs the PCI devices that an ISA graphics device is installed in the system so that the latter can function correctly Configuration options Disabled Enabled V02 61 C Copyright 1985 2006 American Megatrends Inc BIOS SETUP UTILITY Advanced PCI Pn...

Страница 90: ...et the PCI device latency timer register Configuration options Default 32 64 96 128 160 192 224 PCI Express Slot1 3 4 PCI Slot 2 PCI X Slot 5 6 Configuration BIOS SETUP UTILITY Advanced PCI Express Slot 1 Configuration Option ROM Scan Enabled Option ROM Priority Normal Bus Master Enabled Latency Timer Default Initialize device expansion ROM Option ROM Scan Enabled Allows you to enable or disable t...

Страница 91: ...ure the USB host controller Configuration options Disabled 2 USB ports 4 USB ports 6 USB ports The following item appears only when you set USB Function to 2 USB ports 4 USB ports or 6 USB ports Legacy USB Support Enabled Allows you to enable or disable support for legacy USB devices Setting to Auto allows the system to detect the presence of USB devices at startup If detected the USB controller l...

Страница 92: ...8 IRQ4 3E8 IRQ4 2E8 IRQ3 Serial Port2 Address 2F8 IRQ3 Allows you to select the Serial Port2 base address Configuration options Disabled 2F8 IRQ3 3E8 IRQ4 2E8 IRQ3 V02 61 C Copyright 1985 2006 American Megatrends Inc BIOS SETUP UTILITY Advanced Peripheral Configuration OnBoard Floppy Controller Enabled Serial Port1 Address 3F8 IRQ4 Serial Port2 Address 2F8 IRQ3 Select Screen Select Item Change Opt...

Страница 93: ...disables the ACPI MCFG support When this item is set to Enabled the BIOS will report the ACPI MCFG table Configuration options Disabled Enabled High Precision Event Timer Enabled Allows you to enable or disable the High Precision Event Timer Configuration options Disabled Enabled V02 61 C Copyright 1985 2006 American Megatrends Inc BIOS SETUP UTILITY Advanced ACPI Configuration ACPI Version Featur...

Страница 94: ... Resume On PME Disabled When set to Enabled the system enables the PME to generate a wake event while the computer is in Soft off mode Configuration options Disabled Enabled Resume On RTC Alarm Disabled Allows you to enable or disable RTC to generate a wake event When this item is set to Enabled the items RTC Alarm Date RTC Alarm Hour RTC Alarm Minute and RTC Alarm Second appear with set values Co...

Страница 95: ... operation Configuration options Disabled Smart Fan Smart Fan II V02 61 C Copyright 1985 2006 American Megatrends Inc System1 Target Temperature 70 System2 Target Temperature 70 VCORE1 Voltage 1 324V VCORE2 Voltage N A VTT Voltage 1 214V 1 5V Voltage 1 472V 1 8V Voltage 1 792V 3 3V Voltage 3 312V 5V Voltage 5 166V 5VSB Voltage 5 070V 12V Voltage 12 096V VBAT Voltage 3 040V Scroll down for more ite...

Страница 96: ...m1 2 Target Temperature 70 Allows you to set the system target temperature Configuration options 35 70 VCORE1 Voltage VCORE2 Voltage VTT Voltage 1 5V Voltage 1 8V Voltage 3 3V Voltage 5V Voltage 5VSB Voltage 12V Voltage VBAT Voltage The onboard hardware monitor automatically detects the voltage output through the onboard voltage regulators The VCORE2 item shows N A if no processor is installed in ...

Страница 97: ...rican Megatrends Inc BIOS SETUP UTILITY Main Advanced Server Security Boot Exit Remote Access Configuration Select Screen Select Item EnterGo to Sub Screen F1 General Help F10 Save and Exit ESC Exit Configure Remote Access V02 61 C Copyright 1985 2006 American Megatrends Inc BIOS SETUP UTILITY Server Configure Remote Access type and parameters Remote Access Enabled Serial port number COM2 Baudrate...

Страница 98: ...ol Hardware Allows you to select the flow control for console redirection Configuration options None Hardware Software Redirection After BIOS POST Disabled Sets the redirection mode after the BIOS Power On Self Test POST Some operating system may not work when set to Always Configuration options Disabled Boot Loader Always Terminal Type VT UTF83 Allows you to select the target terminal type Config...

Страница 99: ... after you successfully set your password To change the supervisor password follow the same steps as in setting a user password To clear the supervisor password select the Change Supervisor Password then press Enter The message Password Uninstalled appears If you forget your BIOS password you can clear it by erasing the CMOS Real Time Clock RTC RAM See section 4 2 Jumpers for information on how to...

Страница 100: ...ing the Setup utility When set to Always BIOS checks for user password both when accessing Setup and booting the system Configuration options Setup Always Password Lock Mode Disabled When set to Enabled the keyboard will be locked during the adapter card installation Configuration options Disabled Enabled Removable Device Boot Enabled When this item is set to Disabled the system cannot boot from t...

Страница 101: ...TY Main Advanced Server Security Boot Exit Boot Device Priority Boot Settings Configuration Select Screen Select Item EnterGo to Sub Screen F1 General Help F10 Save and Exit ESC Exit Specifies the Boot Device Priority sequence V02 61 C Copyright 1985 2006 American Megatrends Inc BIOS SETUP UTILITY Boot Boot Device Priority 1st Boot Device CD DVD PS TSSTcorp 2nd Boot Device Network IBA GE Slo 3rd B...

Страница 102: ...d Enabled Auto Parity Check Disabled Allows you to enable or disable the memory or paraity error check Configuration options Disabled Enabled POST Errors Enabled When set to Enabled the system waits for the F1 key to be pressed when error occurs Configuration options Disabled Enabled Setup Prompt Enabled When set to Enabled the system displays the message Press DEL to run Setup during POST Configu...

Страница 103: ...is turned off When you select this option a confirmation window appears Select Ok to save changes and exit If you attempt to exit the Setup program without saving your changes the program prompts you with a message asking if you want to save your changes before exiting Press Enter to save the changes while exiting Discard Changes and Exit Select this option only if you do not want to save the chan...

Страница 104: ...5 36 Chapter 5 BIOS setup ...

Страница 105: ...ASUS RS160 S5 PX4 6 1 This chapter provides instructions for setting up creating and configuring RAID sets using the available utilities Chapter 6 RAID configuration ...

Страница 106: ... complete copy of the data in the other drive This RAID configuration provides data protection and increases fault tolerance to the entire system Use two new drives or use an existing drive and a new drive for this setup The new drive must be of the same size or larger than the existing drive RAID 1 E Enhanced RAID 1 has a striped layout with each stripe unit having a secondary or alternate copy s...

Страница 107: ...he RAID setup screens shown in this section are for reference only and may not exactly match the items on your screen due to the controller version difference 6 2 1 Integrated Mirroring IM volume The Integrated Mirroring IM feature supports simultaneous mirrored volumes with two disks IM The IM feature supports hot swap capability so when a disk in an IM volume fails you can easily restore the vol...

Страница 108: ...Utility v6 18 01 00 2007 08 08 Adapter List Global Properties Adapter PCI PCI PCI PCI FW Revision Status Boot BUS Dev Fnc Slot Order SAS1064E 07 00 00 00 1 22 01 00 IR Enabled 0 Esc Exit Menu F1 Shift 1 Help Enter Select Item Enter Change Item LSI Corp Config Utility v6 18 01 00 2007 08 08 Adapter Properties SAS1064E Adapter SAS1064E PCI Slot 00 PCI Address Bus Dev Func 07 00 00 MPT Firmware Revis...

Страница 109: ...d as the Hot Spare for the RAID array The disk is already part of another array Esc Exit Menu F1 Shift 1 Help SPACE Select disk for array or hot spare C Create array LSI Corp Config Utility v6 18 01 00 2007 08 08 Create New Array SAS1064E Array Type IM Array Size MB Slot Device Identifier RAID Hot Drive Pred Size Num Disk Spr Status Fail MB 0 SEAGATE ST373454SS 0003 NO NO 35003 1 SEAGATE ST373454S...

Страница 110: ...rwrite any data and create the new IM array Esc Exit Menu F1 Shift 1 Help Space Select disk for array or hot spare C Create array LSI Corp Config Utility v6 18 01 00 2007 08 08 Create New Array SAS1064E M Keep existing data migrate to an IM array Synchronization of disk will occur D Overwrite existing data create a new IM array ALL DATA on ALL disk in the array will be DELETED No Synchronization p...

Страница 111: ...will be deleted Create IS Volume Create Integrated Striping array of 2 to 10 disks ALL Data on array disks will be deleted 3 The Create New Array screen shows the disks you can add to make up the IME volume Integrated Mirroring Enhanced IME supports three to ten disks or seven mirrored disks plus two hot spare disks Use the arrow key to select a disk then move the cursor to the RAID Disk column To...

Страница 112: ...s the Hot Spare for the RAID array The disk is already part of another array 4 Repeat step 3 to add the other disks to the volume 5 When done press C to create the array then select Save changes then exit this menu 6 The utility creates the array LSI Corp Config Utility v6 18 01 00 2007 08 08 Processing may take up to 1 minute Creating RAID array Create and save new array Cancel Exit Save changes ...

Страница 113: ...re C Create array LSI Corp Config Utility v6 18 01 00 2007 08 08 Create New Array SAS1064E Array Type IS Array Size MB 102996 Slot Device Identifier RAID Hot Drive Pred Size Num Disk Spr Status Fail MB 0 SEAGATE ST373454SS 0003 No NO 35003 1 SEAGATE ST373454SS 0003 NO NO 35003 2 SEAGATE ST373454SS 0003 No NO 35003 3 SEAGATE ST373454SS 0003 No NO 35003 Esc Exit Menu F1 Shift 1 Help Enter Choose arr...

Страница 114: ...as the Hot Spare for the RAID array The disk is already part of another array 4 Repeat step 3 to add the other disks to the volume 5 When done press C to create the array then select Save changes then exit this menu 6 The utility creates the array LSI Corp Config Utility v6 18 01 00 2007 08 08 Processing may take up to 1 minute Creating RAID array Create and save new array Cancel Exit Save changes...

Страница 115: ...Address 50000065 41236545 NVDATA Version 2B 00 Status Enabled Boot Order 0 Boot Support Enabled BIOS OS RAID Properties SAS Topology Advanced Adapter Properties 2 The View Array screen appears Here you can view properties of the RAID array s created If you have configured a hot spare it will also be listed If you created more than one array you may view the next array by pressing Alt N Esc Exit Me...

Страница 116: ...rom the Manage Array screen select Manage Hot Spares then press Enter Esc Exit Menu F1 Shift 1 Help Enter Select Item Alt N Next Array C Create an array LSI Corp Config Utility v6 18 01 00 2007 08 08 View Array SAS1064E Array 1 of 1 Identifier LSILOGICLogical Volume 3000 Type IME Scan Order 0 Size MB 34332 Status Optimal Manage Array Slot Device Identifier RAID Hot Drive Pred Size Num Disk Spr Sta...

Страница 117: ...n select Synchronize Array then press Enter 3 Press Y to begin the synchronization or N to cancel Esc Exit Menu F1 Shift 1 Help SPACE Change Item C Commit Changes LSI Corp Config Utility v6 18 01 00 2007 08 08 Manage Hot Spare SAS1064E Identifier LSILOGICLogical Volume 3000 Type IME Scan Order 0 Size MB 34332 Status Optimal Slot Device Identifier Hot Drive Pred Size Num Spr Status Fail MB 0 SEAGAT...

Страница 118: ...D 1 volume the data is preserved on the primary disk To delete an array 1 From the Manage Array screen select Delete Array then press Enter 2 Press Y to delete or N to cancel Esc Exit Menu F1 Shift 1 Help Enter Select Item LSI Corp Config Utility v6 18 01 00 2007 08 08 Manage Array SAS1064E Identifier LSILOGICLogical Volume 3000 Type IME Scan Order 0 Size MB 34332 Status Optimal Manage Hot Spare S...

Страница 119: ...22 01 00 IR SAS Address 50000065 41236545 NVDATA Version 2D 02 Status Enabled Boot Order 0 Boot Support Enabled BIOS OS RAID Properties SAS Topology Advanced Adapter Properties More keys for the SAS Topology display C Clear Device Mappings for Non Present Devices R Refresh SAS Topology Enter On a SAS Enclosure or Expander Expand or Collapse Item Enter On a Disk Drive Turn on the Locate LED next ke...

Страница 120: ...st Change Item LSI Corp Config Utility v6 18 01 00 2007 08 08 Adapter List Global Properties Pause When Boot Alert Displayed No Boot Information Display Mode Display adapters installed devices Support Interrupt Hook interrupt the Default Restore Defaults Esc Exit Menu F1 Shift 1 Help Alt N Global Properties Alter Boot Order Ins Del Alter Boot List LSI Corp Config Utility v6 18 01 00 2007 08 08 Ada...

Страница 121: ...pter List Change Item LSI Corp Config Utility v6 18 01 00 2007 08 08 Adapter List Global Properties Pause When Boot Alert Displayed No Boot Information Display Mode Display adapters installed devices Support Interrupt Hook interrupt the Default Restore Defaults Esc Exit Menu F1 Shift 1 Help Alt N Adapter List Change Item LSI Corp Config Utility v6 18 01 00 2007 08 08 Adapter List Global Properties...

Страница 122: ... the system defaults Esc Exit Menu F1 Shift 1 Help Alt N Adapter List Change Item LSI Corp Config Utility v6 18 01 00 2007 08 08 Adapter List Global Properties Pause When Boot Alert Displayed No Boot Information Display Mode Display adapters installed devices Support Interrupt Hook interrupt the Default Restore Defaults ...

Страница 123: ...ASUS RS160 S5 PX4 7 1 Chapter 7 Driver installation This chapter provides instructions for installing the necessary drivers for different system components ...

Страница 124: ... on a hard disk drive that is included in a RAID set You can create a RAID driver disk in DOS using the Makedisk application in the support CD To create a RAID driver disk in DOS environment 1 Place the motherboard support CD in the optical drive 2 Restart the computer then enter the BIOS Setup 3 Select the optical drive as the first boot priority to boot from the support CD Save your changes then...

Страница 125: ...1068 B1 SAS Driver Windows 2000 Server Windows Server 2003 32 bit Windows Server 2003 64 bit Windows Server 2008 32 bit Windows Server 2008 64 bit RHEL AS3 UP6 UP8 UP9 32 bit RHEL AS3 UP6 UP8 UP9 64 bit RHEL AS4 UP4 UP5 UP6 32 bit RHEL AS4 UP4 UP5 UP6 64 bit RHEL 5 UP1 32 bit RHEL 5 UP1 64 bit SLES 9 0 SP3 32 bit SLES 9 0 SP3 64 bit SLES 10 SP1 32 bit SLES 10 SP1 64 bit Back Exit ESB2 ASF Firmware...

Страница 126: ... in Drivers LSI 1068 B1 Driver Windows 3 Insert a formatted high density floppy disk to the floppy disk drive 4 Follow screen instructions to complete the process 5 After creating a RAID driver disk eject the floppy disk then write protect it to prevent computer virus infection To create a RAID driver disk in Red Hat Enterprise Linux server environment 1 Insert a blank formatted high density flopp...

Страница 127: ...ird party SCSI or RAID driver Windows Setup S Specify Additional Device ENTER Continue F3 Exit Windows Setup Setup could not determine the type of one or more mass storage devices installed in your system or you have chosen to manually specify an adapter Currently Setup will load support for the following mass storage devices s none To specify additional SCSI adapters CD ROM drives or special disk...

Страница 128: ...lick Cancel 3 Right click the My Computer icon on the Windows desktop and then select Properties from the menu 4 Click the Hardware tab and then click the Device Manager button to display the list of devices installed in the system 5 Right click the RAID controller item then select Properties 6 Click the Driver tab and then click the Update Driver button 7 The Upgrade Device Driver Wizard window a...

Страница 129: ...ce Manager button 3 Click the sign before the item SCSI and RAID controllers and then the LSI Adapter SAS 3000 series 8 port with 1068 StorPort item should appear The screen differs based on the controller 4 Right click the RAID controller driver item and then select Properties from the menu 5 Click the Driver tab and then click the Driver Details button to display the RAID controller drivers 6 Cl...

Страница 130: ...mode type linux text ENTER Use the function keys listed below for more information F1 Main F2 Options F3 General F4 Kernel F5 Rescue boot linux dd 3 Select Yes using the Tab key when asked if you have the driver disk then Main Menu Do you have a driver disk Yes No 4 Select fd0 using the Tab key when asked to select the driver disk source Press Tab to move the cursor to OK then press Enter Driver D...

Страница 131: ...RAID driver disk to the floppy disk drive select OK then press Enter The drivers for the RAID card are installed to the system Insert Driver Disk Insert your driver disk into dev fd0 and press OK to continue OK Back 7 Follow the screen instructions to continue the OS installation More Driver Disks Do you wish to load any more driver disks Yes No ...

Страница 132: ...guage F3 1280 x 1024 F4 DVD F5 Driver Boot from Hard Disk Installation Installation ACPI Disabled Installation Local APIC Disabled Installation Safe Settings Rescue System Memory Test Boot Options 3 Press F5 then select Yes from the menu Press Enter F1 Help F2 Language F3 1280 x 1024 F4 DVD F5 Driver Boot from Hard Disk Installation Installation ACPI Disabled Installation Local APIC Disabled Insta...

Страница 133: ...allation ACPI Disabled Installation Local APIC Disabled Installation Safe Settings Rescue System Memory Test Boot Options 5 When below screen appears select the floppy disk drive fd0 as the driver update medium Select OK then press Enter Please choose the Driver Update medium OK Back fd0 Floppy sr0 CD ROM TEAC DV 516E sda Disk SEAGATE ST336754SS sdb Disk SEAGATE ST336754SS Other device The drivers...

Страница 134: ...o manually install the Intel chipset software on a Windows Server operating system To install the Intel chipset device software 1 Restart the computer and then log on with Administrator privileges 2 Insert the system support CD to the optical drive The support CD automatically displays the Drivers menu if Autorun is enabled in your computer 3 Click the Intel Chipset Device Software item from the m...

Страница 135: ...ASUS RS160 S5 PX4 7 13 4 The Intel R Chipset Device Software window appears Click Next to start installation 5 Select Yes to accept the terms of the License Agreement and continue the process ...

Страница 136: ...pter 7 Driver installation 6 Read the Readme File Information and press Next to continue the installation 7 After completing the installation click Finish to complete the setup process and restart the computer ...

Страница 137: ...stem support CD to the optical drive The CD automatically displays the Drivers menu if Autorun is enabled in your computer Windows automatically detects the LAN controllers and displays a New Hardware Found window Click Cancel to close this window If Autorun is NOT enabled in your computer browse the contents of the support CD to locate the file ASSETUP EXE from the BIN folder Double click the ASS...

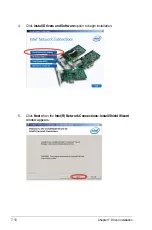
Страница 138: ...7 16 Chapter 7 Driver installation 4 Click Install Drivers and Software option to begin installation 5 Click Next when the Intel R Network Connections InstallShield Wizard window appears ...

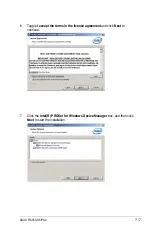
Страница 139: ...US RS160 S5 PX4 7 17 6 Toggle I accept the terms in the license agreement and click Next to continue 7 Click the Intel R PROSet for Windows Device Manager box and then click Next to start the installation ...

Страница 140: ...7 18 Chapter 7 Driver installation 8 Follow the screen instruction s to complete installation 9 When finished press Finish to continue ...

Страница 141: ...ng system To install the XGI Volari Z9s VGA driver 1 Restart the computer then log on with Administrator privileges 2 Insert the motherboard system support CD to the optical drive The support CD automatically displays the Drivers menu if Autorun is enabled in your computer The Drivers menu if Autorun is enabled in your computer 3 The XGI VGA Package window appears preparing the setup ...

Страница 142: ... Chapter 7 Driver installation 5 The system will update the VGA driver 6 When the installation completes click Finish to restart your computer before using the program 4 Click Next to start the installation ...

Страница 143: ... 1 Running the support CD Place the support CD to the optical drive The CD automatically displays the Drivers menu if Autorun is enabled in your computer If Autorun is NOT enabled in your computer browse the contents of the support CD to locate the file ASSETUP EXE from the BIN folder Double click the ASSETUP EXE to run the CD 7 5 2 Drivers menu The Drivers menu shows the available device drivers ...

Страница 144: ...applications Click an item to install 7 5 4 Utilities menu The Utilities menu displays the software applications and utilities that the motherboard supports Click an item to install 7 5 5 Contact information Click the Contact tab to display the ASUS contact information You can also find this information on the inside front cover of this user guide ...

Отзывы: