2-12
Chapter 2: Basic Installation
Chapter 2
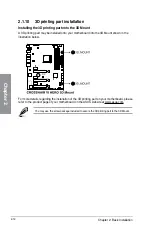
2.1.10 3D printing part installation
Installing the 3D printing part onto the 3D Mount
A 3D printing part may be installed onto your motherboard into the 3D Mount shown in the
illustration below.
For more details regarding the installation of the 3D printing part on your motherboard, please
refer to the product page of your motherboard on the ASUS website at www.asus.com.
You may use the screw package included to secure the 3D printing part to the 3D Mount.
Содержание CROSSHAIR VI HERO
Страница 1: ...Motherboard CROSSHAIR VI HERO ...
Страница 52: ...2 6 Chapter 2 Basic Installation Chapter 2 2 1 4 DIMM installation To remove a DIMM ...
Страница 54: ...2 8 Chapter 2 Basic Installation Chapter 2 2 1 6 SATA device connection OR OR ...
Страница 57: ...ASUS CROSSHAIR VI HERO 2 11 Chapter 2 2 1 9 M 2 installation Supported M 2 type varies per motherboard ...
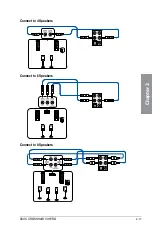
Страница 63: ...ASUS CROSSHAIR VI HERO 2 17 Chapter 2 Connect to 4 Speakers Connect to 6 Speakers Connect to 8 Speakers ...


