ASUS CROSSHAIR VI HERO
1-3
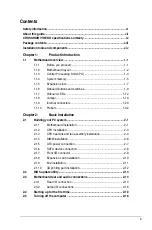
Chapter 1
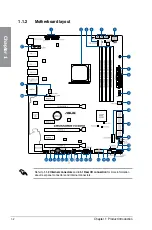
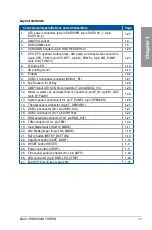
Layout contents
Connectors/Jumpers/Buttons and switches/Slots
Page
1.
ATX power connectors (24-pin EATXPWR; 8-pin EATX12V_1; 4-pin
EATX12V_2)
1-25
2.
AM4 CPU socket
1-4
3.
DDR4 DIMM slots
1-5
4.
AURA RGB headers (4-pin RGB_HEADER1-2)
1-28
5.
CPU, CPU optional, water pump+, AIO pump, and chassis fan connectors
(4-pin CPU_FAN; 4-pin CPU_OPT; 4-pin ; 4-pin AIO_PUMP;
4-pin CHA_FAN1-3)
1-24
6.
Q-Code LED
1-13
7.
3D printing mount
2-12
8.
ProbeIt
1-32
9.
USB 3.1 front panel connector (USB3.1_E1)
1-21
10. M.2 Socket 3 for M Key
1-29
11. AMD
®
Serial ATA 6.0 Gb/s connectors (7-pin SATA6G_1-8)
1-20
12. Water in, water out, and water flow connectors (2-pin W_IN; 2-pin W_OUT;
3-pin W_FLOW)
1-30
13. System panel connectors (10-1 pin F_PANEL; 4-pin SPEAKER)
1-26
14. Thermal sensor connector (2-pin T_SENSOR1)
1-27
15. USB 3.0 connector (20-1 pin USB3_910)
1-21
16. USB 2.0 connector (10-1 pin USB1516)
1-22
17. ROG extension connector (18-1 pin ROG_EXT)
1-27
18. TPM connector (14-1 pin TPM)
1-30
19. Slow Mode Switch (SLOW_MODE)
1-11
20. LN2 Mode jumper (3-pin LN2_MODE)
1-19
21. ReTry button (RETRY_BUTTON)
1-10
22. Safe Boot button (SAFE_BOOT)
1-10
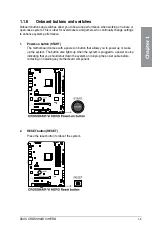
23. RESET button (RESET)
1-9
24. Power-on button (START)
1-9
25. Front panel audio connector (10-1 pin AAFP)
1-23
26. LED connector (5-pin RGB_LED_STRIP)
1-29
27. M.2 Wi-Fi Slot (E-key, type 2230)
1-31
Содержание CROSSHAIR VI HERO
Страница 1: ...Motherboard CROSSHAIR VI HERO ...
Страница 52: ...2 6 Chapter 2 Basic Installation Chapter 2 2 1 4 DIMM installation To remove a DIMM ...
Страница 54: ...2 8 Chapter 2 Basic Installation Chapter 2 2 1 6 SATA device connection OR OR ...
Страница 57: ...ASUS CROSSHAIR VI HERO 2 11 Chapter 2 2 1 9 M 2 installation Supported M 2 type varies per motherboard ...
Страница 63: ...ASUS CROSSHAIR VI HERO 2 17 Chapter 2 Connect to 4 Speakers Connect to 6 Speakers Connect to 8 Speakers ...

