1-24
Chapter 1: Product Introduction
Chapter 1
6.
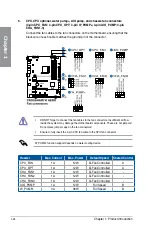
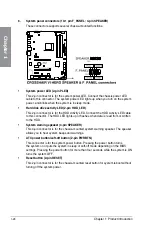
CPU, CPU optional, water pump+, AIO pump, and chassis fan connectors
(4-pin CPU_FAN; 4-pin CPU_OPT; 4-pin ; 4-pin AIO_PUMP; 4-pin
CHA_FAN1-3)
Connect the fan cables to the fan connectors on the motherboard, ensuring that the
black wire of each cable matches the ground pin of the connector.
•
DO NOT forget to connect the fan cables to the fan connectors. Insufficient air flow
inside the system may damage the motherboard components. These are not jumpers!
Do not place jumper caps on the fan connectors!
•
Ensure to fully insert the 4-pin CPU fan cable to the CPU fan connector.
function support depends on water cooling device.
Header
Max. Current
Max. Power
Default Speed
Shared Control
CPU_FAN
1A
12W
Q-Fan Controlled
A
CPU_OPT
1A
12W
Q-Fan Controlled
A
CHA_FAN1
1A
12W
Q-Fan Controlled
-
CHA_FAN2
1A
12W
Q-Fan Controlled
-
CHA_FAN3
1A
12W
Q-Fan Controlled
-
AIO_PUMP
1A
12W
Full Speed
B
3A
36W
Full Speed
B
Содержание CROSSHAIR VI HERO
Страница 1: ...Motherboard CROSSHAIR VI HERO ...
Страница 52: ...2 6 Chapter 2 Basic Installation Chapter 2 2 1 4 DIMM installation To remove a DIMM ...
Страница 54: ...2 8 Chapter 2 Basic Installation Chapter 2 2 1 6 SATA device connection OR OR ...
Страница 57: ...ASUS CROSSHAIR VI HERO 2 11 Chapter 2 2 1 9 M 2 installation Supported M 2 type varies per motherboard ...
Страница 63: ...ASUS CROSSHAIR VI HERO 2 17 Chapter 2 Connect to 4 Speakers Connect to 6 Speakers Connect to 8 Speakers ...


