background image

SECTION 4 

MAINTENANCE 


33 


8.


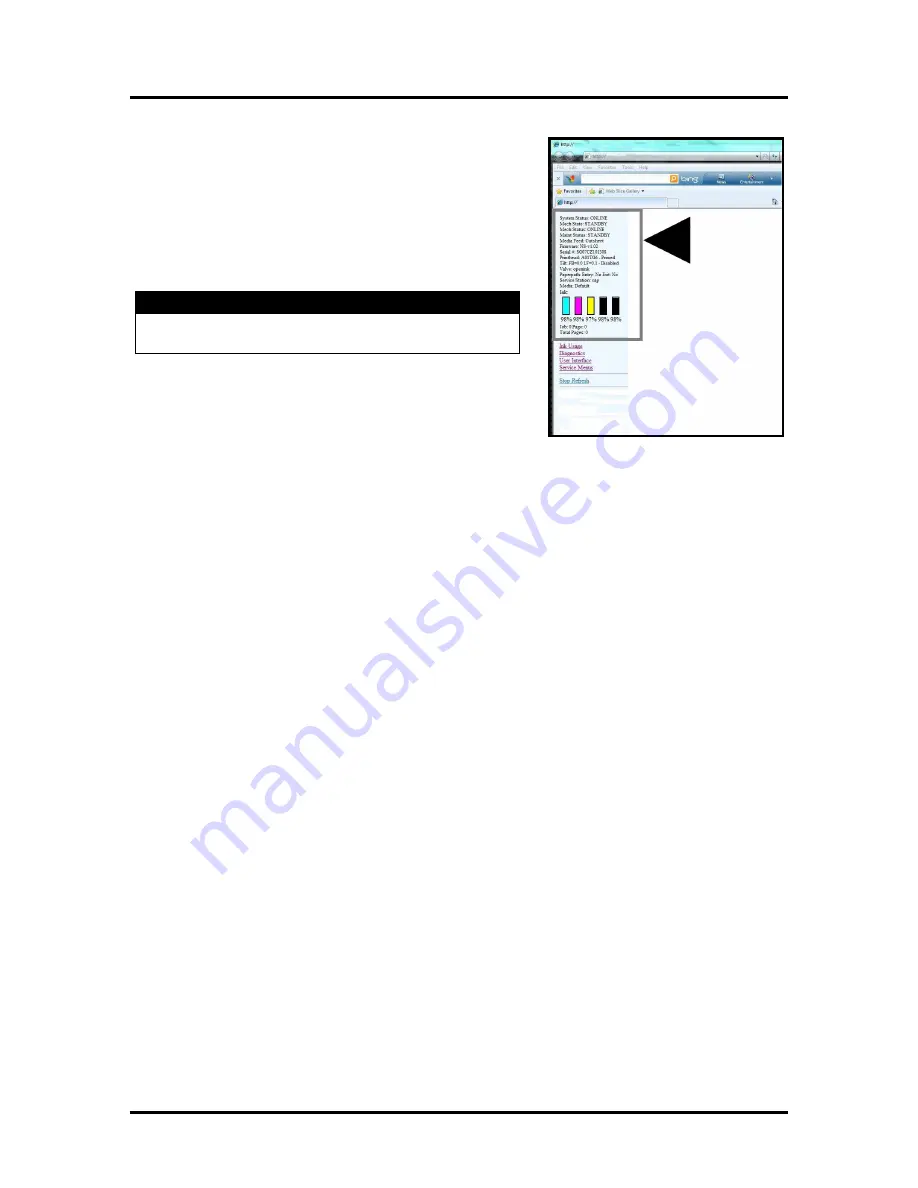
Watch the Toolbox screen on your computer again. 
Notice that some of the information is in red. As the 
Printer circulates ink and primes the system these fields 
should all turn black.


9.


When the Printer stops processing and all the fields in 
System Status are black, the Printer is ready for use. 
Close the top cover.


IMPORTANT 

CHECK INK TANKS. PRINTER MAY NOT FULLY 
REPRIME IF TANKS ARE LESS THAN 1/3 FULL. 

NOTE: The Printer may take up to 12 minutes to set itself up 
during initial startup. This is normal. The machine will emit a 
number of chirps, whirrs and other noises as it circulates ink 
and runs systems. 

Содержание AstroJet M1

Страница 1: ...AstroJet M1 COLOR PAGE PRINTER OPERATOR MANUAL ASTRO MACHINE CORP 630 Lively Blvd Elk Grove Village IL 60007 Phone 847 364 6363 Fax 847 364 9898 www astromachine com...

Страница 2: ...strain on the power cord caused by jamming between the equipment walls or furniture DO NOT remove covers Covers enclose hazardous parts that should only be accessed by a qualified service representat...

Страница 3: ...ction 3 Operating the AstroJet M1 20 Setting Up a Job in MS Word Printer Driver Properties General Tab Layout Tab Services Tab Using the M Series Toolbox 20 22 22 23 24 25 Section 4 Maintenance 28 Rep...

Страница 4: ...___ ______________________________________________________ ______________________________________________________ ______________________________________________________ _______________________________...

Страница 5: ...rn power on or off during idle time and maintenance 4 Rear Guide Holds the media against the Front Plate 5 Rear Guide Support Supports the paper media 6 Adjustable Media Guide Adjusts to hold the pape...

Страница 6: ...ble attaches to the printer here 3 Network Connection The network cable plugs in here 4 Envelope Paper Media Guide All printing is registered against this guide It has adjustable positions for envelop...

Страница 7: ...rinter and print queue in driver NOTE Cancelled Jobs must be reloaded before printing can resume PRINTER OPERATION INDICATORS NORMAL PRINTER STATUS POWER ON OFF PAPER STOP RESUME CANCEL CANCEL JOB Pow...

Страница 8: ...not fixed press CANCEL to cancel the job Tilt Error LED ON steady LEDs flashing fast alternately ON OFF about 3 times second ACTION Press PAPER to stop feed Check that Pinter is on a stable level surf...

Страница 9: ...Printhead Set up the feed on the Printer Choose a Location The AstroJet M1 should be placed on a sturdy level worktable or cabinet at least 9 inches from any walls Protect the AstroJet M1 from excessi...

Страница 10: ...e using the two screws 2 provided Attach the Rear Paper Support using the knob 3 provided NOTE The two outside holes fit over the socket head screws Install the Back Guide using the thumbscrew and was...

Страница 11: ...AN OUTLET THAT SHARES THE SAME CIRCUIT WITH LARGE ELECTRICAL MACHINES OR APPLIANCES Connecting to the Computer The Printer connects to the computer through the USB port 2 A Network port 3 is provided...

Страница 12: ...er in your CD drive When the AutoPlay Window opens click Run Setup exe to start 2 The Install Printer Software window opens on the computer screen Click Install Printer Software 3 The License Agreemen...

Страница 13: ...he Printer on and connect the USB cable Don t click on either button The software will then finish installing 8 The Finished software installation window opens Do not print a test page since printer i...

Страница 14: ...TURN PRINTER OFF PRESS THE POWER BUTTON THE CONTROL PANEL WAIT FOR THE PRINTER TO STOP PROCESSING PRESS THE MAIN POWER SWITCH ON THE REAR PANEL 1 Open the Front Cover hinged at bottom Remove the Exit...

Страница 15: ...rvice Station while turning the large Gear on right side of Print Engine clockwise Gear should engage gear on Service Station and pull it in Once the Service Station starts moving stop turning the Gea...

Страница 16: ...he Toolbox On the Opening Screen you will see System Status information in the upper left corner 2 Open the Front Cover hinged at bottom Open the three Latches A 3 Remove the new Tank s from packaging...

Страница 17: ...e Toolbox screen on your computer you will see the ink colors fill in as the Tanks are installed If the ink color does not fill in after a few seconds reinstall the Tank 6 Close the three Latches Clos...

Страница 18: ...compromise print quality due to dehydration DO NOT place an unwrapped Printhead on any surface before installing Protect the Printhead from dust fibers dirt and other contaminants at all times 1 With...

Страница 19: ...protective strip from the Printhead Nozzles Hold the Printhead by the handle with one hand Pull the strip tab with the other hand and slowly peel the strip from the Printhead DO NOT pull the strip at...

Страница 20: ...ed water and a wet lint free cloth Close and relatch the Printhead Assembly CAUTION OPERATE AND HOLD ONTO BOTH LATCHES WHEN OPENING AND CLOSING THE PRINTHEAD ASSEMBLY TO PREVENT DAMAGE DO NOT ALLOW TH...

Страница 21: ...e system these fields should all turn black 7 When the printer stops processing and all the fields in System Status are black the printer is ready for use Close the top cover NOTE The Printer may take...

Страница 22: ...a and the position closest to the center of the printer is for printing 8 5 wide media edge to edge 2 Loosen the locking screws located behind the sheet separators and raise the paper separators then...

Страница 23: ...ing the knob to slide the guide right and left If you experience feeding problems slide the rear support guide right or left keep the media aligned with the media guides 6 Adjust the rear media guide...

Страница 24: ...etermine the print area of the printer and the paper sizes it can handle Maximum print area for the printer 8 5 wide x 17 long Maximum paper size printer can feed 9 5 wide x 17 long See diagram at rig...

Страница 25: ...Page Setup and select 0 margins 2 Select the Paper tab select Paper Size Custom size then set the paper Width to 8 5 and the paper Height to 5 5 Then click OK 3 The screen at right is an example of a...

Страница 26: ...t job to load before printing starts Copies Lets you choose the number of copies to be printed Media Allows you to choose a different size paper than the document was originally designed for The docum...

Страница 27: ...n the new page size Printing Adjustments Allows you to make minor positioning changes to the print area in relation to the media if needed NOTE Only works on jobs using less than the full print area l...

Страница 28: ...ns the Printhead Cover for removing installing the Printhead Cartridge System Deprime Drains the ink in the lines back into the Ink Tanks before servicing the Printhead Cartridge or prepping the Print...

Страница 29: ...Start from the Windows taskbar go to All Programs open the Astro Machine folder then click on Toolbox When the Printer User Control window opens you will find a series of Menu Options you can click o...

Страница 30: ...een From this screen you can Clear Errors Cancel a Job Reset the Job Counter and Reset the Page Counter You can also perform some maintenance and operating tasks such as Circulate Ink Purges air from...

Страница 31: ...Click the Browse button and find the file you just saved to your desktop 4 Click Submit DO NOT touch the printer until the firmware is loaded A message will appear on your screen warning you not to un...

Страница 32: ...en you will see System Status information in the upper left corner 2 Turn the Printer OFF with the Control Panel Power Button and open the Front Cover hinged at bottom Open the three Latches A and pul...

Страница 33: ...er circulates ink and primes the system these fields should all turn black 9 When the Printer stops processing and all the fields in System Status are black the Printer is ready for use 10 Latch the t...

Страница 34: ...loth Take care not to damage the copper contacts the metal plate or the gold Printhead surface Close and relatch the Printhead Assembly Generally when the ink supply is adequate and the print quality...

Страница 35: ...emove the used Printhead Cartridge by tilting it toward the ink lines 3 then carefully lift it out of the Printhead Compartment 4 Carefully remove the Printhead Cartridge from the foil packaging A Tea...

Страница 36: ...e to raise the Printhead Assembly Moisten the Printhead nozzles using distilled water and a wet lint free cloth Close and relatch the Printhead Assembly CAUTION OPERATE AND HOLD ONTO BOTH LATCHES WHEN...

Страница 37: ...the Printer stops processing and all the fields in System Status are black the Printer is ready for use Close the top cover IMPORTANT CHECK INK TANKS PRINTER MAY NOT FULLY REPRIME IF TANKS ARE LESS T...

Страница 38: ...R OFF CAUTION WHENEVER POWERING DOWN UNIT ALWAYS 1 PRESS THE POWER BUTTON ON THE CONTROL PANEL 2 WAIT FOR THE PRINTER TO STOP PROCESSING 3 THEN PRESS THE MAIN POWER SWITCH ON THE REAR PANEL 1 Open the...

Страница 39: ...Ribbon Cable Remove the Service Station 4 Carefully unwrap the new Service Station NOTE Loose parts may fall out Keep roller side facing up when removing packaging CAUTION Make sure latches on the Wi...

Страница 40: ...ar to prevent misalignment and operating problems 8 GENTLY push the Service Station while turning the large Gear on right side of Print Engine clockwise Gear should engage gear on Service Station Roll...

Страница 41: ...ion of the pieces as they are being fed If you experience double sheet feeding and cannot adjust the Separators to prevent it replace the Separators Replacing the Sheet Separators is not difficult 1 T...

Страница 42: ...nd the brushes Clear the jam then carefully reinstall the Brush Assembly CAUTION DO NOT BEND PINCH OR CUT THE INK LINES LOCATED DIRECTLY IN FRONT OF THE BRUSH ASSEMBLY NOTE Make sure Brush Assembly is...

Страница 43: ...lint free cloth using any standard nonabrasive household cleaner that does not contain plastic harming solvents CAUTION NEVER SPRAY OR POUR CLEANERS DIRECTLY ON OR INTO THE PRINTER EXCESS LIQUID COUL...

Страница 44: ...as needed with distilled water on a damp lint free cloth DO NOT use anything other than distilled water to clean the rollers B Media Sensors Paper lint and dust may build up on the Media Sensors Use a...

Страница 45: ...e or by using the Service Tab in the Printer Driver and pressing System Deprime Remove the Printhead Cartridge 1 Open the Top Cover Press the Printhead Cover Release Button 1 The Printer pumps any ink...

Страница 46: ...ve the Service Station TURN PRINTER POWER OFF CAUTION WHENEVER POWERING DOWN UNIT ALWAYS 1 PRESS THE POWER BUTTON ON THE CONTROL PANEL 2 WAIT FOR THE PRINTER TO STOP PROCESSING 3 THEN PRESS THE MAIN P...

Страница 47: ...Maintenance Station Remove the Ink Tanks 1 Turn the Printer OFF with the Control Panel Power Button and open the Front Cover hinged at bottom Unlatch the three Locks A and pull the Ink Tank s out of...

Страница 48: ...t shows regularly missing or misdirected nozzles or ink color mixing Debris on Printhead Perform the startup routine Clean the Printhead using one of the Maintenance Levels in the driver Wipe the Prin...

Страница 49: ...not receiving power Use proper USB cable see Operator Manual Check plug connections ON OFF button and fuse on back panel Print too light or missing character dots Clogged or dirty Printhead Running o...

Страница 50: ...INK Water based ink 5 individual 250 ml ink tanks CMYKK PRINT CARTRIDGE Memjet INTERFACE USB DIMENSIONS 20 W x 24 L x 17 1 4 H 50 8 cm x 61 cm x 44 0 cm WEIGHT 75 lbs 34 kg DUTY CYCLE 500 000 10 Envel...

Страница 51: ...onnection 2 7 O Optional Hardware 46 P Paper Switch 1 Power Connection 2 Printer Connection 7 Printer Driver Installation 8 Printer Driver Properties 22 Printer Setup 5 Printer Toolbox 25 Printer Trou...

Страница 52: ...____________________ ______________________________________________________ ______________________________________________________ ______________________________________________________ ______________...

Страница 53: ......

Страница 54: ...Copyright 2011 ASTRO MACHINE CORP Elk Grove Village IL 60007 7 28 2011 Part Number 200 AJM1 Rev H...

Отзывы: