


SECTION 3
FUNCTIONAL OPERATION
21
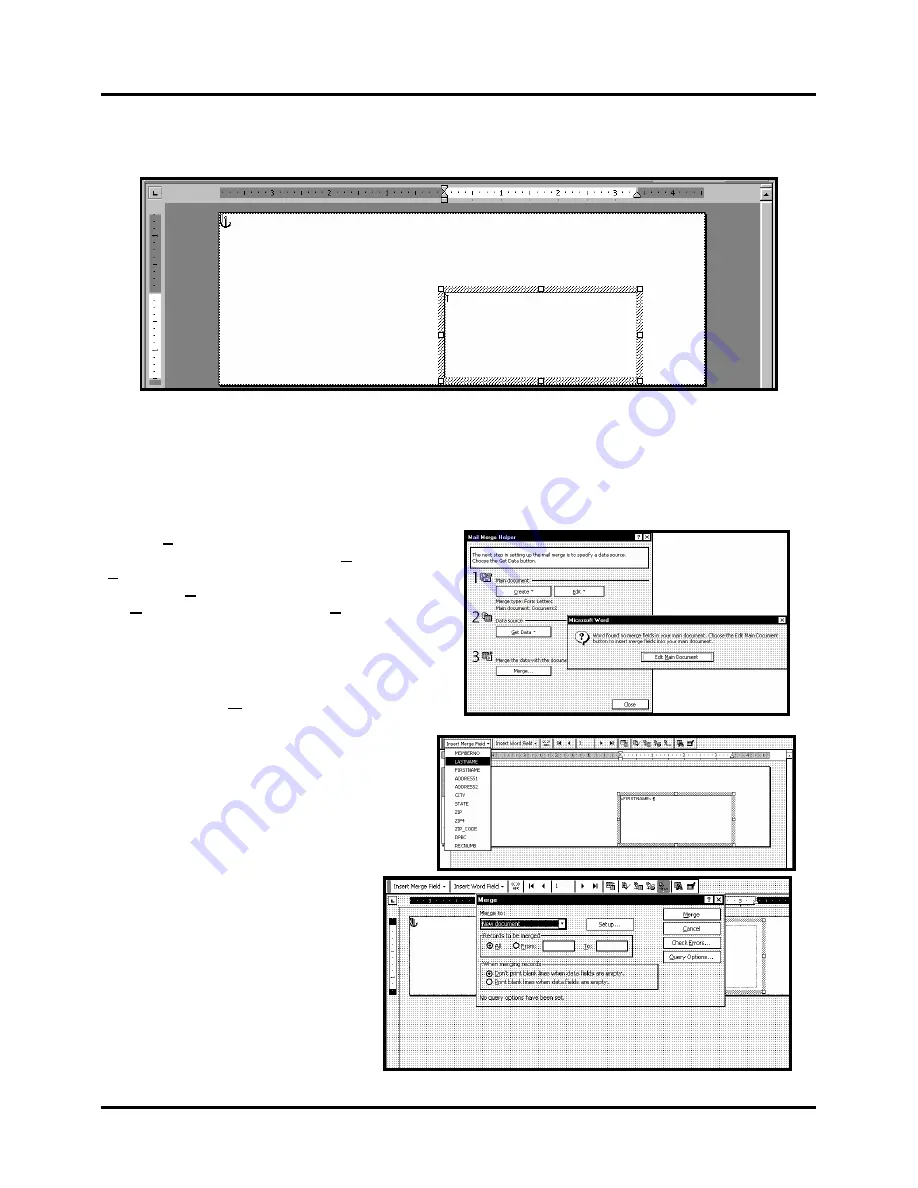
The next step is to create a text box so that you can position the address the proper distance from the lead edge of the
piece. Once the page layout is set, you might want to save it as a template for use later.
When you have completed the steps above the layout for an AstroJet 2600P should look like the one below.
NOTE: When setting up a layout for the ASTROJET 2600P/2650P/2800P, be aware that the printheads are
aligned in four banks and these banks can be aligned so that you can print up to 3” wide with the AstroJet
2600P or 4” wide with the AstroJet 2800P on your media, or spread the printing over the width of the media.
There are two printheads that will print 1” or 1 1/2” of information depending on the printer and two single
heads that will print 1/2” of information depending on the printer model. How you position them is up to the
requirements of the job.
Click on
Tools
and then
Mail Merge
. The “Mail Merge
Helper “ window will open. Click On
Create
, then
Envelopes
. The “Microsoft Word” window will open.
Click on the
Active Window
button, and then click on
the
Get Data
button. Next, click on
Open data
source.
Locate the data file you intend to use. In our example,
we are using a Microsoft Excel file. Select the file and
the “Microsoft Excel” window opens select entire
spreadsheet and click
OK
.
Next, click on
Edit Main Document
and then click on
Close
.
Use the Mail Merge Tool Bar, click on Insert Merge
Field, and begin to build the layout by inserting the
address fields.
When you have completed setting up the
layout, click on the
Mail Merge
icon on
the tool bar and the “Merge” window will
open.
In the
Merge to
menu, there are several
choices for where how the data is exported.
The two that concerns us is “New
Document” and “Printer”. If you choose
“New Document”, the merge will be
created in your word application with a
separate record for each address. If you
Содержание ASTROJET 2600P
Страница 10: ...SECTION 1 INSTALLATION 6 Notes...
Страница 34: ...SECTION 4 ADJUSTMENTS 30 Notes...
Страница 46: ...SECTION 5 DISASSEMBLY ASSEMBLY 42 Notes...
Страница 50: ...MAINTENANCE 46 Notes...
Страница 53: ......


