background image

9

Fit Strike

  Partially close door and mark position of latch bolt 

to determine striker height. Mark and mortice door 
jamb to suit the striker box and striker.

  Drill the 2.5mm pilot holes for both striker box  

and striker.

  Insert the striker box and secure with the 44mm 

timber screw provided.

  Insert the striker and secure with two of the 

provided 20mm screws.

  Check final operation of the lock, latch and strike.

Содержание Yale YDLL/BLK

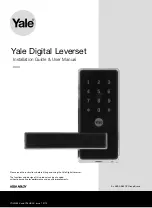
Страница 1: ...e Yale Digital Leverset The functions and design of this product can be changed without prior notice for performance and quality improvements Yale Digital Leverset Installation Guide User Manual An AS...

Страница 2: ...3 Components 4 Specifications 4 Door Preparation 5 Drilling 5 Latch Preparation 6 Fitting External Furniture 6 Fitting Internal Furniture 7 Fit Strike 9 Registering Credentials 10 Removing Credentials...

Страница 3: ...nual is subject to change without prior notice The latest published version can be found online at www yalelock com au or www yalelock co nz Please note all images shown are for illustration purposes...

Страница 4: ...tallation Tools Required Door Preparation 54mm hole saw 25mm hole saw Fixing Phillips Head Screwdriver Alkaline Batteries Strike Box Yale Key x 2 M4x44mm Machine Screw x 3 20mm Timber Screw x 4 44mm T...

Страница 5: ...position of the 14mm hole Use a 54mm hole saw for the main hole as shown Use a 14mm spade bit for the screw hole as shown Using a 25mm hole saw or spade bit drill latch hole horizontally through to th...

Страница 6: ...sert the spindle with spring into the external furniture Position the lock in place against the external face of the door Cable should route above latch body Verify the spindle passes through the latc...

Страница 7: ...ate of Inside Panel Pass the cable through the inside rubber gasket then tighten M4 machined screw across metal plate and rubber gasket with outside panel Internal Furniture M4 Screw holes Gasket 1 Re...

Страница 8: ...of the Internal Furniture with the Mounting Plate and loosely affix the screws for now Install the remaining long M4 Screw in the hole located at the centre of the battery compartment beneath the Bat...

Страница 9: ...mortice door jamb to suit the striker box and striker Drill the 2 5mm pilot holes for both striker box and striker Insert the striker box and secure with the 44mm timber screw provided Insert the stri...

Страница 10: ...cally exit the the mode after 8 seconds of inactivity Ver1 03 Factory Reset Strike 60mm Backset Latch Before Installation Tools Required Door Preparation 54mm hole saw 25mm hole saw Fixing Phillips He...

Страница 11: ...a for delete Delete all the registered KeyCard s Press and release SET button twice The keypad light will turn red in deleting mode Enter 0000 2 1 2 2 3 1 3 2 Enter a new PIN Code 6 to 10 digits and p...

Страница 12: ...as no data for delete Delete all the registered KeyCard s Press and release SET button twice The keypad light will turn red in deleting mode Enter 0000 Usage Open Door by PIN Code Open Door by KeyCard...

Страница 13: ...lashing red for 1 min NOTE If Automatic Locking is enabled the lock will automatically re lock again after timer reaches zero default 8 sec A long beep sound will be heard if the deleting successfully...

Страница 14: ...B High Security Mode turn on ress and release SET button three times hen press A long beep sound will be heard if the lock is in high ecurity mode ress and release SET button three times hen press A l...

Страница 15: ...nel of lock Note PIN Code KeyCard remained unchange Open the Door by both PIN Code and KeyCard No response 6 5 All dimensions in millimetres Unlock Indicator 6 2 The unlock indicator light on green wh...

Страница 16: ...ries are flat the lock is provided with two mechanical keys To open the lock via the key press on the outer edge of the Exterior Lever to expose the key cylinder Using the provided keys the lock can t...

Страница 17: ...IN Code 000000 WARNING Performing a factory reset will reset the user PIN code back to default and delete any registered Key Tags Advanced Function Passage Mode turn on Door without locking 5 1 A long...

Страница 18: ...be heard and unlock indicator 5 3 High Security Mode turn on Press and release SET button three times Then press A long beep sound will be heard if the lock is in high security mode 5 4 Press and rel...

Страница 19: ...19 User Key Tag Log Slot Number Name 1 2 3 4 5 6 7 8 9 10 11 12 13 14 15 16 17 18 19 20...

Страница 20: ...20 User Key Tag Log Slot Number Name 21 22 23 24 25 26 27 28 29 30 31 32 33 34 35 36 37 38 39 40...

Страница 21: ...mplies with all the applicable requirements of the Regulatory Compliance Mark RCM for Australia This product complies with all the applicable requirements of the Regulatory Compliance Mark RCM and Rad...

Страница 22: ...22 Notes...

Страница 23: ...23 Notes...

Страница 24: ...rate at the time of publication ASSA ABLOY Australia Pty Limited ASSA ABLOY recommends that you consult ASSA ABLOY or its agents prior to placing an order to ascertain current information on specific...

Отзывы: