background image

30

© 20

22

 United Stat

es Stov

e Comp

any

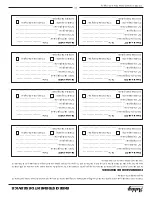
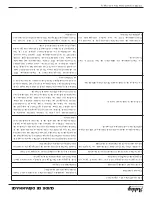
ENREGISTREMENT DE SERV

ICE

Il est 

rec

ommandé 

que votr

e sy

stèm

e de 

chauff

age 

est desser

vi régulièr

ement 

et que 

le Ser

vice 

Inter

val 

enregistr

ement 

appropr

ié est ter

minée.

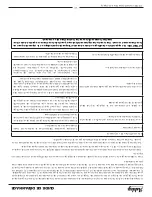
FOURNISSEUR DE SERV

ICES

Avant 

de ter

miner 

l’enr

egistrem

ent de 

servic

e appr

oprié 

ci-dessous, 

s’il vous 

plaît vous 

assurer 

que vous 

ave

z eff

ectué 

le 

servic

e tel 

que décr

it dans 

le les 

instructions 

du fabr

icant. T

oujours 

utiliser pièc

e de 

rec

hange 

indiquée 

par 

le fabr

icant 

lors de r

emplacem

ent est néc

essaire.

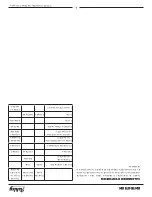
Servic

e de 01

 Date

: ______________________

Nom de l’ingénieur

:

 ____________________________

N° de licen

ce.:

 __________________________________

Comp

agnie:

 ___________________________________

N° de téléph

one:

 _______________________________

Poêle Inspec

té:    

         Chemin

ée bala

yée:    

Artic

les Remplacé:

 _____________________________

Servic

e de 03

 Date

: ______________________

Nom de l’ingénieur

:

 ____________________________

N° de licen

ce.:

 __________________________________

Comp

agnie:

 ___________________________________

N° de téléph

one:

 _______________________________

Poêle Inspec

té:    

         Chemin

ée bala

yée:    

Artic

les Remplacé:

 _____________________________

Servic

e de 05

 Date

: ______________________

Nom de l’ingénieur

:

 ____________________________

N° de licen

ce.:

 __________________________________

Comp

agnie:

 ___________________________________

N° de téléph

one:

 _______________________________

Poêle Inspec

té:    

         Chemin

ée bala

yée:    

Artic

les Remplacé:

 _____________________________

Servic

e de 07

 Date

: ______________________

Nom de l’ingénieur

:

 ____________________________

N° de licen

ce.:

 __________________________________

Comp

agnie:

 ___________________________________

N° de téléph

one:

 _______________________________

Poêle Inspec

té:    

         Chemin

ée bala

yée:    

Artic

les Remplacé:

 _____________________________

Servic

e de 02

 Date

: ______________________

Nom de l’ingénieur

:

 ____________________________

N° de licen

ce.:

 __________________________________

Comp

agnie:

 ___________________________________

N° de téléph

one:

 _______________________________

Poêle Inspec

té:    

         Chemin

ée bala

yée:    

Artic

les Remplacé:

 _____________________________

Servic

e de 04

 Date

: ______________________

Nom de l’ingénieur

:

 ____________________________

N° de licen

ce.:

 __________________________________

Comp

agnie:

 ___________________________________

N° de téléph

one:

 _______________________________

Poêle Inspec

té:    

         Chemin

ée bala

yée:    

Artic

les Remplacé:

 _____________________________

Servic

e de 06

 Date

: ______________________

Nom de l’ingénieur

:

 ____________________________

N° de licen

ce.:

 __________________________________

Comp

agnie:

 ___________________________________

N° de téléph

one:

 _______________________________

Poêle Inspec

té:    

         Chemin

ée bala

yée:    

Artic

les Remplacé:

 _____________________________

Servic

e de 08

 Date

: ______________________

Nom de l’ingénieur

:

 ____________________________

N° de licen

ce.:

 __________________________________

Comp

agnie:

 ___________________________________

N° de téléph

one:

 _______________________________

Poêle Inspec

té:    

         Chemin

ée bala

yée:    

Artic

les Remplacé:

 _____________________________

Содержание AP5622

Страница 1: ...officials about permits restrictions and installation requirements in your area NEVER OPERATE THIS PRODUCT WHILE UNATTENDED CAUTION Please read this entire manual before you install or use your new room heater Failure to follow instructions may result in property damage bodily injury or even death Improper Installation Could Void Your Warranty Save These Instructions In A Safe Place For Future Ref...

Страница 2: ...ood pellet fuel this heater has been shown to deliver heat at a rate of 32 591 to 13 640 Btu hr This heater achieved a particulate emissions rate of 1 5 g hr when tested to method ASTM E 2779 EPA Method 28R and 76 efficiency INTRODUCTION Heating Specifications Fuel Burn Rate lowest setting 2 1 5 lbs hr 0 97 2 26 kg hr Pellet size may effect the actual rate of fuel feed and burn times Fuel feed rat...

Страница 3: ... Brand___________________________________ If no Date of inspection of existing venting system _______________________________________________________ COMMISSIONING Confirm Hearth Pad Installation as per Installation Instructions Confirm proper placement of internal parts Check soundness of door gasket and door seals Confirm clearances to combustibles as per installation instructions in this manual...

Страница 4: ...PROTECTOR IS REQUIRED THIS UNIT MUST BE PLUGGED INTO A 110 120V 60 HZ GROUNDED ELECTRICAL OUTLET DO NOT USE AN ADAPTER PLUG OR SEVER THE GROUNDING PLUG DO NOT ROUTE THE ELECTRICAL CORD UNDERNEATH IN FRONT OF OR OVER THE HEATER DO NOT ROUTE THE CORD IN FOOT TRAFFIC AREAS OR PINCH THE CORD UNDER FURNITURE CAUTION BURNING FUEL CREATES CARBON MONOXIDE AND CAN BE HAZARDOUS TO YOUR HEALTH IF NOT PROPERL...

Страница 5: ...out of the top of the stove There will be two wire harnesses as shown 2 Unpack the top mount controls and ensure that the wiring harness shown is attached securely 3 Connect the factory installed wiring harnesses to the control panel as shown 4 Secure the control panel to the top of the stove with two sheet metal screws ...

Страница 6: ...in front 6 153 mm on each side and 1 26 mm behind the stove Floor protection must extend under and 2 51 mm to each side of the chimney tee for an interior vertical installation A Floor Protector of 1 26 mm thick is recommended for this installation D B C B A A Rear through wall 1 25 mm B Side 6 152 mm C Front 6 152 mm D Rear interior vertical 2 50 mm CLEARANCES Your pellet stove has been tested an...

Страница 7: ...h both a hearth pad if used and the floor of the home The heater must be electrically grounded to the steel chassis of the mobile home with 8 GA copper wire using a serrated or star washer to penetrate paint or protective coating to ensure grounding Vent must be 3 or 4 inch PL Vent and must extend a minimum or 36 914 mm above the roof line of the mobile home and must be installed using a certified...

Страница 8: ...f the installation is over 2 500 feet above sea level We recommend the use of Simpson Dura Vent or Metal Fab pipe if you use other pipes consult your local building codes and or building inspectors Do not use Type B Gas Vent pipe or galvanized pipe with this unit The pellet vent pipe is designed to disassemble for cleaning and should be checked several times during the burning season The pellet ve...

Страница 9: ...st conform to CAN CSA B365 WARNING DO NOT OBTAIN COMBUSTION AIR FROM THE ATTIC GARAGE OR ANY OTHER UNVENTILATED AREA YOU MAY OBTAIN COMBUSTION AIR FROM A VENTILATED CRAWL SPACE DO NOT INSTALL A FLUE DAMPER IN THE EXHAUST VENTING SYSTEM OF THIS UNIT DO NOT CONNECT THIS UNIT TO A CHIMNEY FLUE SERVING ANOTHER HEATER FURNACE OR APPLIANCE INSTALL VENT AT CLEARANCES SPECIFIED BY THE VENT MANUFACTURER ON...

Страница 10: ...ce through a combustible wall Once outside the structure a 3 76 mm clearance should be maintained from the outside wall and a clean out tee should be placed on the pipe with a 90 degree turn away from the house At this point a 3ft 0 91m minimum section of pipe should be added with a horizontal cap which would complete the installation A support bracket should be placed just below the termination c...

Страница 11: ...g part number 860001 3 6 transition into 6 connector pipe The illustration is only an example Please conform to any local building codes or regulations having jurisdiction before you have a qualified installer proceed with this installation WARNING You may want to locate any utilities or obstacles inside the wall before attempting this install Make sure to keep in mind your unit s clearance requir...

Страница 12: ... to heat range 5 C C F Button The C F button changes the two digit display from degrees Celsius to degrees Fahrenheit D MODE M T BUTTON The Mode of the stove can be switched between manual and controlled with a Thermostat Separate LEDs to the left of the two digit display indicate the mode of operation Manual or T Stat The stove has to be in normal operation to be switched from Manual to T Stat mo...

Страница 13: ... by weight and salt under 300 parts per million Pellets that are soft contain excessive amounts of loose sawdust have been or are wet will result in reduced performance Store your pellets in a dry place DO NOT store the fuel within the installation clearances of the unit or within the space required for refuelling and ash removal Doing so could result in a house fire Do not over fire or use volati...

Страница 14: ...eve a high burn your stove should be set on setting 5 with the damper open To achieve a medium burn your stove should be set on setting 3 with the damper 50 open To achieve a low burn your stove should be set on setting 1with the damper closed If the door is opened while the stove is in operation it must be closed within 30 seconds or the stove will shut down If the stove shuts down push the On Of...

Страница 15: ...g convection blower the high temperature thermodisc will automatically shut down the auger preventing the stove from overheating NOTE On some units once tripped like a circuit breaker the reset button will have to be pushed before restarting your stove On other units the thermodisc has no reset button and will reset itself once the stove has cooled The manufacturer recommends that you call your de...

Страница 16: ...ht side panel To access the igniter remove the air inlet tube and cover 2 screws The auger motor is located in the center rear of the unit Note When cleaning take care not to damage the fan blades If a vacuum is used to clean your stove we suggest using the AV15E AshVac vacuum The AV15E AshVac is designed for ash removal Some regular vacuum cleaner i e shop vacs may leak ash into the room DO NOT V...

Страница 17: ...hould be removed to reduce the risk of a chimney fire Inspect the system at the stove connection and at the chimney top Cooler surfaces tend to build creosote deposits quicker so it is important to check the chimney from the top as well as from the bottom The creosote should be removed with a brush specifically designed for the type of chimney in use A qualified chimney sweep can perform this serv...

Страница 18: ...d a buildup of creosote or carbon accumulate you may wish to use 000 steel wool and water to clean the glass DO NOT use abrasive cleaners DO NOT perform the cleaning while the glass is HOT Do not attempt to operate the unit with broken glass Replacement glass may be purchased from your U S Stove dealer If the glass is broken follow these removal procedures 1 Once the heater has cooled remove the d...

Страница 19: ...ould be inspected and repaired or replaced when necessary Daily Weekly Monthly or as needed Burn Pot Stirred Empty Combustion Chamber Brushed Ashes Check Empty Interior Chambers Vacuumed Combustion Blower Blades Vacuumed Brushed Convection Blower Impeller Vacuumed Brushed Vent System Cleaned Gaskets Inspected Glass Wiped Cleaned Hopper end of season Empty Vacuumed ...

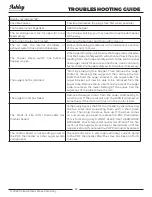
Страница 20: ...stove first when possible The convection blower is overheating and tripping the internal temperature shutoff Clean any dust off of the windings and fan blade If oiling the blower does not help the blower may be bad The stove is being left on the highest setting for extended periods of time If operating the heater on the highest heat setting the room temperature could increase enough and lead to po...

Страница 21: ...ires to the air switch Combustion blower failure With the stove on check to see if the combustion blower is running If it is not you will need to check for power going to the combustion blower It should be a full current If there is power the blower is bad If there is not make sure the control board is sending power to the air switch Control board not sending power to combustion blower If there is...

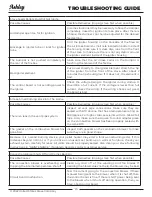
Страница 22: ...g the auger pin then remove the two bolts that hold the auger bracket to the auger tube The auger bracket will now be able to be removed form the auger tube Remove the two bolts on the side of the auger tube to remove the lower bearing of the auger Pull the auger out of the tube to free the jam The auger motor has failed Remove the auger motor from the auger shaft and try to run the unit If the mo...

Страница 23: ...el and auger motor for secure connections Use a continuity tester to test the hopper safety switch replace if necessary The auger shaft is jammed Start by emptying the hopper Then remove the auger motor by removing the auger pin Remove the auger shaft inspection plate in the hopper so that you can see the auger shaft Gently lift the auger shaft straight up so that the end of the auger shaft comes ...

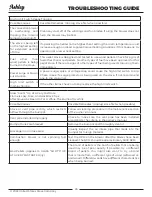
Страница 24: ... Smell Coming Back Into The Home Possible Causes Possible Remedies Unplug stove first when possible There is a leak in the vent pipe system Inspect all vent pipe connections Make sure they are sealed with RTV silicone that has a temperature rating on 500 degree F or higher Also seal joints with UL 181 AP foil tape Also make sure the square to round adapter piece on the combustion blower has been p...

Страница 25: ... shaft inspection plate in the hopper so that you can see the auger shaft Gently lift the auger shaft straight up so that the end of the auger shaft comes up out of the bottom auger bushing Next remove the two nuts that hold the top auger biscuit in Then rotate the bottom end of the auger shaft up towards you until you can lift the shaft out of the stove After you have removed the shaft inspect it...

Страница 26: ...rent type of wood softwood vs hardwood Different woods have different characteristics when being burned High Limit Switch Keeps Tripping Possible Causes Possible Remedies Unplug stove first when possible The convection blower is overheating and tripping the internal temperature shutoff Clean any dust off of the windings and fan blades If oiling the blower does not help the blower may be bad The st...

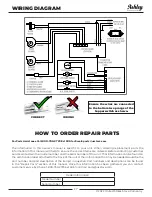
Страница 27: ...d the serial number of this unit That information can be found on the certification label attached to the back of the unit Other information that may be needed would be the part number and part description of the item s in question Part numbers and descriptions can be found in the Repair Parts section of this manual Once this information has been gathered you can contact customer service by phone ...

Страница 28: ...ass 1 3 88324 1 Rope Gasket 1 4 893629 Burnpot Assembly 1 5 80780 IR Remote 1 6 80455 High Temp Snapdisc 1 7 80886 Circuit Board Assy 1 8 88351 Channel Gasket 1 9 88118 Ignitor Flange Gasket 1 10 80869 Ceramic Ignitor 1 11 80549 Pressure Switch 1 12 80867 Distribution Blower 1 13 88106 Distribution Blower Gasket 1 14 80866 Drive Motor 1 5 RPM CCW 1 15 80610 POF Snapdisc 1 16 88100 Exhaust Blower G...

Страница 29: ...07 Date ______________________ Engineer Name ________________________________ License No _____________________________________ Company ______________________________________ Telephone No __________________________________ Stove Inspected Chimney Swept Items Replaced ________________________________ Service 02 Date ______________________ Engineer Name ________________________________ License No ___...

Страница 30: ...30 2022 United States Stove Company NOTES ...

Страница 31: ...cles Remplacé _____________________________ Service de 07 Date ______________________ Nom de l ingénieur ____________________________ N de licence __________________________________ Compagnie ___________________________________ N de téléphone _______________________________ Poêle Inspecté Cheminée balayée Articles Remplacé _____________________________ Service de 02 Date ______________________ Nom...

Страница 32: ...r le service client notez le numéro de modèle et le numéro de série de cet appareil Cette information se trouve sur l étiquette de certification apposée à l arrière de l appareil D autres informations qui pourraient être nécessaires sont le numéro de pièce et la description de l article en question Les références et les descriptions se trouvent dans la section Pièces de réparation de ce manuel Une...

Страница 33: ...3629 Assemblage Burnpot 1 5 80780 Ir à distance 1 6 80455 Snapdisc à température élevée 1 7 80886 Assy de carte de circuit imprimé 1 8 88351 Joint de canal 1 9 88118 Joint de bride d igniteur 1 10 80869 Ignitor céramique 1 11 80549 Pressostat 1 12 80867 Souffleur de distribution 1 13 88106 Joint de soufflante de distribution 1 14 80866 Moteur d entraînement 1 5 RPM CCW 1 15 80610 POF Snapdisc 1 16...

Страница 34: ...mission d air qui entre dans le pot de combustion en recherchant des corps étrangers Le ventilateur de combustion ne tourne pas assez vite Testez la vitesse de rotation du ventilateur après avoir nettoyé les pales La vitesse de rotation doit être d environ 3000 t min Granulés de mauvaise qualité Ne s applique qu au problème LA VITRE NOIRCIT TRÈS RAPIDEMENT La marque ou le lot de granulés utilisés ...

Страница 35: ... moteur de l arbre de la tarière et essayez de le faire fonctionner Si le moteur tourne c est l arbre qui est coincé sur quelque chose Si le moteur ne tourne pas il est défectueux Tarière bloquée Commencez par vider la trémie Puis retirez le moteur de la tarière en retirant la goupille de la tarière Retirez la plaque d inspection de l arbre de la tarière dans la trémie pour pouvoir examiner l arbr...

Страница 36: ...ou si vous remarquez qu un peu de suie s accumule sur les murs ou les meubles vérifiez soigneusement le système d évacuation des fumées en recherchant des fuites Tous les joints doivent être correctement scellés Nettoyez également le poêle en suivant les instructions de la section ENTRETIEN Si le problème persiste prenez contact avec votre revendeur GUIDE DE DÉPANNAGE LE VENTILATEUR DE CONVECTION ...

Страница 37: ...boîtier de l allumeur Le pot de combustion n est pas poussé à fond vers l arrière du foyer Vérifiez que le collet de prise d air du pot de combustion touche la paroi arrière du foyer Élément allumeur défectueux Envoyez directement le courant à l allumeur Observez l extrémité de l allumeur depuis l avant du poêle Au bout de 2 minutes cette extrémité doit rougeoyer Sinon c est que l élément est défe...

Страница 38: ...la trémie soit fermé pour permettre à l interrupteur de sécurité de la trémie de s activer Vérifiez le branchement des fils qui partent de l interrupteur de sécurité de la trémie jusqu au tableau de commande et au moteur de la tarière Utilisez un testeur de continuité pour tester l interrupteur de sécurité de la trémie remplacer le si nécessaire L arbre de la tarière est coincé Commencez par vider...

Страница 39: ...cez par vider la trémie Retirez ensuite le moteur de la tarière en retirant la goupille de la tarière puis retirez les deux boulons qui fixent le support de tarière au tube de tarière Vous pouvez maintenant retirer le support du tube de tarière Retirez les deux boulons du côté du tube de tarière pour déposer le roulement inférieur de la tarière Tirez sur la tarière pour la sortir du tube afin de l...

Страница 40: ...upteur de débit d air Panne du ventilateur de combustion Lorsque le poêle est en marche vérifiez si le ventilateur de combustion est en fonctionnement Sinon vérifiez l alimentation électrique du ventilateur de combustion Ce doit être la tension nominale Si l alimentation électrique est bonne c est le ventilateur qui est défectueux Si l alimentation est absente reportez vous au point No 8 Le tablea...

Страница 41: ...Le ventilateur de convection surchauffe et déclenche l arrêt de température interne Enlevez la poussière des bobinages et pales de ventilateur Si le graissage du ventilateur ne suffit pas il se peut que le ventilateur soit défectueux Le poêle est demeuré sur le réglage le plus élevé pendant de longues périodes En cas d utilisation du poêle sur le réglage de chauffage le plus élevé il se peut que l...

Страница 42: ... ou remplacés si nécessaire Tous les jours Toutes les semaines Tous les mois ou selon les besoins Pot de combustion Agité Vidé Chambre de combustion Brossée Cendres Vérifiées Vidées Chambres intérieures Aspirées Pales du ventilateur de combustion Aspirées Brossées Turbine du ventilateur de convection Aspirée Brossée Système d évacuation Nettoyé Joints Inspectés Vitre Essuyée Nettoyée Trémie fin de...

Страница 43: ...ur vitres de haute qualité Si une accumulation de créosote ou de carbone s accumule vous pouvez utiliser de la laine d acier et de l eau pour nettoyer le verre N UTILISEZ PAS de nettoyants abrasifs N effectuez PAS le nettoyage lorsque la vitre est CHAUDE N essayez pas de faire fonctionner l appareil avec du verre brisé Le verre de remplacement peut être acheté auprès de votre revendeur américain S...

Страница 44: ...s rapidement il est donc important de vérifier la cheminée par le haut ainsi que par le bas La créosote doit être éliminée avec une brosse spécialement conçue pour le type de cheminée utilisé Un ramoneur qualifié peut fournir ce service Il est également conseillé d inspecter de nettoyer et si nécessaire de réparer la totalité du système avant chaque saison de chauffage Pour nettoyer la cheminée dé...

Страница 45: ...couvercle 2 vis Le moteur de la vis sans fin est situé au centre arrière de l unité Remarque lors du nettoyage veillez à ne pas endommager les pales du ventilateur Si un aspirateur est utilisé pour nettoyer votre poêle nous vous suggérons d utiliser l aspirateur AV15E AshVac L AV15E AshVac est conçu pour l élimination des cendres Certains aspirateurs ordinaires c est à dire les aspirateurs d ateli...

Страница 46: ... Sur certains appareils une fois le bouton de réinitialisation déclenché comme un disjoncteur il faut appuyer dessus pour redémarrer le poêle Sur d autres appareils le thermodisque ne comporte pas de bouton de réinitialisation et se réinitialise lorsque le poêle a refroidi Le fabricant vous recommande de vous adresser au revendeur si cela se produit car cela peut indiquer un problème plus grave Il...

Страница 47: ...ulés dans le pot de combustion à la main REMARQUE Au cours des premiers incendies votre poêle émettra une odeur lorsque la peinture à haute température durcit ou deviendra assaisonnée au métal Le maintien de petits incendies minimisera cela Évitez de placer des articles sur la cuisinière pendant cette période car la peinture pourrait être affectée Les tentatives pour atteindre des débits de chaleu...

Страница 48: ...STITUTE PFI L UTILISATION D AUTRES COMBUSTIBLES ANNULE LA GARANTIE Votre poêle à granulés est conçu pour brûler des granulés de bois dur de qualité supérieure conformes à la norme PFI Pellet Fuels Institute densité minimale de 40 lb par pied cube diamètre de 1 4 à 5 16 moins de 8 200 BTU lb humidité inférieure à 8 en poids cendres inférieure à 1 en poids et sel inférieur à 300 parties par million ...

Страница 49: ...on ou la plage de chaleur du poêle Les niveaux de production de chaleur changent progressivement sur le diagramme en barres passant du niveau 1 au niveau 5 de chauffage C Touche C F La touche C F fait passer l affichage à deux chiffres des degrés Celsius aux degrés Fahrenheit et vice versa D TOUCHE mode M T Le Mode de fonctionnement du poêle peut être Manuel ou commandé par un Thermostat Des diode...

Страница 50: ...teur de 6 pouces les illustrations ci dessous ne sont que des exemples Veuillez confirmer à tous les codes du bâtiment locaux ou ragulations ayant compétence avant de demander à un installateur qualifié de procéder à cette installation AVERTISSEMENT Vous voudrez peut être localiser les utilitaires ou les obstacles à l intérieur du mur avant de tenter cette installation Assurez vous de garder à l e...

Страница 51: ...u un tous les 4 pieds 1 22 m pour rendre le système plus stable Si vous habitez dans une région qui a fortes chutes de neige il est recommandé que l installation soit plus grand que 3 pieds 0 91 m pour obtenir au dessus de la ligne de congère Cette même installation peut être utilisée si votre chauffe eau est en dessous du niveau du sol en ajoutant simplement la section de nettoyage et tuyau verti...

Страница 52: ...ifié pour une utilisation avec énuméré 3 pouces ou 4 pouces PL produits granulés de ventilation L utilisation d autres composants autres que mentionnés ici pourrait causer des lésions corporelles les dommages de chauffage et annuler votre garantie ECHAPPEMENT HORIZONTALES INSTALLATION 1 Localisez votre poêle à granulés dans un endroit qui répond aux exigences de ce manuel mais dans une zone où il ...

Страница 53: ...sieurs fois pendant la saison de combustion Le tuyau d évent à granulés n est pas fourni avec l appareil et doit être acheté séparément INSTALLATION D ÉVENT À GRANULÉS L installation doit comprendre un té de nettoyage pour permettre la collecte des cendres volantes et pour permettre le nettoyage périodique du système d échappement Les coudes à 90 degrés accumulent les cendres volantes et la suie r...

Страница 54: ...t doit être de 3 ou 4 po PL et doit dépasser d au moins 36 po 914 mm au dessus de la ligne de toit de la maison mobile et doit être installé à l aide d un coupe feu de plafond certifié et d un chapeau de pluie Lors du déménagement de votre maison mobile toute ventilation extérieure doit être enlevée pendant le déplacement de la maison mobile Après le déplacement tous les évents doivent être réinst...

Страница 55: ...r au moins 6 po 153 mm à l avant 6 po 153 mm de chaque côté et 1 po 26 mm derrière le poêle La protection du plancher doit s étendre sous et 2 po 51 mm de chaque côté du té de cheminée pour une installation verticale intérieure Un protecteur de plancher de 1 po 26 mm d épaisseur est recommandé pour cette installation Les installations canadiennes nécessitent 18 po 450 mm devant l unité D B C B A D...

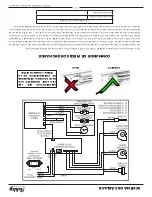
Страница 56: ...E PRISE ET NE COUPEZ PAS LA FICHE DE TERRE N ACHEMINEZ PAS LE CORDON ÉLECTRIQUE SOUS DEVANT OU SUR LE POÊLE NE FAITES PAS COURIR LE CORDON ÉLECTRIQUE DANS LES ZONES DE PASSAGE ET NE LE COINCEZ PAS SOUS LES MEUBLES ATTENTION ATTENTION LA COMBUSTION DU COMBUSTIBLE GÉNÈRE DU MONOXYDE DE CARBONE QUI PEUT S AVÉRER DANGEREUX POUR LA SANTÉ EN L ABSENCE D UNE VENTILATION APPROPRIÉE ATTENTION UN DÉTECTEUR ...

Страница 57: ...s du poêle Il y aura deux faisceaux de câbles comme illustré 2 Déballez les meilleurs contrôles de montage et de veiller à ce que le faisceau de câblage illustré est fixé 3 Connecter les installés en usine faisceaux de câblage sur le panneau de commande comme indiqué 4 Fixez le panneau de commande au dessus du poêle comme indiqué Fixer avec deux vis à tôle ...

Страница 58: ...non date d inspection du système de ventilation existant ___________________________________________________________________ MISE EN SERVICE Confirmer l installation du tapis de foyer conformément aux instructions d installation Confirmer le bon placement des pièces internes Vérifier la solidité du joint de porte et des joints de porte Confirmer les dégagements aux combustibles selon les instructi...

Страница 59: ...e de Pellet peut effectuer le taux réel d alimentation en carburant et de brûler fois Taux d alimentation en carburant peut varier par autant que 20 Utiliser PFI carburant listé pour de meilleurs résultats Temps de combustion réglage le plus bas 80 hrs Capacité de la trémie 170lbs 77kg Spécifications Électriques Note électrique 110 120 volts 60 HZ 30 Amps Watts opérationnel 175 approx Watts allume...

Страница 60: ...s de fortune lors de l installation de ce radiateur Contactez les responsables locaux du bâtiment ou des pompiers pour connaître les permis les restrictions et les exigences d installation dans votre région NE JAMAIS UTILISER CE PRODUIT SANS SURVEILLANCE MISE EN GARDE Veuillez lire l intégralité de ce manuel avant d installer ou d utiliser votre nouveau radiateur Le non respect des instructions pe...

Отзывы: