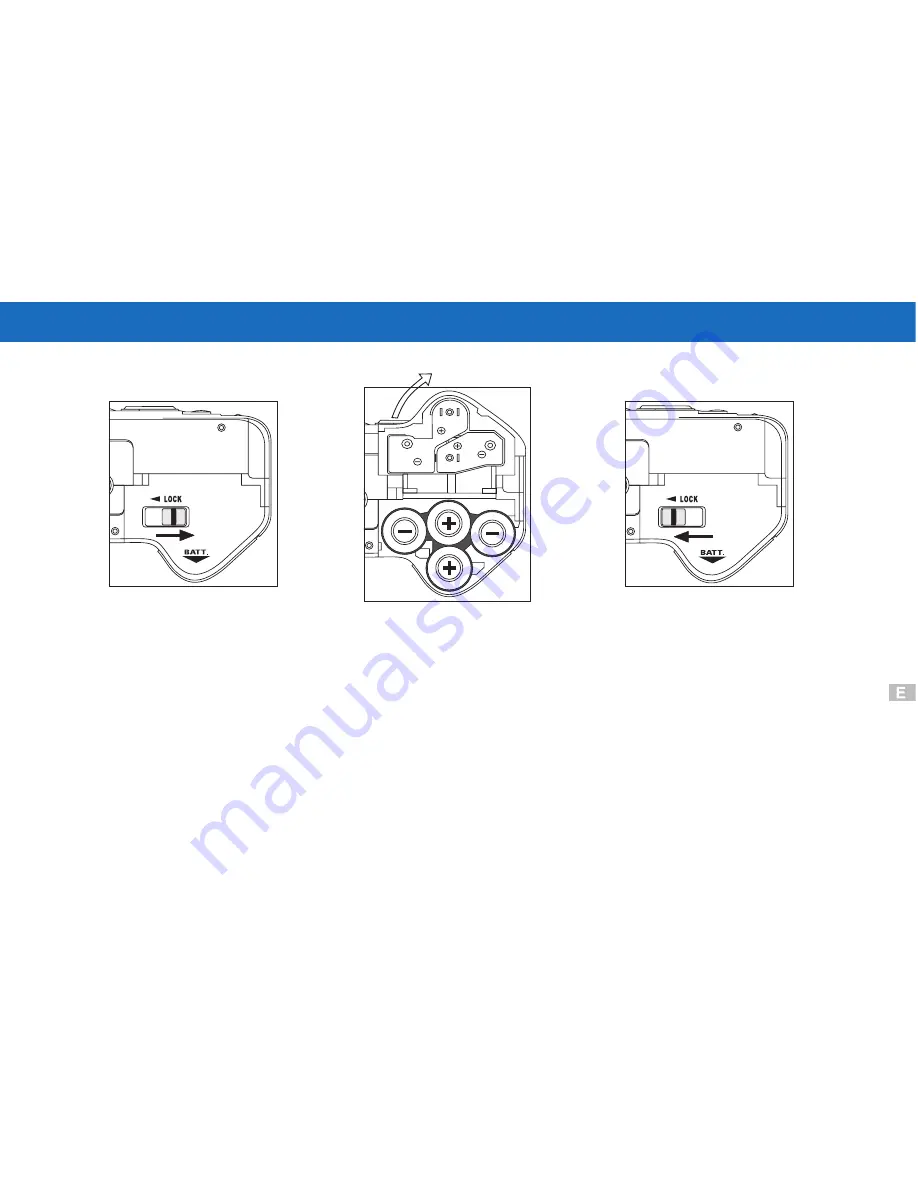
1.Be sure that power is OFF.
Unlock the battery compartment by sliding the LOCK switch in the opposite
direction of the arrow. See Figure 1.
Powering Up
Figure 1
Figure 2
Figure 3
2.Open battery chamber cover.
Insert 4 AA batteries into the battery chamber. Be sure to use correct polarity
as shown on the battery chamber inside cover. See Figure 2.
3.Close battery chamber cover.
Slide the LOCK switch in the direction of the arrow to secure the battery
compartment closed. See Figure 3..
Battery Installation
7
sliding the LOCK switch in the
opposite direction of the arrow
to unlock
Содержание DC3550
Страница 1: ...Digital Camera DC3550 User s Manual 9 9 9 9 6 8 8 5 5 ...
Страница 2: ......
Страница 4: ......
Страница 10: ...Accessory Set up CARD CARD Figure 1 Figure 2 Figure 3 Figure 4 6 ...
Страница 32: ...28 Install way Follow on screen of your computer click START SETTING CONTROL PANEL add New Hardware ...
Страница 33: ...29 Note Screen display the driver file name automatically Then click Next ...
Страница 34: ...30 Note Select the driver Then click Next Search ...
Страница 35: ...31 Note Select locations of data source Then click Next ...
Страница 36: ...Digital Camera Zoom 32 Note Screen display to confirm the driver location Then click Next F ...
Страница 38: ...34 Note Screen display a removable Disk appear Then click it ...
Страница 39: ...35 Note A new file appear ...
Страница 40: ...36 Note Click the file ...
Страница 41: ...37 Note Click the file to playback picture ...
Страница 43: ...39 ...
Страница 44: ...40 Note The set up process automatically please wait ...
Страница 45: ...41 Note The software recommended that you exit all Windows programs If you ready click Next ...
Страница 46: ...42 Note Display the LICENSE AND WARRANTY information If you agree click Yes ...
Страница 47: ...43 Note Please select the image file type s that you wish associate then click Next ...
Страница 48: ...44 Note Choose the file destination location Browse the destination folder then click Next ...
Страница 49: ...45 Note select folder name Accessories or new then click Next ...
Страница 50: ...46 8 21 8 21 Note display Current setting automatically then click Next ...
Страница 51: ...47 Note display Online Registration automatically then click Continue ...
Страница 52: ...48 ...
Страница 54: ...50 Note Program way click Start Programs MGI PhotoSuite8 21SE MGI PhotoSuite8 21SE exe or click quick mark ...
Страница 55: ...51 ...
Страница 56: ...52 ...
Страница 57: ...53 ...
Страница 58: ...54 ...
Страница 59: ...55 21SE ...
Страница 61: ...57 ...
Страница 62: ...58 ...
Страница 63: ...59 Note The instruction of Location Installation Update then click Next ...
Страница 64: ...60 Note The software recommended that exit all Windows programs If ready click Next ...
Страница 65: ...61 Note Display the LICENSE AND WARRANTY information If you agree click Agree ...
Страница 66: ...62 Note Choose the file destination location Browse the folder then click Next ...
Страница 67: ...63 Note Please select the image file type s that you wish associate then click Next ...
Страница 68: ...64 Note Select folder name Accessories or new then click Next ...
Страница 69: ...65 Note Selection of Plugin then click Next ...
Страница 70: ...66 Note The set up process automatically please wait ...
Страница 71: ...67 Note The instruction of Setup Assistant then click Next ...
Страница 72: ...68 Note The MIME Setting then click Next ...
Страница 73: ...69 Note Select the file type assocition then click Next ...
Страница 75: ...71 ...
Страница 76: ...72 ...
Страница 77: ...73 ...
Страница 78: ...74 ...
Страница 79: ...75 ...
Страница 88: ...Play Forward Backward Last Frame First Frame Volume Mute TV Switch QUICKTIME5 MENU QUICK GUIDE ...
Страница 89: ......


