030-713-C0 Rev A WC
Page 11 of 23
6
Wiring and Connections
This chapter provides cabling details and notes on cable sizing for DC applications with respect to the Argus
Cordex 48-1kW modular switched mode rectifier system.
Refer also to drawing 030-713-08 at the rear of this manual.
6.1 Safety
Precautions
WARNING
Hazardous AC voltages may be present. Ensure power at the AC service panel is off before
attempting work on the AC connections. Use a voltmeter to verify the absence of voltage. Clearly
mark the correct polarity of the battery leads before commencing work on DC connections.
Refer to the previous (Installation) chapter for additional safety precautions.
6.2 Tools
Required
Various tools are essential for product installation. Use this list as a guide:
•
Philips head screwdriver, #2 (tip size 3/16”)
•
Slot head screwdrivers (blade size 1/4”, 1/8", 1/16")
•
Digital voltmeter equipped with test leads
•
Adjustable 48Vdc load (optional)
•
Cutters and wire strippers
•
Crimping tool (optional for large gauge wire)
•
Socket and ratchet set (Imperial measure)
•
Anti-static wrist strap.
6.3
Power System Chassis Ground and DC Ground Reference
WARNING
For safety reasons, ensure the system is properly bonded to the building’s ground grid.
Both the shelf chassis ground (via power system chassis ground) and common return shall be connected to the
site ground to ensure correct operation of the system and to prevent drifting floating analog (especially current)
readings.
6.4
AC Feeder Protection/Sizing
An individual AC feed is provided for each of the three rectifiers. It is recommended for each feed to use a
dedicated protection feeder breaker located at the AC distribution panel. The feeder breaker can also act as the
disconnect device for the connected rectifier.
Refer to the specifications at the front of this manual for Argus recommendations.
6.5
AC Input Connections
CAUTION: AC input wires should be routed in flexible or rigid conduit as far away as possible
from the DC power wires to minimize EMI disturbances.
Ensure all modules are removed from the shelf.
Remove the metal cover from the rear of the shelf to expose the wireway for input terminal blocks.
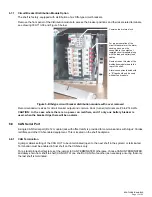
The wireway is designed for two customer-supplied 1" conduit fittings for AC supply located on the left side of the
shelf and two 3/4" conduit fittings on the rear.
Attach the conduit retainers to the wireway hole(s) and route the AC cables through. Secure the wires to the AC
input and chassis ground terminals as required. Tighten the cable connector to the AC cable (conduit similar).
Replace rear cover(s) once all connections have been completed.
Содержание ALPHA OUTBACK ENERGY Cordex 48-1kW
Страница 1: ...Cordex 48 1kW 19 Shelf Flush Mounting Up To 3000W With Distribution 030 713 B2 ...
Страница 14: ...This page intentionally left blank ...
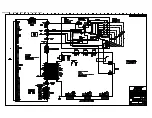
Страница 38: ...03071305B__ sch 1 Mon May 14 15 17 29 2007 ...
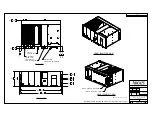
Страница 39: ...03071305B__ sch 2 Mon May 14 15 17 32 2007 ...
Страница 44: ...This page intentionally left blank ...


