7
Connecting the Power Supply
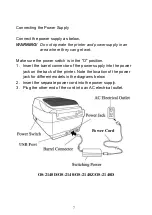
Connect the power supply as below.
WARNING! Do not operate the printer and power supply in an
area where they can get wet.
Make sure the power switch is in the "O" position.
1. Insert the barrel connector of the power supply into the power
jack on the back of the printer.
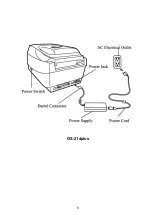
Note the location of the power
jack for different models in the diagrams below.
2. Insert the separate power cord into the power supply.
3. Plug the other end of the cord into an AC electrical outlet.
OS-2140D/OS-2140/OS-2140Z/OS-2140D
Power Core
Power Cord
Содержание OS-214 plus
Страница 9: ...8 OS 214plus ...
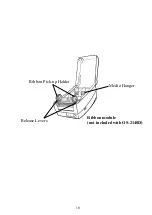
Страница 11: ...10 Media Hanger Ribbon Pick up Holder Release Levers Ribbon module not included with OS 2140D ...
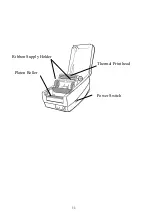
Страница 12: ...11 Power Switch Ribbon Supply Holder Thermal Print head Platen Roller ...
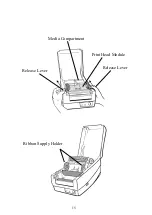
Страница 16: ...15 Media Compartment Release Lever Print Head Module Release Lever Ribbon Supply Holder ...
Страница 43: ...42 3 Assign the directory to keep Seagull driver for example C Seagull and click Next 4 Click Finish ...
Страница 76: ...75 4 Remove the middle cover Slot for Extension card ...


