background image

24

25

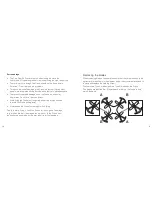
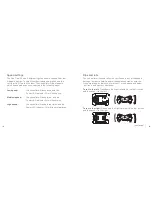
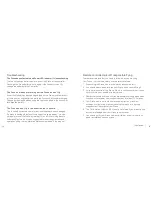
Turning on Headless mode 

1.  Place the Drone in front of you, facing forward
2.   When the Drone takes-off it will set the way it is facing as the forward direction
3.   Turn on Headless mode by pressing down the Right throttle (19)  

for 3 seconds

4.   The Drone will now respond to your change of direction commands in relation 

to which way was set as forward, regardless of which way it now faces

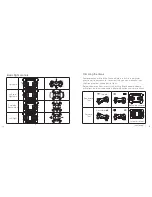
ON

OFF

OFF

ON

ON

OFF

OFF

ON

ON

OFF

OFF

ON

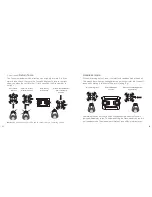
Press  

Headless mode

Drone can face  

any direction

Select backwards 

direction

Drone moves 

backwards

Take off

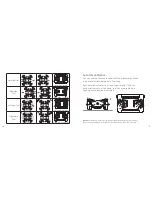
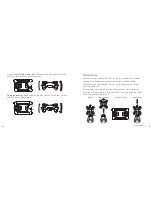
To turn OFF Headless mode, hold down Right throttle (19) for 3 seconds.

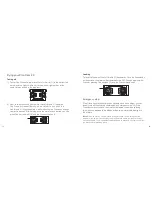
Using the camera

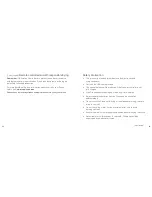
1.   Whilst the Drone is turned OFF, insert a Micro SD card (not included) 

into the Micro SD Card Slot (7)

2.   Turn on the Drone by putting the Power switch (5) in the ON position 
3.   To take a photo, press Photo/Video (9) once. The Function LED 

Indicator (22) will flash once to indicate a photo has been taken

4.   To start recording a video, hold Photo/Video (9) for 2 seconds.  

The Function LED Indicator (22) will continually flash whilst recording.  

To stop recording, hold down Photo/Video (9) for 2 seconds

5.   The photos and videos will automatically save on to your Micro SD Card
6.   To view your recorded files, turn off the Drone by putting the Power 

switch (5) into the OFF position and remove the Micro SD Card. 

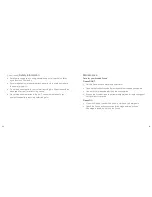
Note: 

You will require a Micro SD Card Reader (not included) to be able to transfer  

the files onto a PC/laptop and view your saved files.

Note:

 Your Micro SD Card will need formatting before use. Please refer to your  

PC/laptop instructions on how to do this. 

Note: 

The Pico Cam 2.0 records using FAT32 format. We recommend using a  

Micro SD Card of up to 64 GB, and Class 8 and above.

Содержание Pico CAM 2.0

Страница 1: ...f Lithium coin cell batteries with general waste Please return it to battery recycling collection point Your product and batteries must be recycled or disposed of properly Products showing the Crossed...

Страница 2: ...13 Emergency stop 13 Basic flight controls 14 Trimming the Drone 15 Auto Trim calibration 16 Speed settings 18 Flips and rolls 19 Return home 21 Headless mode 23 Using the camera 25 Troubleshooting 2...

Страница 3: ...ions 1 Blade 2 Blade guard 3 LED indicators 4 Battery port 5 Power switch 6 Battery cradle 7 Micro SD Card Slot 8 Camera Micro SD card not included ON OFF 1 ON OFF OFF ON 2 3 OFF ON ON OFF OFF ON OFF...

Страница 4: ...button left spin 13 Trim button right spin 14 Power LED indicator 15 Drone cover 16 Battery cover 17 Trim button forward 18 Trim button backwards 19 Right throttle Flip Headless mode 20 Trim button r...

Страница 5: ...preparation Charging the battery 1 Ensure the battery is removed from the Drone 2 Using the supplied USB charging cable connect one end to the battery and connect the USB end to a power supply 3 An in...

Страница 6: ...t fly in rainy conditions Avoid flying the Drone in strong wind especially at high altitude to avoid the Drone drifting away Always keep the Drone in clear sight when flying Finally before flying chec...

Страница 7: ...Left throttle 11 downwards Once the Drone lands on the surface the motors will automatically turn OFF You can also land the Drone by pressing One key land 10 and the Drone will land itself ON OFF OFF...

Страница 8: ...controls ON OFF OFF ON ON OFF OFF ON ON OFF OFF ON ON OFF OFF ON continued Trimming the drone Sometimes you will find the Drone will start to drift in a particular direction of its own accord To corre...

Страница 9: ...Right spin trimmer ON OFF OFF ON ON OFF OFF ON ON OFF OFF ON ON OFF OFF ON ON OFF OFF ON ON OFF OFF ON ON OFF OFF ON ON OFF OFF ON O N O F F O FF O N O N O F F O FF O N Auto Trim calibration You can...

Страница 10: ...o that it clicks and then push it to the right ON OFF OFF ON Speed settings The Pico Cam 2 0 has 3 different flight speeds to choose from low medium and high To select your desired speed press down th...

Страница 11: ...a tool to help you retrieve your Drone by sending it in a backwards direction from where it started facing When the Drone first takes off the way it is facing will act as its front direction as defau...

Страница 12: ...s Drone does not have GPS and so cannot return to its starting position Headless mode When first turning on the Drone it will start with Headless mode turned off This means that when you change direct...

Страница 13: ...Drone by putting the Power switch 5 in the ON position 3 To take a photo press Photo Video 9 once The Function LED Indicator 22 will flash once to indicate a photo has been taken 4 To start recording...

Страница 14: ...uggested to reset the gyroscope and compass using the re calibration methods mentioned in the manual continued Remote controlled aircraft responsible flying There are certain laws that you need to fol...

Страница 15: ...is intended for outdoor use subject to suitable flying conditions Only use the USB cable provided The control distance will be reduced if the Drone or controller is not fully charged If the Drone beco...

Страница 16: ...cloth and no detergents Check the Drone and accessories for damage before each use If damage is found do not use the Drone continued Safety information Small parts can pose a choking hazard keep out o...

Страница 17: ...se and operation of this Drone is beyond our control Warranty of the Drone is limited to defects caused by faulty manufacture or defects in materials only Please ensure you operate this product with t...

Страница 18: ...has an embedded non replaceable battery do not attempt to access or remove the battery as this may cause personal injury and will damage the product Making any attempt to open the product or carry out...

Отзывы: