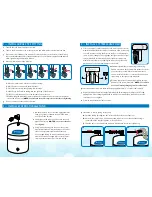
8 — SANITIZE, TEST & PURGE
Sanitize
Note: Sanitization is recommended immediately after RO Filter System installation and any inner-part
servicing. The person sanitizing should have clean hands during this process.
1
Shut off water supply to RO system.
2
Open faucet. If tank is not empty, allow to
drain until empty.
3
With included eyedropper and household
bleach (5.25%), disconnect white tubing
from the manifold outlet labeled “TANK”.
Note: Bleach needs to be handled
according to manufacturer’s instructions.
4
Add 3ml bleach into open end of tank white
tubing.
5
Reconnect the tank from the tube into the
manifold outlet labeled “TANK”. Be sure to
push tubing in all the way.
6
Sanitation will be completed during the following pressure test and purge. Important:
Bleach must be completely removed from system before drinking water. See Purge
instructions below.
Pressure Test
Important: Complete sanitization prior to pressure test.
1
Open cold water supply valve to RO Filter System.
2
To purge air from the plumbing system, open kitchen faucet. Close faucet when water runs
smooth.
3
Confirm RO faucet is closed.
4
Within approximately 2 hours, pressure will start to build in the RO Filter System. Carefully
inspect all connections and fittings while this pressure buildup occurs.
5
Check for leaks. If leaks are found, fix by ensuring all tubing is cut squarely and fully inserted.
Also confirm there are no scratches, dents or notches at tubing end. If there are, squarely cut
1" off and re-insert.
Note: When RO Filter System is first pressurized, water may project
from faucet air gap hole until air is passed from RO Filter System.
Purge
1
Open RO faucet and let water flow through system for 24 hours.
Note: Flow rate will be slow during this time.
2
Close RO faucet after purge is complete.
Note: Your RO Filter System is ready for use when purge is complete, however, you will not have filtered
water immediately. It takes 1-3 hours to completely fill the tank. The flow rate will be less than your
kitchen faucet. Water will run to the drain while the RO Filter System is filtering water – even when not in
use. This is normal. Water going to drain will stop automatically when tank is at capacity.
7 — STEP 1–3 FILTER INSTALLATION
Before you begin: make sure the cold water valve is shut off and there is no pressure in the system. Carbon
(red) and Claryum (yellow) filter cartridges will come pre-installed in their cartridge sumps.
1
Attach red carbon sump to the 1st stage position on the inlet side of the system manifold.
Make sure all connection points are aligned and push the top of the sump up and into the
system manifold. Turn it towards the right until it locks in.
2
Repeat step 1 for the 2nd Stage RO membrane that goes in the center, and for the yellow
Claryum cartridge in the 3rd stage position on the outlet side of the system manifold.
Be sure to turn 2nd stage RO membrane all the way to the right, until drain port on cartridge is
facing the rear of the system.
OptimH2O™
Stage 2
RO Membrane
AQ-RO3-RO
OptimH2O™
OptimH2O™
Remineralizer
AQ-RO3-RM
1
1
2
3
3
2
1
3
3
2
1
A
B
C
D
2
1
2
1
2
1
1
2


