background image

AquaReef 200

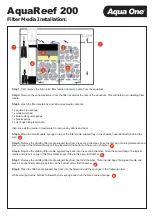
Filter Media Installation:

Step 1:

 First remove the light units, filter media and return pump from the aquarium.

Step 2: 

Remove the protein skimmer from the filter located at the rear of the aquarium. This will help when installing filter 

media.

Step 3. 

Open the filter media box and remove all media contents:

1 x square blue sponge
1 x white wool pad
1 x blue rectangular sponge
1 x black sponge
3 x net bags biological media

then rinse all the media in clean water to remove any debris and dust.

Step 4. 

Place the small square sponge on top of the filter media support tray in the chamber located directly behind the 

weir.

Step 5. 

Remove the dividing filter media support tray from the second chamber. Take the first bag of biological media and 

place on top of the filter media support tray located at the bottom of the second chamber.

Step 6. 

Replace the dividing filter media support tray back into the second chamber. Take the second bag of biological 

media and place it on top of the filter media support tray in the second chamber.

Step 7.

 Remove the dividing filter media support tray from the third chamber. Take the last bag of biological media and 

place it on the filter media support tray at the bottom of the third chamber.

Step 8. 

Place the filter media support tray back into the filter and add the sponges in the following order:

White wool pad at the bottom, followed by blue sponge and then the black coarse sponge.

1

2

3

4

5

Содержание AquaReef 200

Страница 1: ...AquaReef 200 Instruction Manual ...

Страница 2: ...oving the lighting when filling and landscaping the aquarium to avoid possibilities of accidental damage GENERAL SAFETY NOTICE It is absolutely imperative that you ensure this cabinet and aquarium is installed upon level flooring It is also a prerequisite that you ensure the flooring upon which it is positioned is able to support the weight of this aquarium which could be up to 400kg including wat...

Страница 3: ...g in contact with the receptacle If the plug or receptacle does get wet do not unplug the appliance Disconnect the fuse or circuit breaker that supplies the power to the appliance then unplug and examine for presence of water in the receptacle 3 Close supervision is necessary when the appli ance is used by or near children 4 Always unplug the aquarium from the electri cal outlet when not in use be...

Страница 4: ...nd the weir Step 5 Remove the dividing filter media support tray from the second chamber Take the first bag of biological media and place on top of the filter media support tray located at the bottom of the second chamber Step 6 Replace the dividing filter media support tray back into the second chamber Take the second bag of biological media and place it on top of the filter media support tray in...

Страница 5: ...r 3 Airline clamp Venturi connector Level adjuster Venturi adjustment 4 Step 1 The skimmer should arrive pre assembled but the following checks will need to be done Step 2 Check the pipework connecting the pump to the skimmer is pushed in firmly and securely Step 3 Check the airline is pushed on firmly to the venturi connector Step 4 Check the airline is fitted to the airline clamp securely This w...

Страница 6: ...ed the cables through the hole provided on the back of the aquarium Step 5 Take the first flap and insert the two pins into the light unit The flap should push forward and sit flat Step 6 Take the second flap and insert two pins into the back of the first light unit the second flap will now sit flat Step 7 Take the second light unit and tilt it forward this will enable you to fit the middle flap t...

Страница 7: ...te some models have twin light units The black end caps have brackets which slide over the aquarium trim Please ensure light unit is firmly in place before switching on The black hood covers help secure the lights in place Removing Light Tubes Switch light off remove from mains supply and tank before disassembly of lights at any time Unscrew the white end caps of the tube holders by turning anti c...

Страница 8: ...e the aquarium is up and running the skimmer can be turned on Once the aquarium has been filled turn the skimmer on and it will fill up with water Once the skimmer is working the outlet tap can be used to raise and lower the water level in the filter The venturi adjuster can also limit the amount of air which enters the skimmer There needs to be a fine balance between water entering the skimmer an...

Страница 9: ...as per instructions on your fish food container WEEKLY Test and adjust pH levels if needed Use Aqua One quality pH test kit available from your local Aqua One Dealer pH is a measure of how acidic or alkaline the water is It is measured on a scale of 0 14 in which 7 is neutral less than 7 is acidic and more than 7 is alkaline Some species require specific pH levels please seek advice from your aqua...

Страница 10: ...Notes ...

Отзывы: